
Imagine stepping into your backyard and being instantly transported to a serene haven that feels worlds away from the hustle and bustle of daily life. Whether you’re just beginning to explore the potential of your outdoor spaces or you’re a seasoned pro looking to add new dimensions, our guide, “11 Relaxing Spots Ideas for Your Next Project,” is your ticket to creating that perfect oasis. With each idea, you’ll find inspiration and practical tips to transform any outdoor area into a personal retreat.
From cozy nooks that invite you to unwind with a good book to expansive decks perfect for entertaining friends, this guide is packed with creative solutions to suit every taste and skill level. Discover the joy and satisfaction of crafting a space that not only enhances your home’s value but also nurtures your soul. With our enthusiastic guidance, you’ll feel confident and excited about turning your outdoor dreams into reality.
Incorporate Hammocks for Ultimate Relaxation
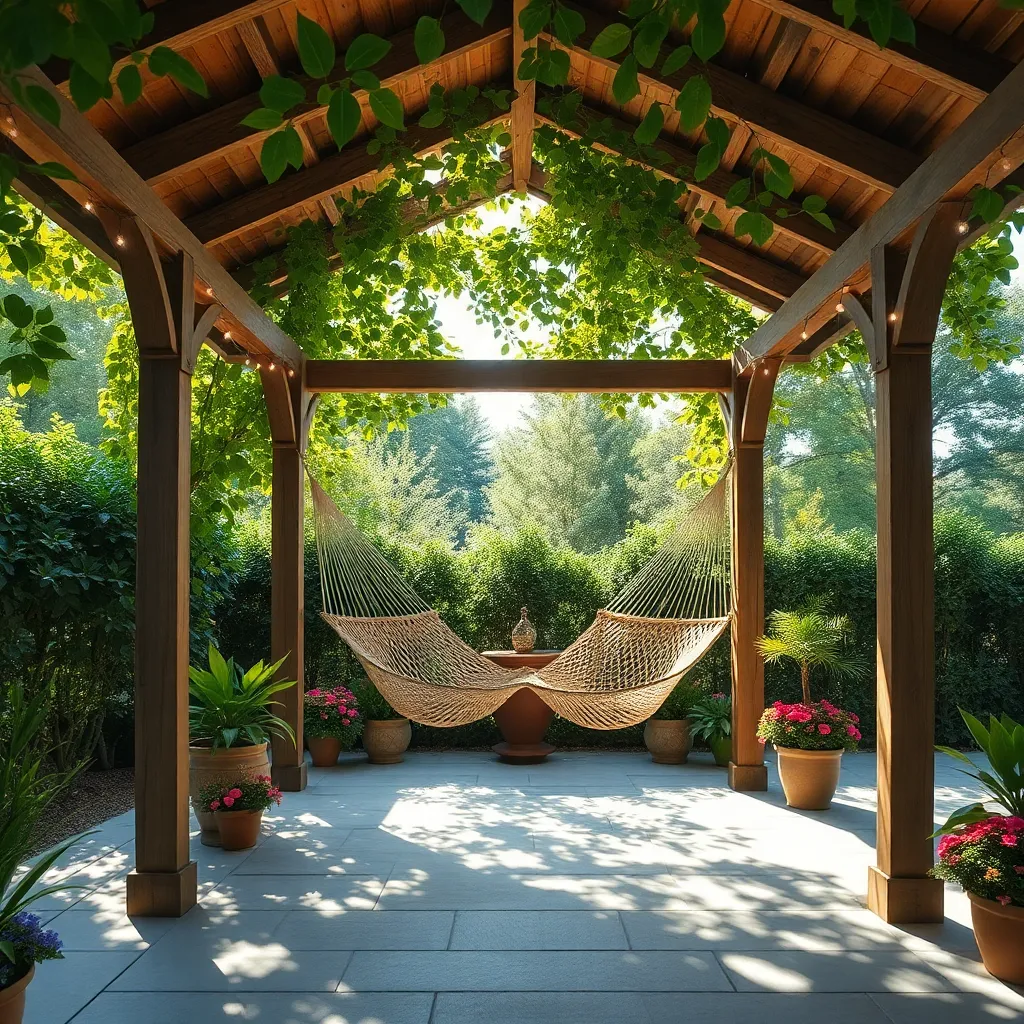
To create the ultimate relaxation spot in your backyard, consider incorporating a hammock into your outdoor shelter design. Start by choosing a sturdy location, such as between two mature trees or install a durable frame. Look for hammocks made from weather-resistant materials like polyester or acrylic to ensure longevity, especially in varying climates. For beginners, a classic spreader-bar hammock provides stability and comfort, while seasoned hammock enthusiasts might opt for a Brazilian or Mayan style, which offers a cozy cocoon-like experience.
Enhance your hammock setup by adding thoughtful design elements that complement your outdoor area. Install a retractable canopy or shade sail to protect against harsh sunlight, ensuring a comfortable lounging experience. For a more advanced touch, integrate string lights or solar lanterns around the hammock area to create a serene ambiance at night. To maximize comfort, consider *b>adding pillows and a soft blanket, securing them with ties or clips to withstand breezy conditions. By blending these elements, your hammock spot will become a cherished retreat for unwinding after a long day.
Build a Cozy Fire Pit Area
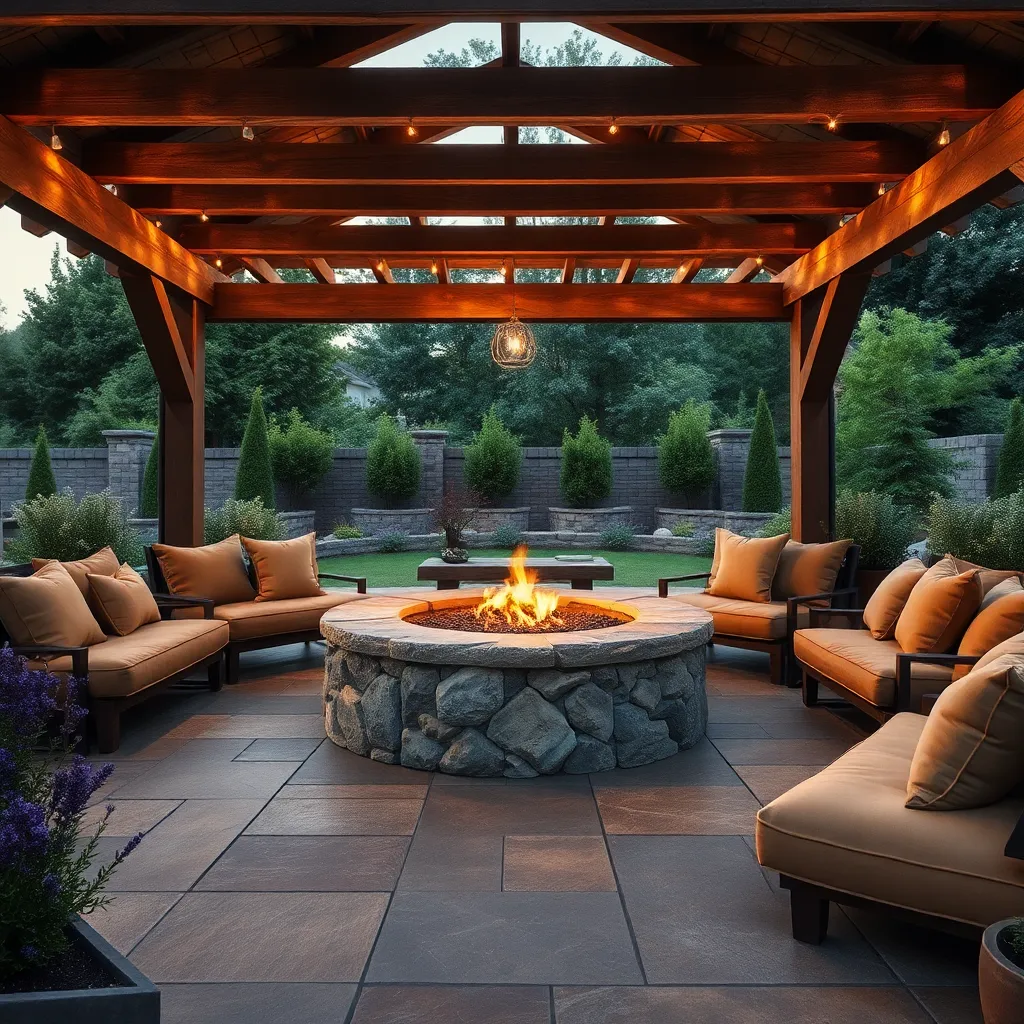
Transform your backyard into a cozy retreat by building a fire pit area that’s both inviting and functional. Start by selecting a location that’s at least 10 feet away from any structures or overhanging branches for safety. Use materials like stone, brick, or heat-resistant pavers to construct a circular or square pit, ensuring it’s about 36 to 44 inches in diameter for optimal warmth and usability. For beginners, consider a pre-made fire pit kit available at most home improvement stores, which simplifies construction with easy-to-follow instructions.
Enhance comfort and style by surrounding your fire pit with durable outdoor seating—adirondack chairs or weather-resistant cushions are excellent choices. For a professional touch, add a gravel or flagstone base around the pit area to define the space and provide drainage. If you’re more experienced, consider incorporating built-in seating or a low retaining wall that doubles as extra seating. Don’t forget to include essential tools like a fire poker and a screen cover for safety, and enjoy the warm, inviting atmosphere of your new fire pit area.
Add Water Features for Tranquility
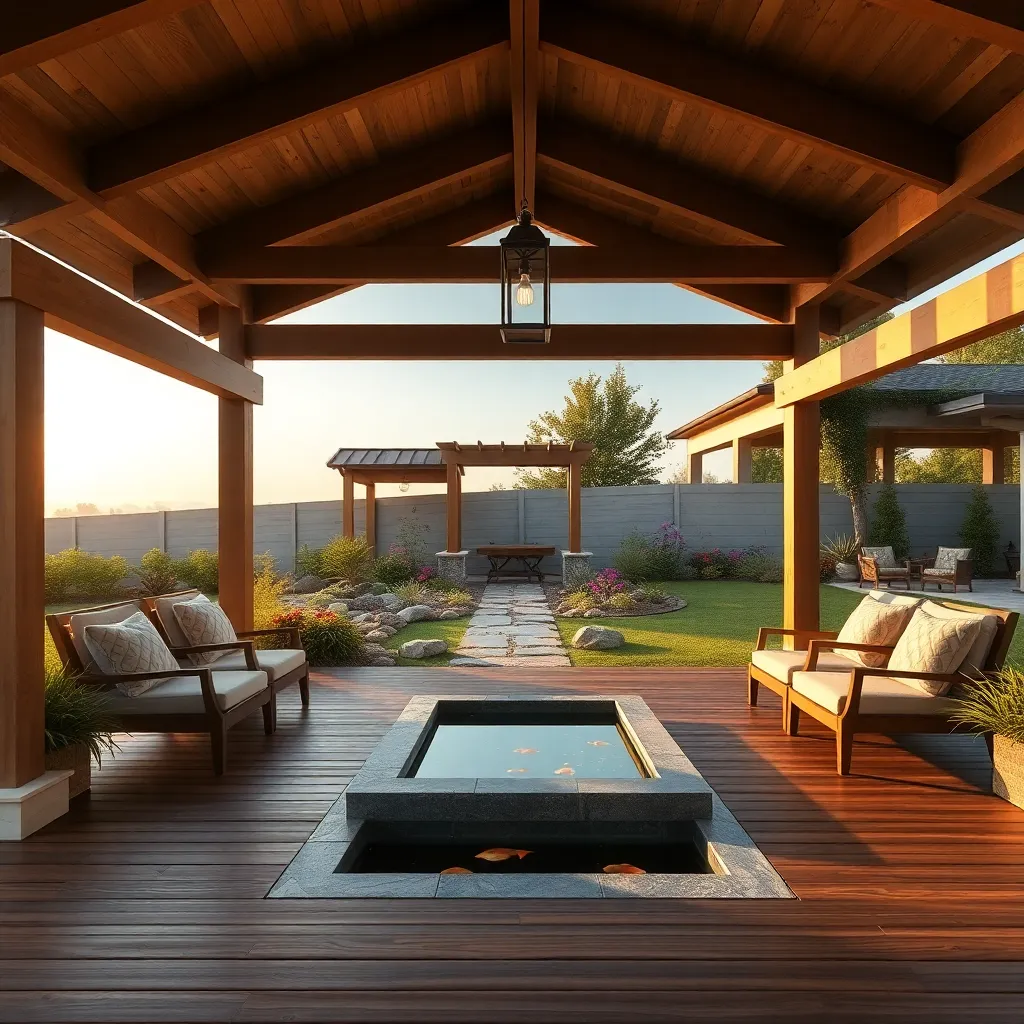
Incorporating a water feature into your outdoor space can instantly create a sense of tranquility. For beginners, starting with a simple birdbath or a small, self-contained fountain kit can be an excellent choice. These options are generally easy to install and require minimal maintenance. For more advanced projects, consider a pond with a waterfall. This can be achieved using a flexible pond liner, a submersible pump, and some strategically placed stones to create a natural look. Ensuring you have a reliable power source nearby is key to keeping the water circulating smoothly.
Enhance your water feature by integrating various design elements that complement your existing landscape. Position your feature near seating areas to fully enjoy the soothing sounds of flowing water. Use surrounding plants like ferns or hostas to add greenery and blend the water element seamlessly into your garden. For a more dramatic effect, incorporate underwater lighting or solar-powered lights around the perimeter. These touches will not only illuminate your feature at night but also add an enchanting ambiance to your outdoor shelter.
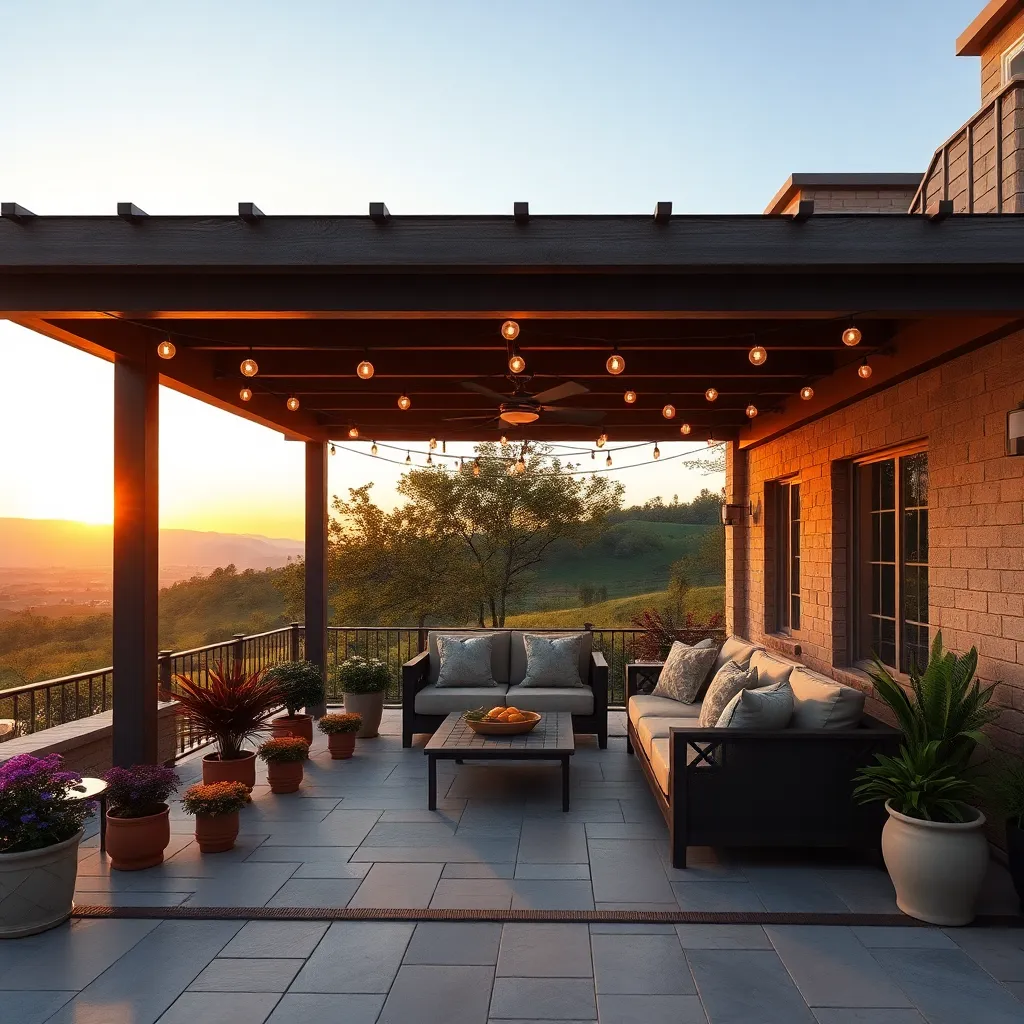
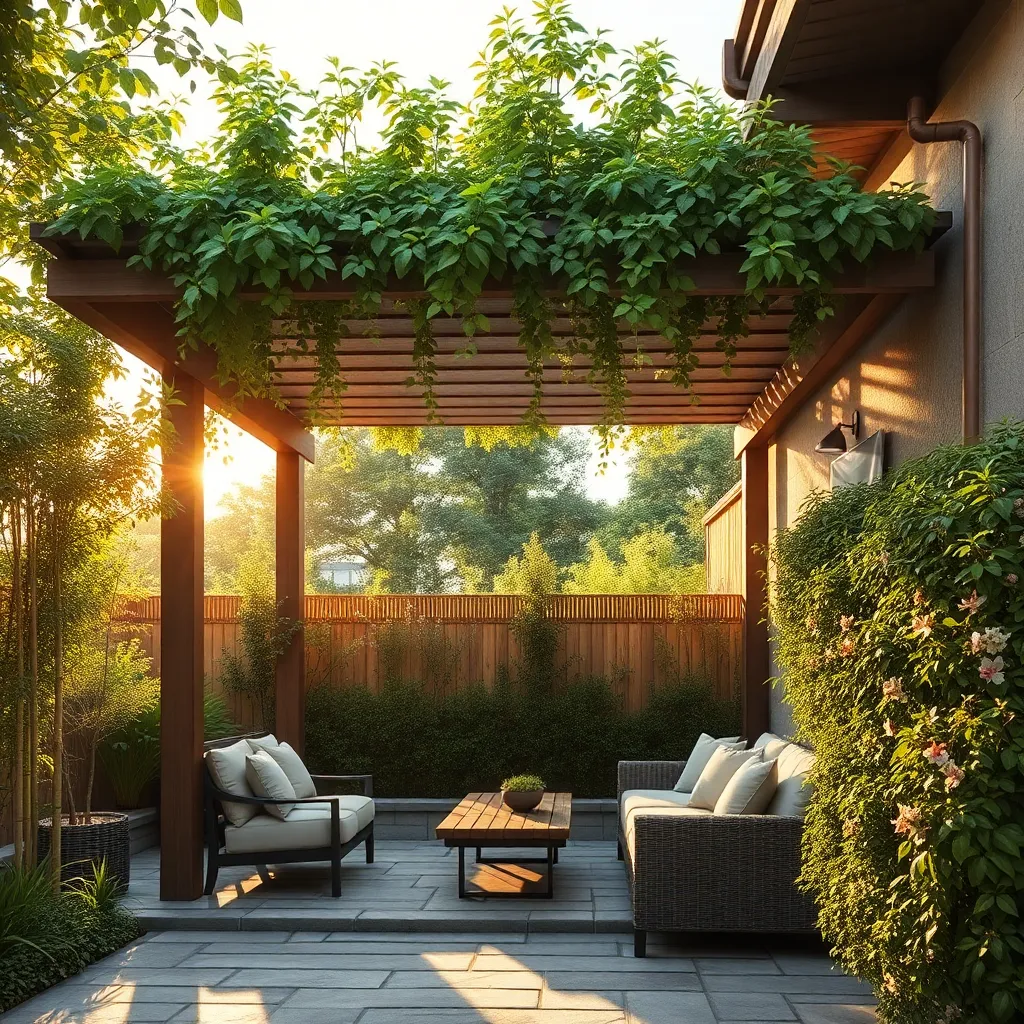
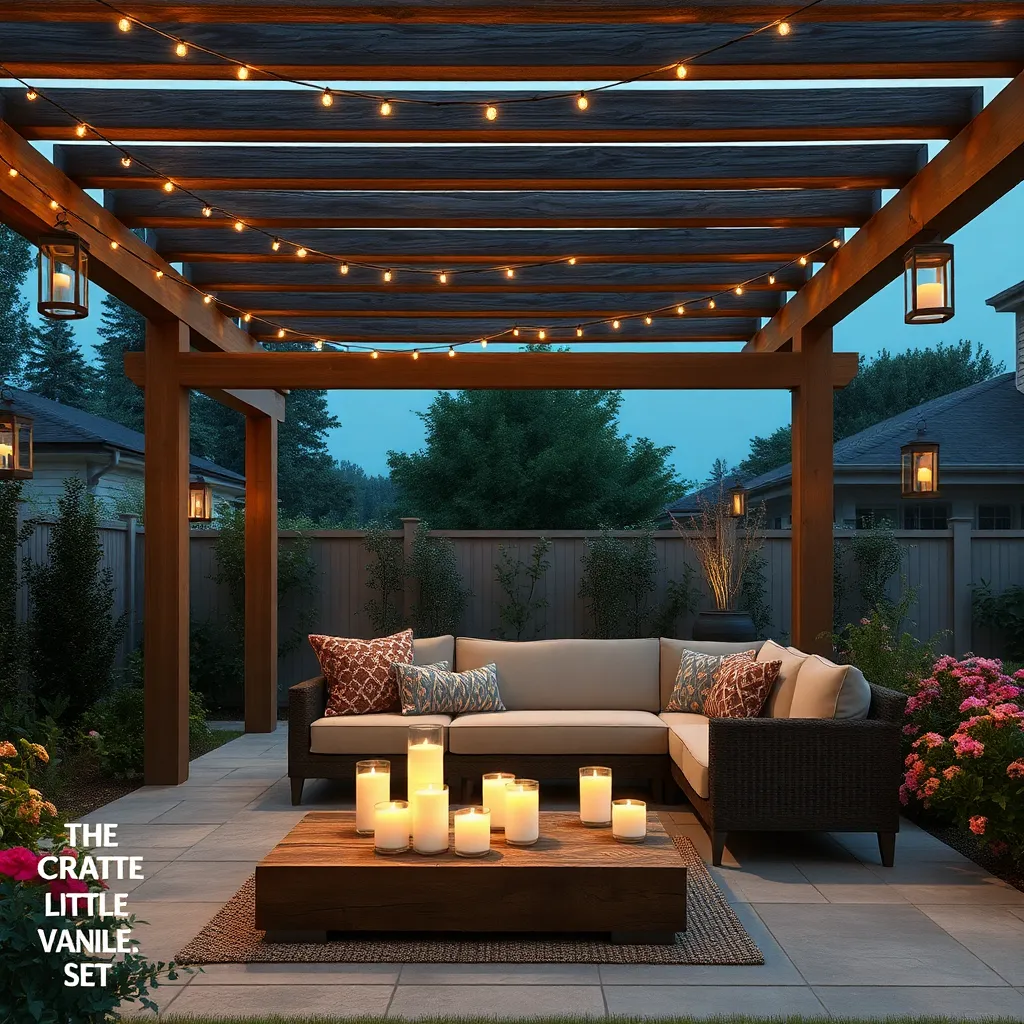
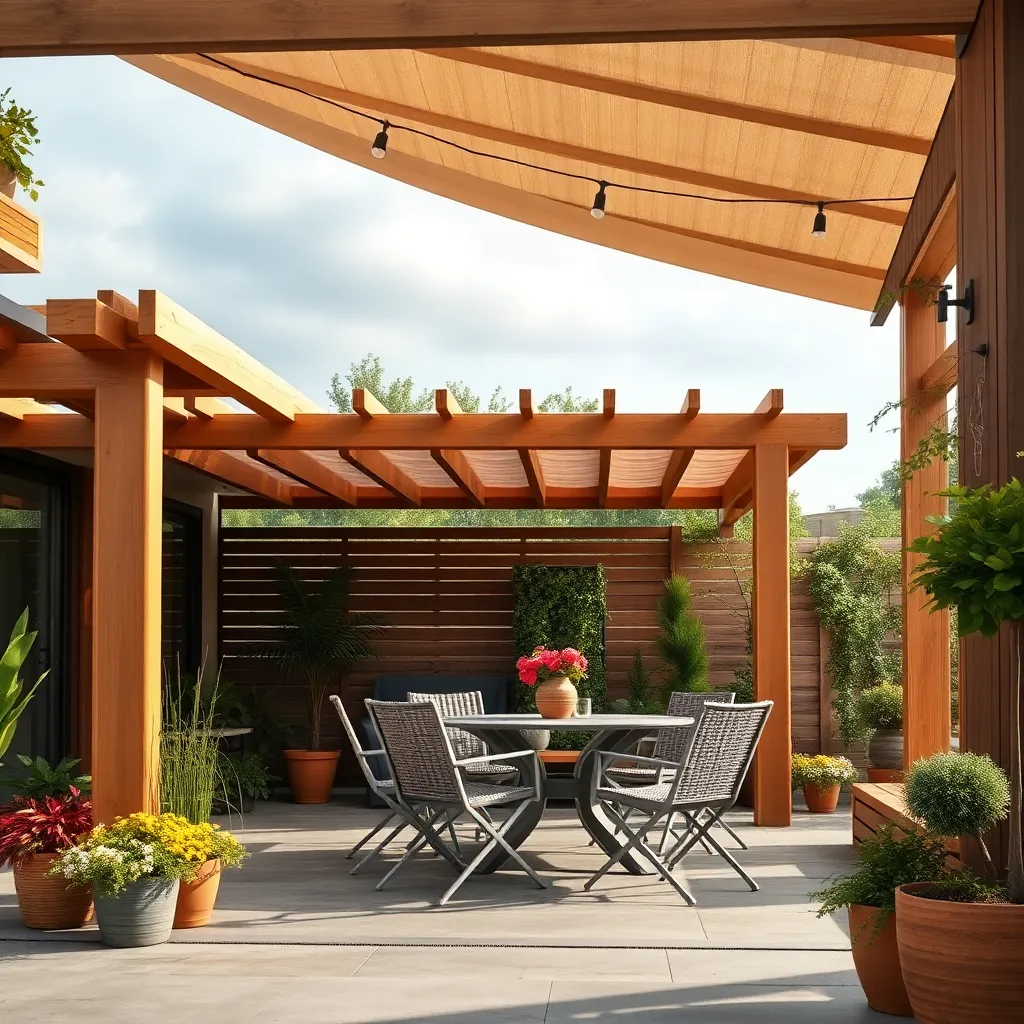
Create Shade with Pergolas
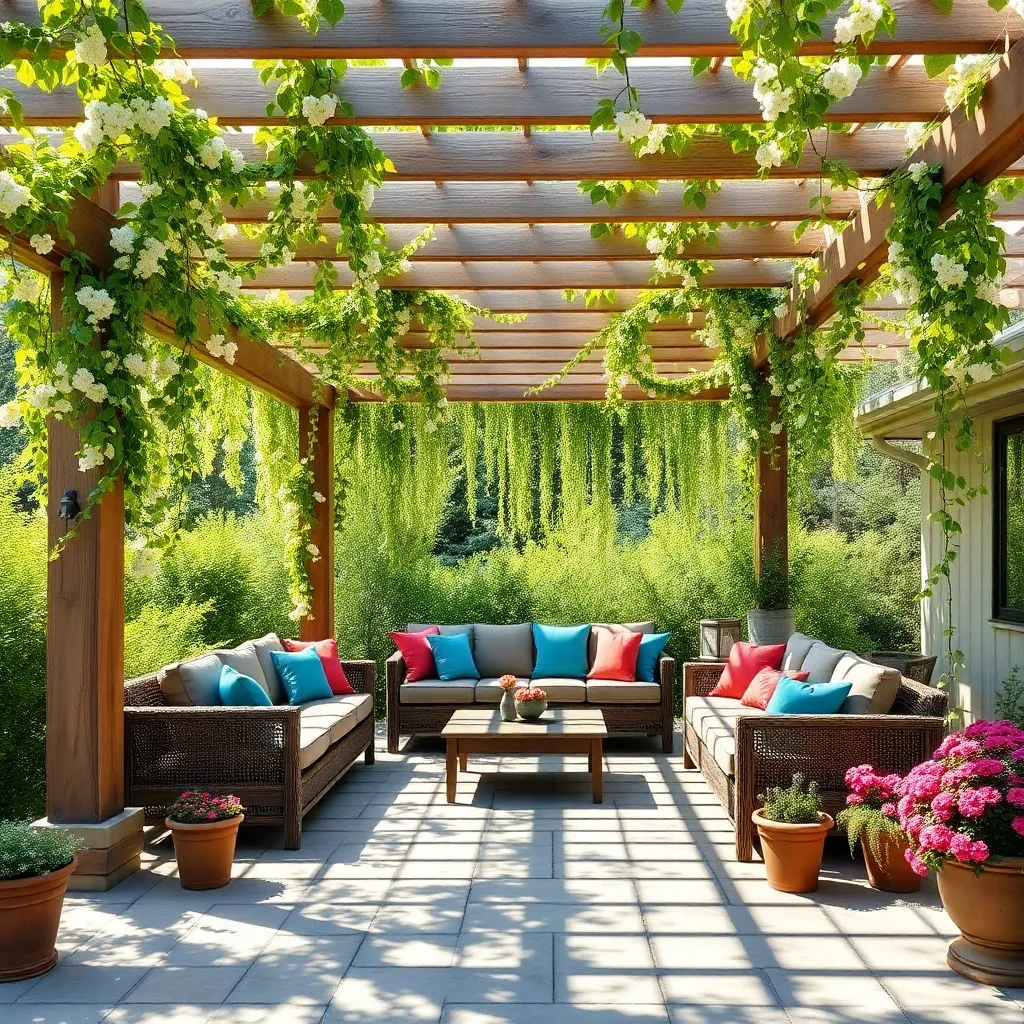
Transform your outdoor space into a haven by constructing a pergola, which not only adds shade but also enhances your garden’s aesthetic appeal. For a straightforward approach, consider using pressure-treated wood, which is both durable and affordable. Beginners can start with a simple square or rectangular design, ensuring posts are securely anchored into the ground to withstand weather elements. Opt for a lattice roof that allows dappled sunlight to filter through, creating a cozy and inviting atmosphere underneath.
For those looking to elevate their pergola project, incorporating climbing plants like wisteria or grapevines can add a lush, natural canopy over time. Using materials like cedar or redwood offers a more refined look and greater resistance to decay. Consider adding string lights or retractable fabric panels for added functionality and ambiance. Whether your goal is a peaceful retreat or a vibrant gathering spot, a pergola can be customized to reflect your personal style while providing essential shade.
Position Seating for Scenic Views
When positioning seating for scenic views, consider the natural beauty surrounding your space. Begin by identifying the best vantage points in your garden, such as overlooking a flower bed, water feature, or the horizon. For maximum comfort and durability, choose materials like teak, cedar, or powder-coated metal that can withstand the elements. Arrange seating to face these focal points, ensuring that guests can fully appreciate the view while relaxing.
Enhance the experience by incorporating design elements like a low-profile railing or a clear glass windbreak that won’t obstruct the view. For those with a larger budget or advanced DIY skills, consider building a raised platform or a small deck to elevate the seating area, which can provide a more sweeping perspective. Remember to add cushions with weather-resistant fabrics for comfort, and consider the angle of the sun to avoid glare during specific times of the day. This thoughtful approach ensures a picturesque and comfortable retreat in your outdoor space.
Use Natural Barriers for Privacy
For a natural and cost-effective way to add privacy to your outdoor space, consider using living barriers such as hedges, trees, or bamboo. Choose fast-growing species like Leyland Cypress or Bamboo to create a dense screen quickly. Plant them strategically around your seating area or along property lines, maintaining at least 2-3 feet between each plant to allow for growth. This approach not only enhances privacy but also adds lush greenery, which can significantly improve the ambiance of your relaxation spot.
Incorporate decorative elements to enhance both function and aesthetics. Install trellises or lattice panels to support climbing plants like honeysuckle or clematis, which offer seasonal blooms and additional privacy. For a more advanced touch, consider a staggered planting design to create depth and visual interest, using a mix of evergreen and deciduous plants for year-round appeal. This blend of greenery and structure provides a dynamic, natural barrier that evolves beautifully with the seasons.
Design Multi-Level Deck Spaces
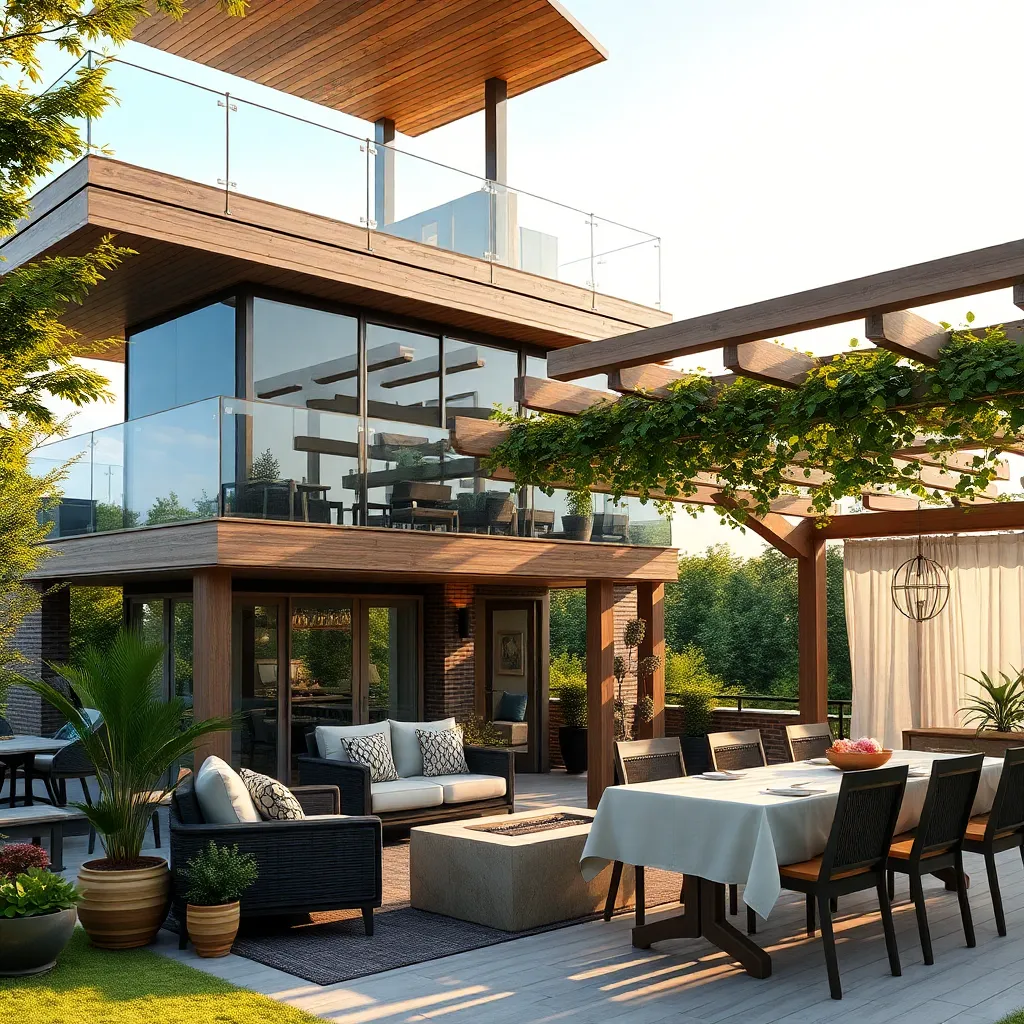
Creating multi-level deck spaces can transform your backyard into a dynamic oasis that caters to various activities. Start by considering the layout: use pressure-treated wood for durability and ensure each level has a purpose, such as a dining area, lounge space, or garden nook. Beginners should focus on simple two-tier designs, which offer a manageable starting point and can be expanded later. For those with more experience, incorporating built-in seating, planters, and lighting will enhance functionality and ambiance.
Materials play a crucial role in the longevity and look of your deck. Opt for composite decking to reduce maintenance and ensure a longer lifespan. When constructing the levels, aim for a height difference of at least 12 inches to create distinct zones while maintaining visual connections. For an advanced touch, integrate pergolas or shade sails to offer shelter and define spaces without enclosing them. This approach not only provides practical benefits but also elevates the aesthetic appeal of your outdoor area.
Select Comfortable, Durable Furniture
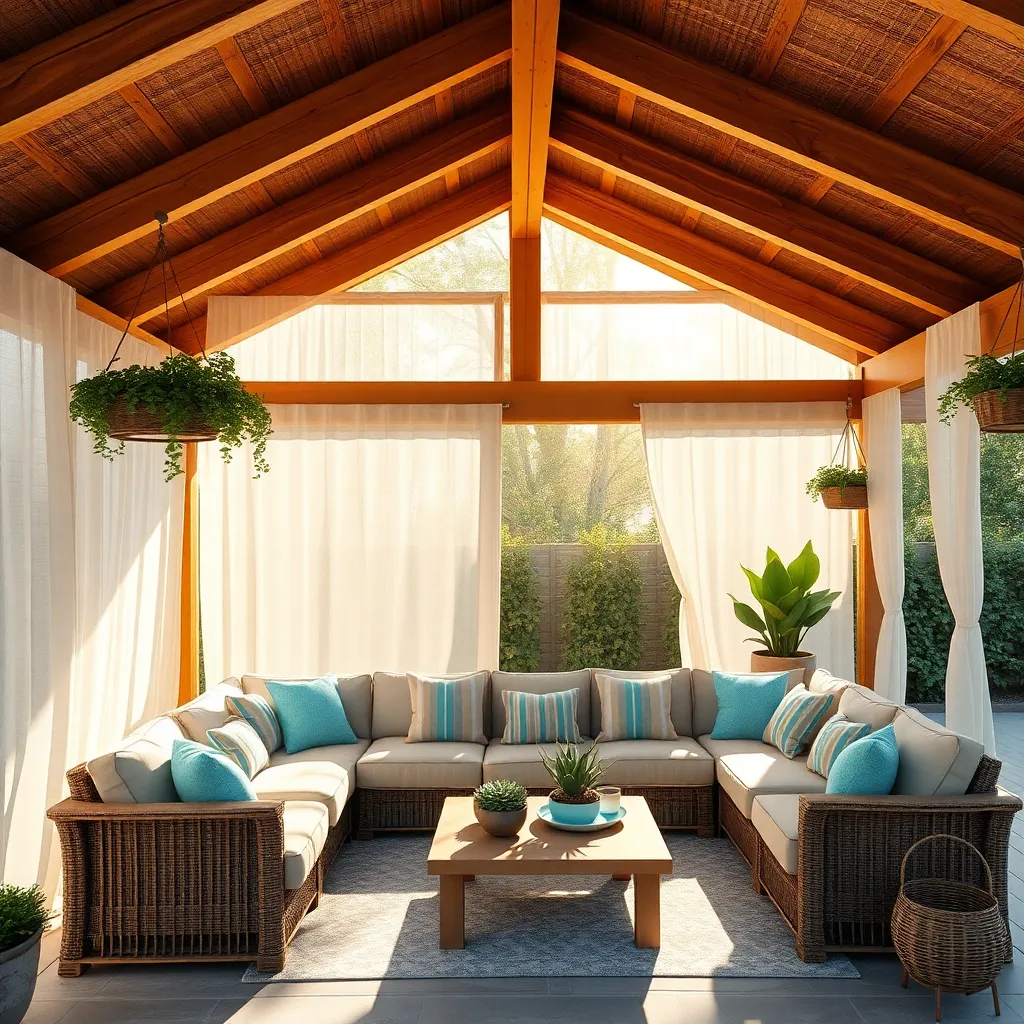
Choosing comfortable, durable furniture is essential to creating a relaxing outdoor shelter. Begin by selecting pieces made from weather-resistant materials such as teak, eucalyptus, or powder-coated aluminum, which are known for their longevity and low maintenance. For those new to outdoor design, start with a basic setup: a sturdy table and a few chairs with cushions in fade-resistant fabrics like Sunbrella. This ensures your furniture remains inviting and resilient throughout various seasons.
Incorporating different seating options can elevate your outdoor space. Consider advanced choices like modular sectional sofas or hammocks for a versatile setup that adapts to your needs. Pro tip: Ensure your furniture layout accommodates natural traffic flow and provides ample room for movement, with at least 3 feet of space around each piece. Adding small side tables or a storage bench can enhance functionality and provide convenient spots for drinks or décor, creating a perfect balance of comfort and practicality in your outdoor retreat.
Enhance Ambiance with Soft Lighting
To enhance the ambiance of your outdoor shelter, consider incorporating soft lighting that creates a warm and inviting atmosphere. Use string lights or lanterns to add a gentle glow, which can be easily draped or hung along pergolas, gazebos, or even large trees. Opt for LED bulbs for energy efficiency and durability, ensuring that your lighting solution is both environmentally friendly and long-lasting.
Experiment with different lighting designs and materials to achieve the perfect mood. For a more sophisticated look, install dimmable lights or solar-powered fixtures that automatically adjust as the sun sets. You might use a combination of
- hanging pendant lights for a focal point,
- pathway lights for safety,
- and candle lanterns for a touch of elegance.
These choices not only enhance the beauty of your outdoor space but also provide practical illumination for nighttime gatherings.
Integrate Planters for Lush Greenery
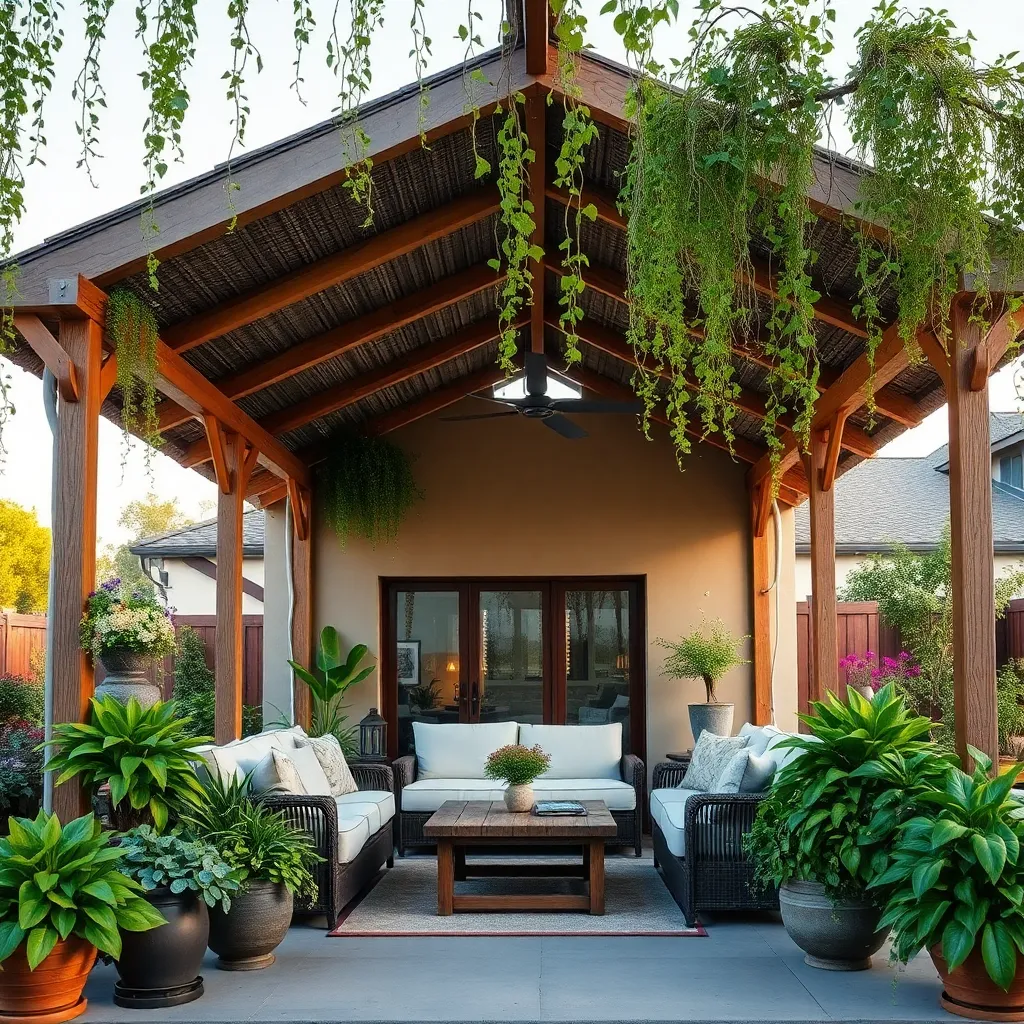
To seamlessly integrate planters into your outdoor shelter, consider using vertical space by installing hanging planters or wall-mounted pots. This not only saves ground space but also creates a lush, cascading effect. Choose durable materials like galvanized steel or ceramic for your planters, ensuring they can withstand the elements. For a cohesive look, opt for planters in colors or textures that complement your existing decor, and consider self-watering options to reduce maintenance.
For a more advanced touch, incorporate built-in planters into the structure of your shelter. These can be set into the base of pergolas or along the edges of a gazebo, creating a seamless transition between the built environment and nature. Use weather-resistant materials like treated wood or composite for the planter boxes, and ensure proper drainage with a layer of gravel at the bottom. Select a mix of trailing plants like ivy and upright varieties such as ferns or ornamental grasses to add depth and visual interest.
Optimize Space with Folding Furniture
Maximize your outdoor space by incorporating folding furniture, which is perfect for patios or smaller gardens. Look for materials like teak or powder-coated steel, which offer durability against the elements while being lightweight enough for easy maneuverability. Compact folding chairs and tables can be easily stored when not in use, freeing up space for other activities or to simply enjoy the open area.
For those looking to enhance their design, consider options with built-in features, such as fold-out footrests or adjustable backrests for added comfort. Advanced users might explore custom-built folding furniture that fits snugly into specific alcoves or corners. Ensure your folding furniture complements the overall aesthetic of your garden by choosing finishes and colors that match or enhance your existing décor. This not only optimizes space but also elevates the style and functionality of your outdoor retreat.
Conclusion: Creating Beautiful Outdoor Spaces
In exploring the 11 relaxing spots for your next relationship project, we’ve journeyed through transformative spaces that nurture connection and intimacy. From the tranquility of nature walks to the cozy embrace of a home-cooked meal, each idea holds the potential to deepen bonds and invigorate your shared experiences. We’ve delved into the power of creating shared goals, the importance of unplugged time, and the magic of rediscovering local gems together. Each concept is a stepping stone toward a more fulfilling and harmonious relationship.
As an actionable step, choose one spot from our list and plan a visit this week. Whether it’s a serene park or a quaint café, make it a priority to carve out time for just the two of you.
Don’t forget to bookmark this article to revisit these enriching ideas whenever you need a spark of inspiration. As you continue to invest in these experiences, you’ll find your relationship blossoming with resilience and joy. Remember, every moment spent nurturing your connection is a step toward lasting happiness and love. Embrace the journey, and watch your relationship thrive.