
Imagine stepping into a backyard oasis where you can unwind, entertain, and savor the beauty of the outdoors, all while being comfortably sheltered. Whether you’re a novice embarking on your first outdoor project or a seasoned homeowner looking to elevate your space, “14 Outdoor Shelter Ideas for Your Next Project” is your go-to guide. This collection promises to inspire and equip you with creative solutions that cater to every taste and budget.
In this guide, you’ll uncover the secrets to creating functional, stylish shelters that enhance your outdoor living experience. From pergolas to gazebos, each idea is designed to provide shade, privacy, and a touch of elegance, ensuring your outdoor area becomes a cherished extension of your home. Get ready to transform your backyard into a personal paradise, confident in the knowledge that practical, beautiful outdoor living is within your reach.
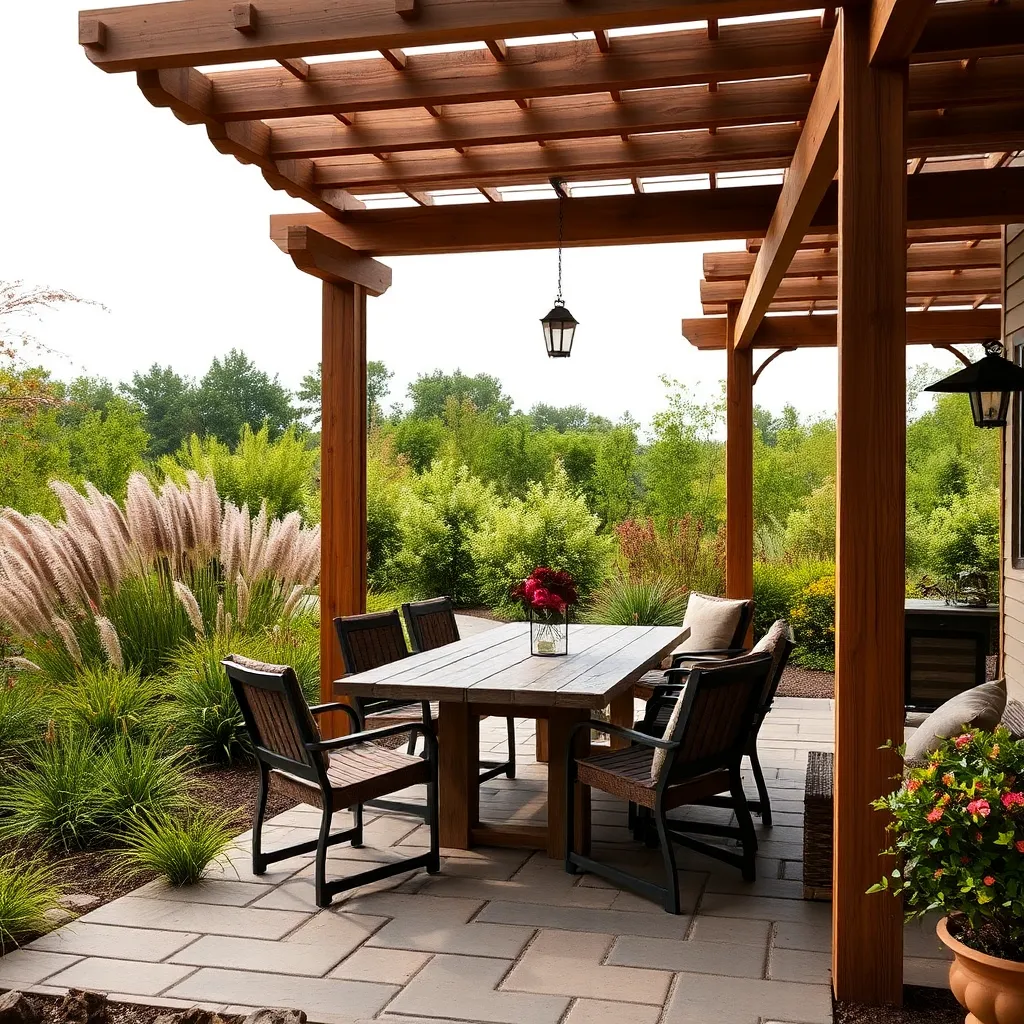
Incorporate Natural Materials for Durability
Embracing natural materials in your outdoor shelter project can significantly enhance both its durability and aesthetic appeal. Consider using hardwoods like cedar or redwood, known for their resistance to decay and insect damage, making them ideal for long-lasting structures. These woods not only withstand the elements but also add a warm, inviting look to your space. For a beginner-friendly approach, you might start with a simple pergola, which can be constructed with these robust materials in standard dimensions of 8×10 feet for a cozy, intimate setting.
For those ready to tackle more advanced designs, integrating stone or bamboo can add both strength and a natural touch to your shelter. Stone pillars, paired with wooden beams, create a sturdy and elegant framework, while bamboo offers a lightweight yet strong alternative for roofing or wall panels. Ensure your stone pillars are set with a deep foundation, at least 18 inches below ground, for stability. When using bamboo, treat it with a sealant to prevent moisture damage and extend its lifespan. These elements not only increase the structure’s resilience but also harmonize beautifully with surrounding landscapes.
Choose Weather-Resistant Fabrics Wisely
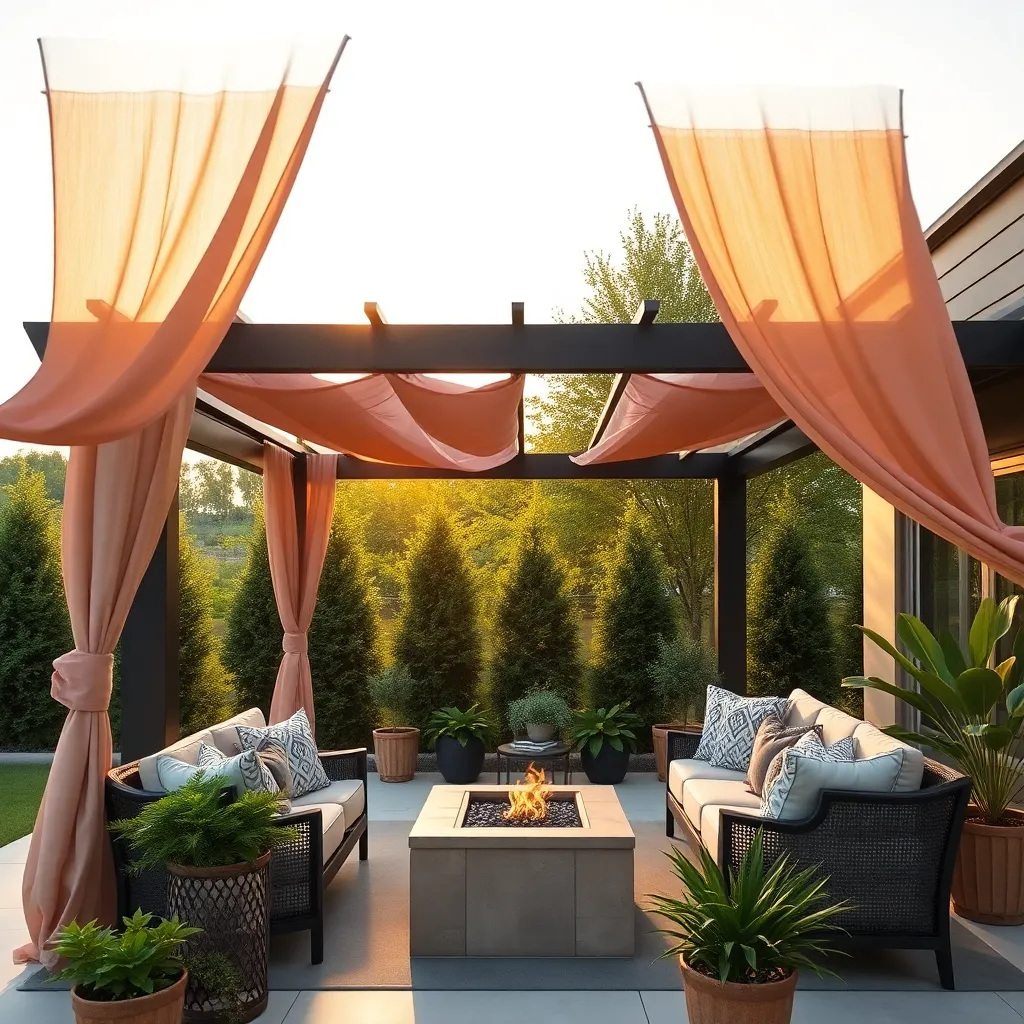
When selecting fabrics for your outdoor shelter, it’s essential to focus on weather-resistant materials that can withstand the elements. Look for options like solution-dyed acrylics or polyester with a high denier rating, as these materials offer excellent UV protection and are highly resistant to mildew. For beginners, consider starting with a fabric that has been treated with a water-repellent finish to ensure longevity and ease of maintenance.
Incorporate advanced techniques by ensuring your chosen fabric is paired with reinforced stitching and rust-resistant grommets for durability. Double-stitching or using marine-grade thread can significantly enhance the shelter’s lifespan, particularly in areas prone to high winds or heavy rain. For added style and structure, opt for fabrics with a tight weave that not only provide shade but also reduce heat absorption, making your outdoor space more comfortable during hot summer days.
Utilize Retractable Awnings for Flexibility
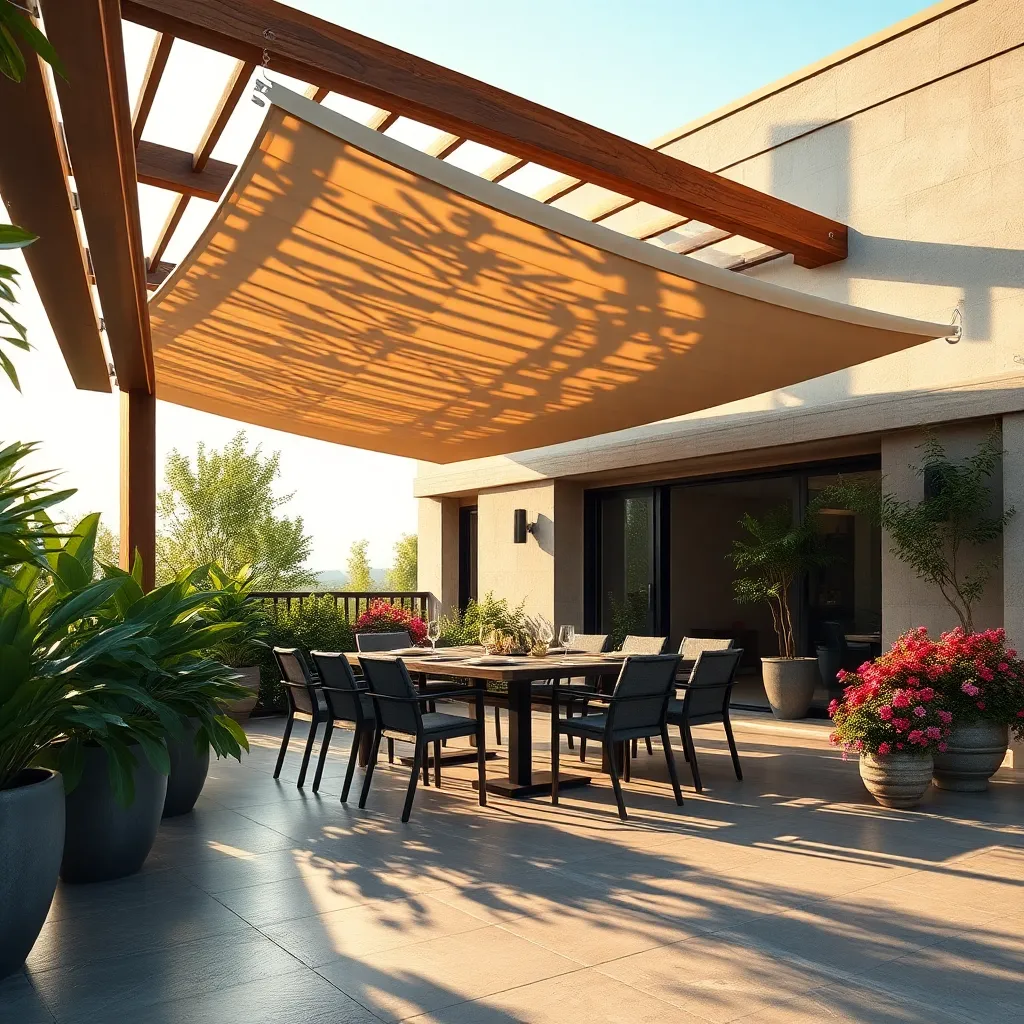
Retractable awnings offer a versatile solution for outdoor spaces, providing shade and shelter on demand. These awnings can be extended during sunny days to create a cool, comfortable area for relaxation or retracted when you want to enjoy the open sky. Look for awnings made from durable, UV-resistant materials like acrylic or polyester to ensure longevity and protection from the elements. For beginners, a motorized retractable awning offers convenience, while more experienced DIYers might enjoy installing a manual model.
Integrating retractable awnings into your outdoor design can enhance both aesthetics and functionality. Consider pairing the awning with complementary outdoor furniture and decor to create a cohesive look. Ensure the structure is securely mounted and properly angled to direct water away from your seating area when it rains. Advanced users might explore smart home integration, allowing control of the awning via smartphone or voice commands. Whether your space is large or small, these awnings can be customized to fit any dimension, providing a tailored solution for your outdoor needs.
Opt for Multi-Functional Furniture Pieces
Choosing multi-functional furniture pieces can transform your outdoor space into a versatile haven. Consider investing in items like benches with built-in storage, which offer a place to sit while keeping cushions and garden tools neatly tucked away. Look for materials such as weather-resistant teak or powder-coated aluminum that can withstand the elements and maintain their appearance over time.
Additionally, think about pieces that can easily adapt to different needs, such as modular seating that can be rearranged for social gatherings or intimate settings. Foldable tables are perfect for saving space and can be expanded when you host larger groups. For a more advanced touch, consider integrating furniture with solar-powered charging ports, allowing you to power devices while enjoying the outdoors. These thoughtful choices will ensure your outdoor area is both functional and inviting, ready to cater to any occasion.
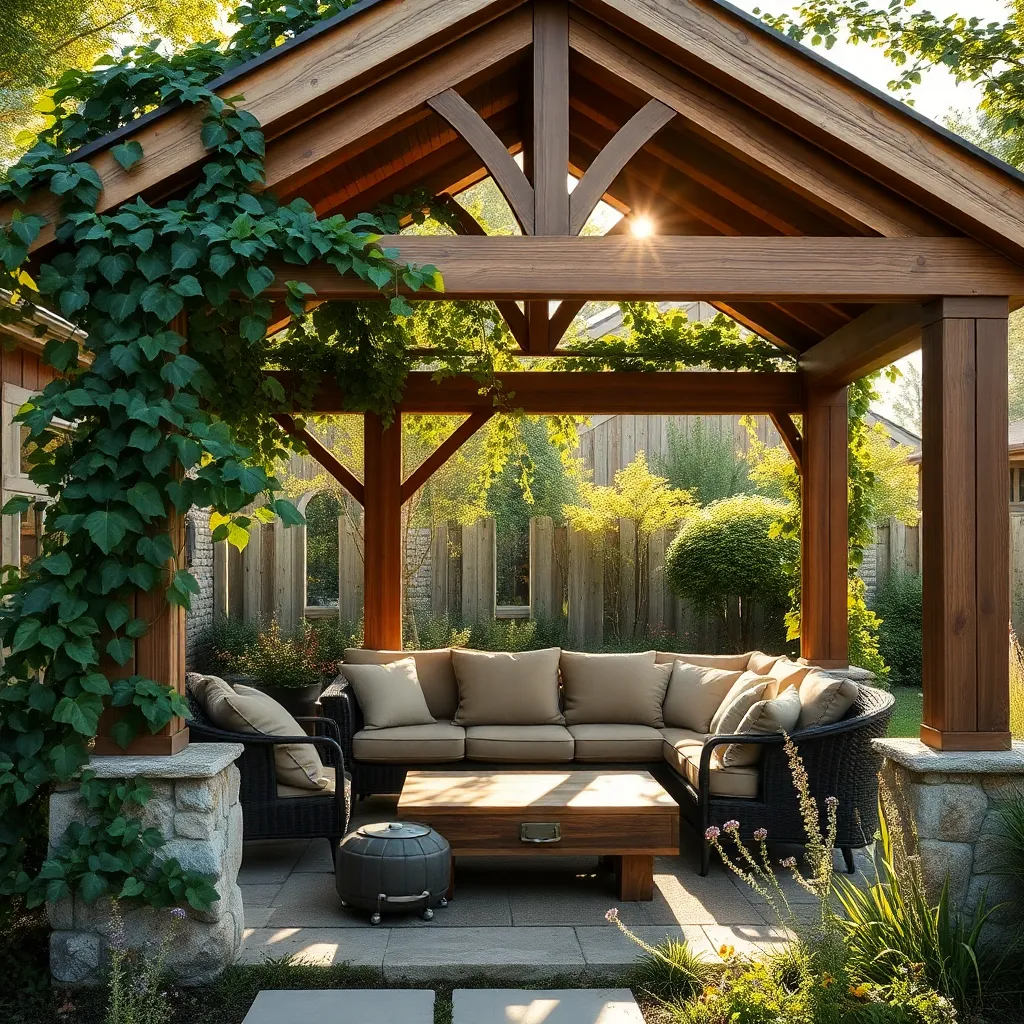
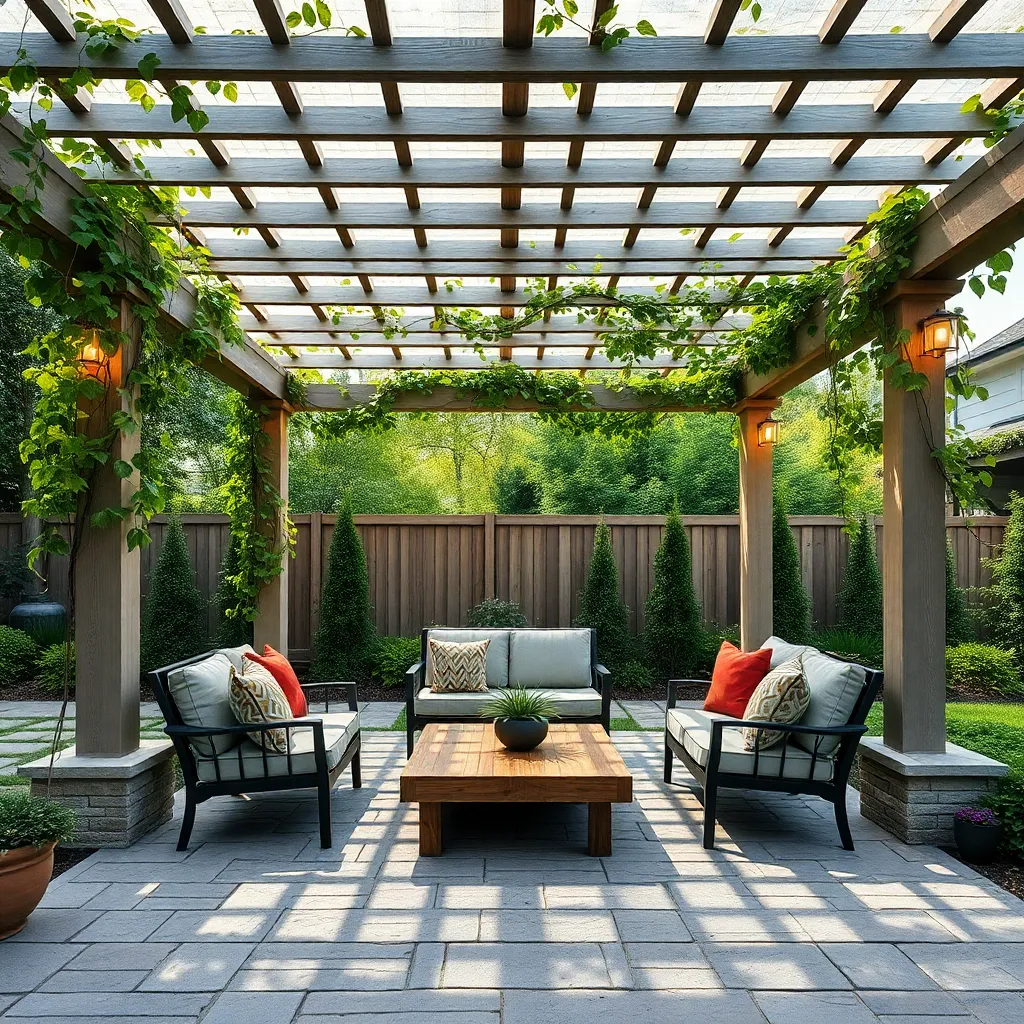
Create Shade with Pergolas and Vines
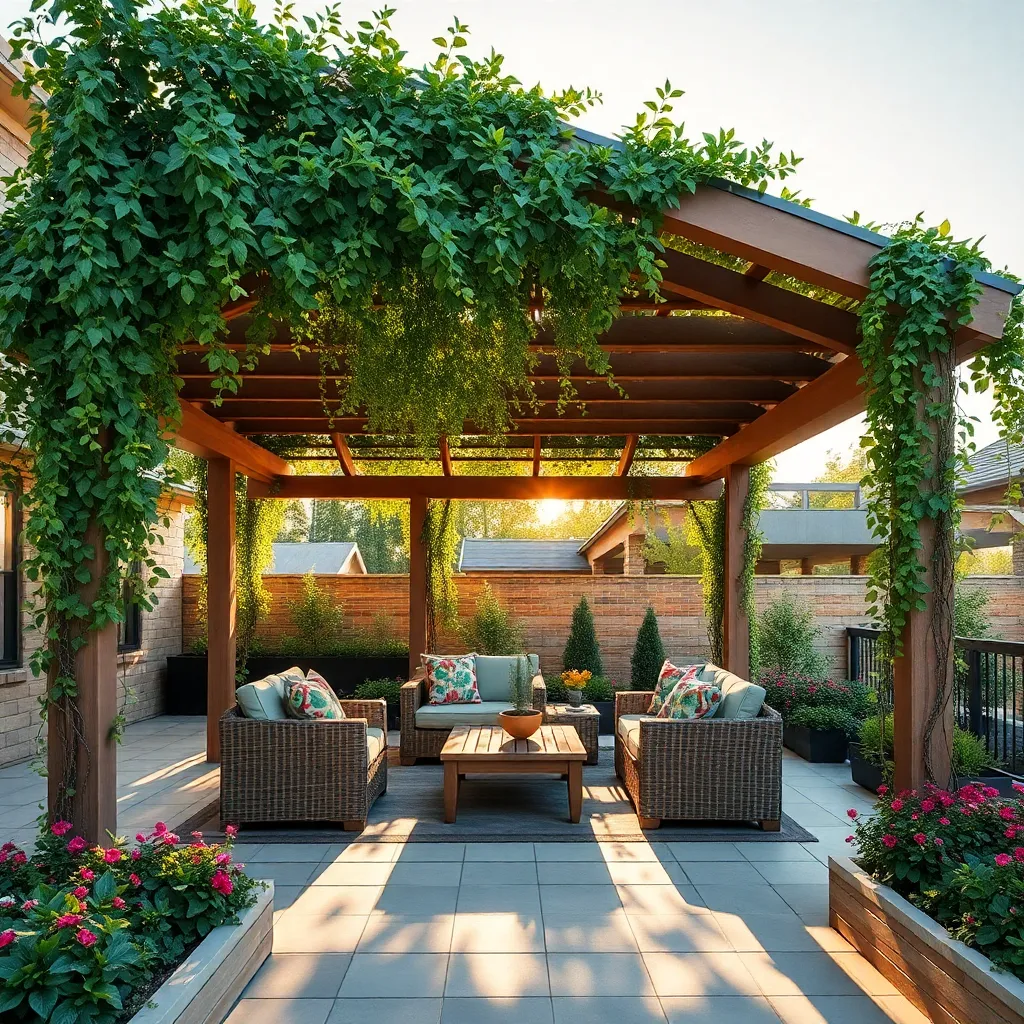
Transforming your outdoor space with a pergola covered in vines provides both shade and aesthetic appeal. Start by selecting a durable material for your pergola, such as cedar or pressure-treated wood, which are both long-lasting and weather resistant. For a beginner-friendly design, aim for a basic square or rectangular shape with dimensions like 10×10 feet, which offers ample coverage without overwhelming the space. Once your pergola is constructed, choose fast-growing vines like wisteria, clematis, or grapevines to weave through the structure, ensuring they are suitable for your climate.
Consider the orientation and location of your pergola to maximize shade during the hottest parts of the day. Position it where it can best block the afternoon sun, and remember that the vine’s growth direction will influence shade patterns. For an advanced touch, incorporate retractable shade canopies or adjustable lattice panels to provide additional control over sunlight exposure. Regular pruning of your vines will encourage healthy growth and prevent them from becoming too heavy for the structure. With these steps, your pergola and vines will create a serene, shaded retreat in your backyard.
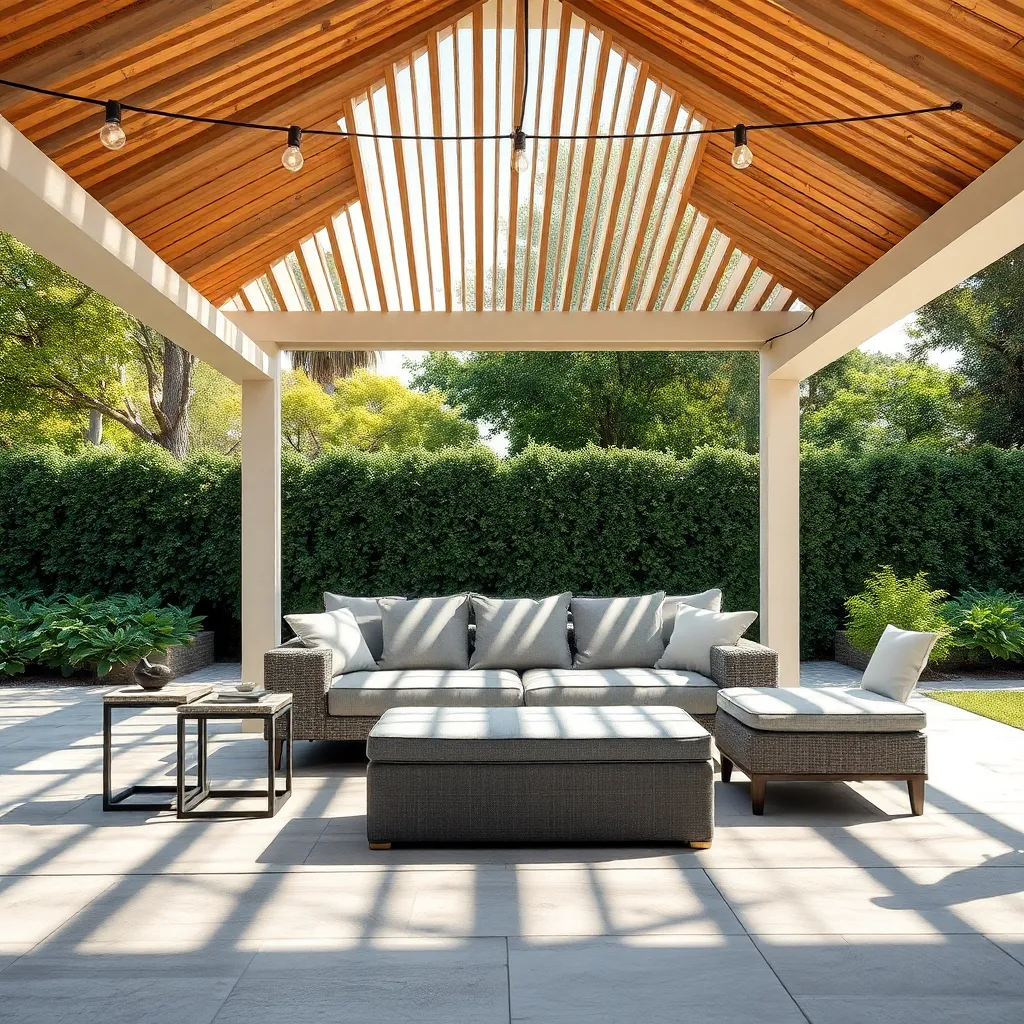
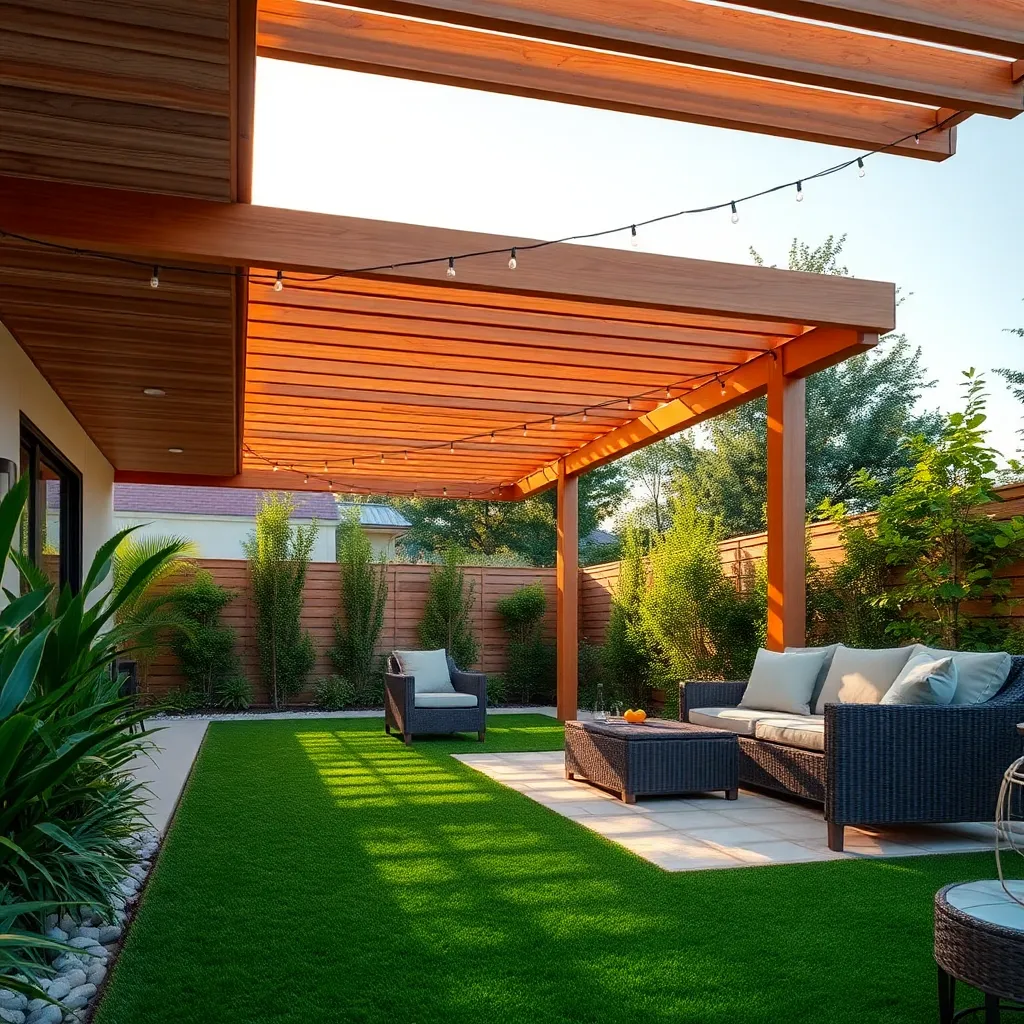
Design Using Modular Shelter Systems
Consider using modular shelter systems for a versatile and adaptable outdoor space. These systems offer a flexible design approach that allows you to create a custom shelter by combining pre-fabricated components. For beginners, start with basic modules like a simple canopy or a partial wall to keep your project manageable. Advanced users can explore more complex setups, incorporating elements like retractable roofs or integrated lighting. Choose durable materials such as aluminum or treated wood for longevity, ensuring your structure withstands various weather conditions.
When designing with modular systems, it’s essential to plan your layout according to the available space and intended use. Begin by measuring your designated area and determining the primary function of your shelter—be it dining, lounging, or entertaining. Ensure your modules fit seamlessly together by selecting compatible sizes and styles, and consider adding adjustable features for enhanced functionality. For a polished look, incorporate decorative elements like climbing plants or outdoor curtains, which can add charm while providing extra shade and privacy. This approach not only enhances your outdoor living experience but also allows for future expansion or reconfiguration as your needs evolve.
Integrate Solar-Powered Lighting Options
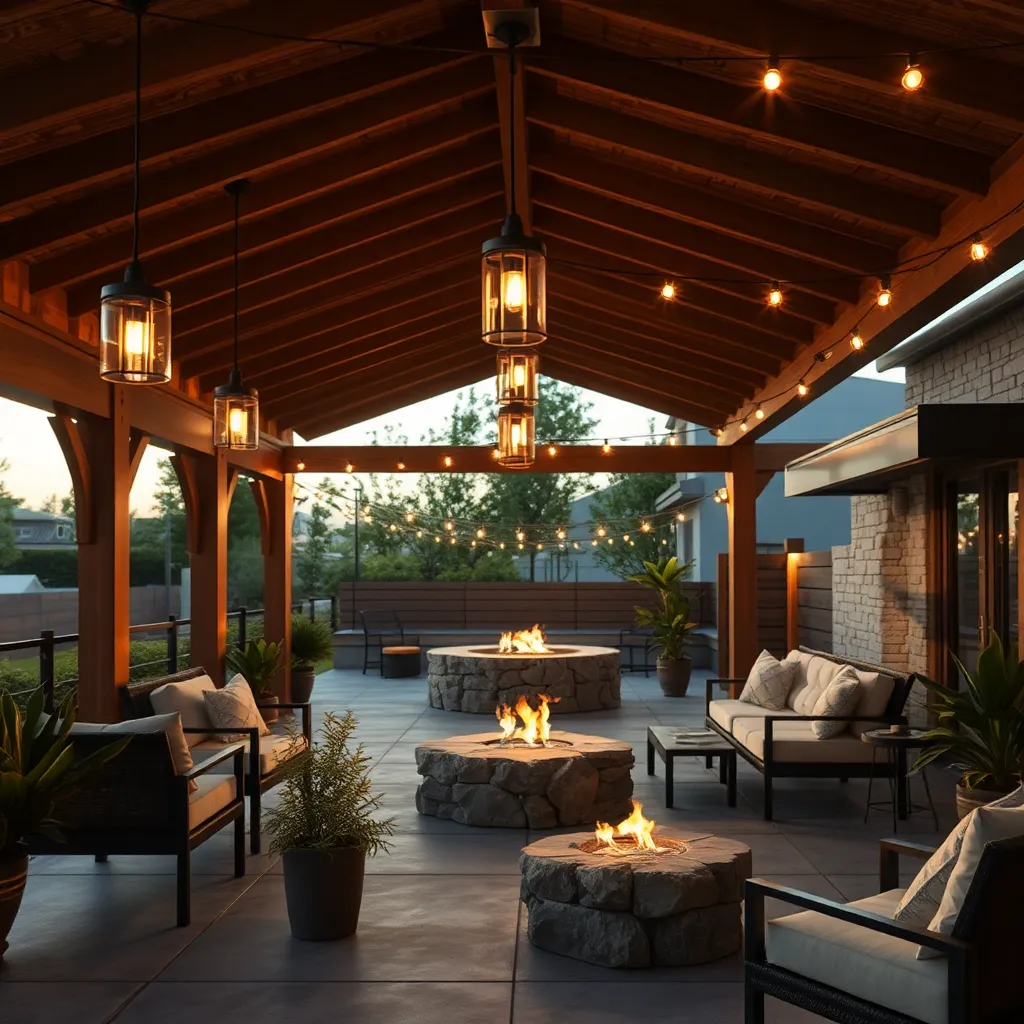
Incorporating solar-powered lighting into your outdoor shelter not only enhances its visual appeal but also boosts functionality and sustainability. Start by selecting durable, weather-resistant solar lights designed for outdoor use. Position lights strategically along pathways, under eaves, or atop posts to ensure ample illumination. For beginners, opt for simple stake lights that don’t require wiring. Advanced users can explore integrated solar panels with battery storage systems to power more complex lighting setups, ensuring your space remains well-lit even on cloudy days.
To achieve the best results, consider the placement and angle of solar panels to maximize sunlight exposure throughout the day. Ensure the panels are not obstructed by trees or structures, as this can affect efficiency. Use adjustable brackets to fine-tune the angle seasonally, optimizing energy collection. For a cohesive look, match the style and finish of the solar lights with your shelter’s design elements, such as wood finishes or metal accents. This thoughtful integration can transform your shelter into a stunning, eco-friendly retreat, perfect for evening gatherings or quiet relaxation under the stars.
Construct Windbreaks with Native Plants
Creating windbreaks with native plants is an effective way to protect your outdoor areas from harsh winds while enhancing the natural beauty of your landscape. Start by selecting hardy native species that thrive in your region, such as willow, oak, or juniper, as these plants are typically well-adapted to local soil and climate conditions. It’s important to plant them in staggered rows to maximize wind reduction; aim for a density that allows some airflow, as this helps prevent turbulence and damage to the plants themselves.
Incorporating a variety of plant heights can further strengthen your windbreak. Consider combining taller trees with medium-sized shrubs and ground covers to create a tiered effect that effectively disrupts wind flow. For a more advanced approach, use a mix of evergreen and deciduous species to ensure year-round protection. Mulch the base of your plants to conserve moisture and suppress weeds, promoting healthy growth. Regular maintenance, such as pruning and monitoring for pests, will keep your windbreak thriving and effective over the years.
Install Rainwater Collection Systems
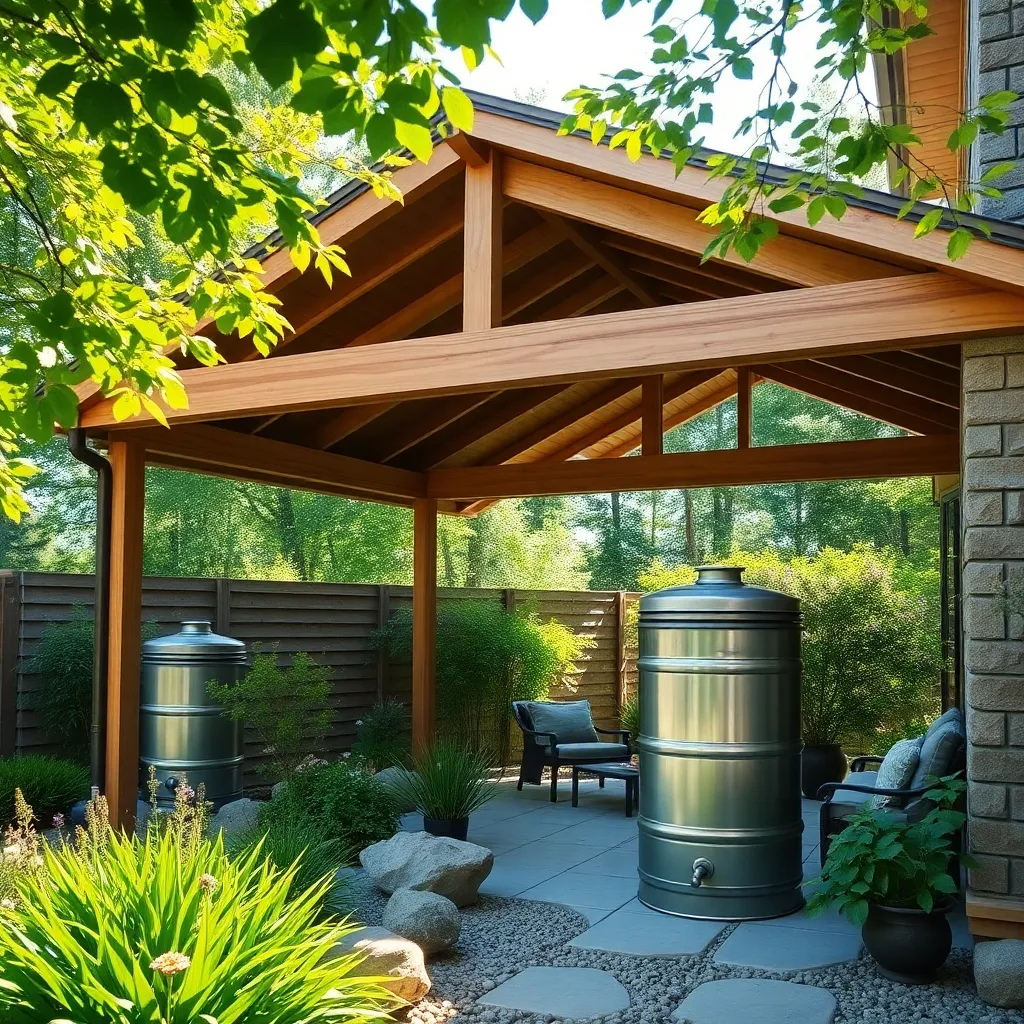
Rainwater collection systems are an eco-friendly way to enhance your outdoor shelter by providing a sustainable water source for your garden or yard. To get started, install a rain barrel beneath the downspout of your gutter system. Choose a barrel with a capacity of at least 50 gallons to ensure it can handle significant rainfall. A basic setup involves a diverter that channels water from the downspout directly into the barrel, which should be placed on a sturdy platform to leverage gravity for better water pressure.
For those looking to maximize efficiency, consider adding a multi-barrel system connected with PVC piping to increase your storage capacity. This setup allows for seamless overflow management, ensuring water is collected even during heavy rains. Install a spigot at the base of each barrel for easy hose connection, and use a fine mesh screen on top to prevent debris and insects from contaminating the water. Regular maintenance, such as cleaning gutters and checking for leaks, will ensure your system operates smoothly, providing a reliable water source year-round.
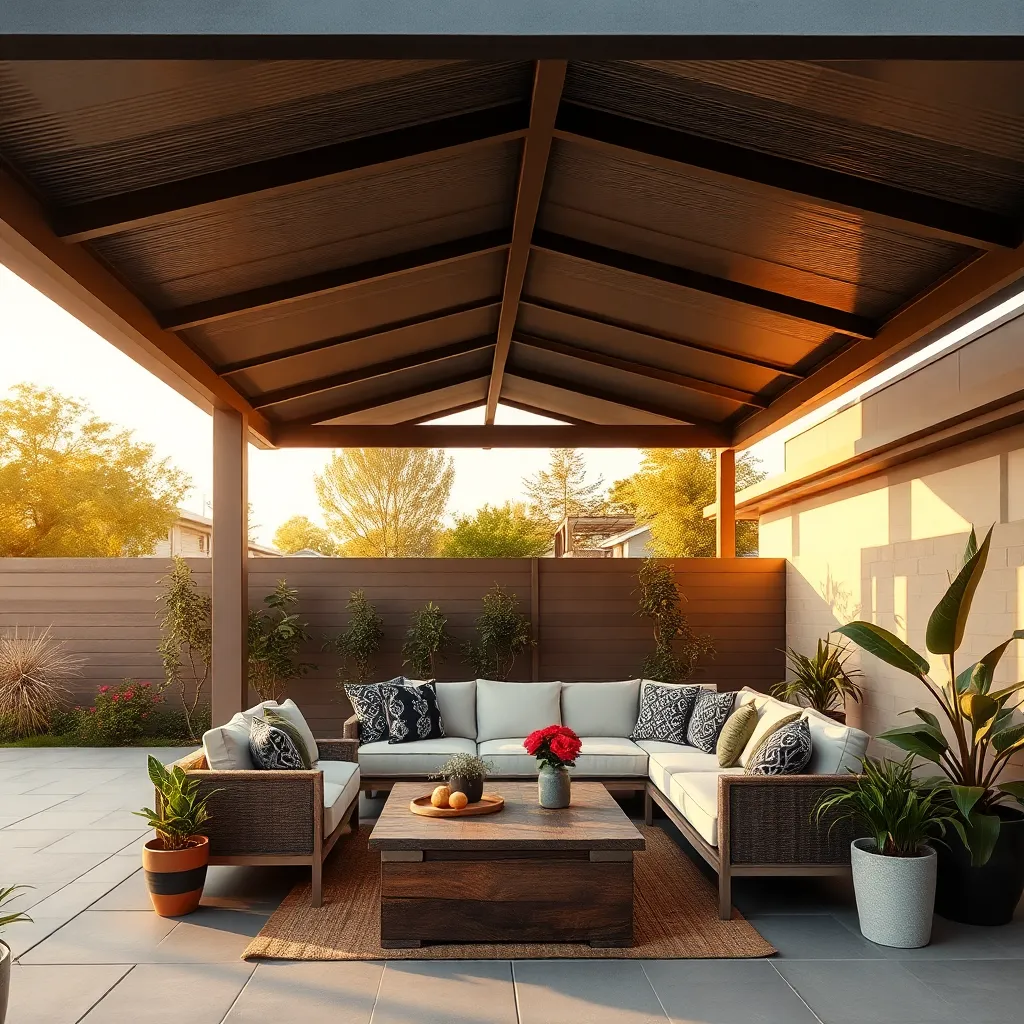
Elevate Comfort with Soft Seating Areas
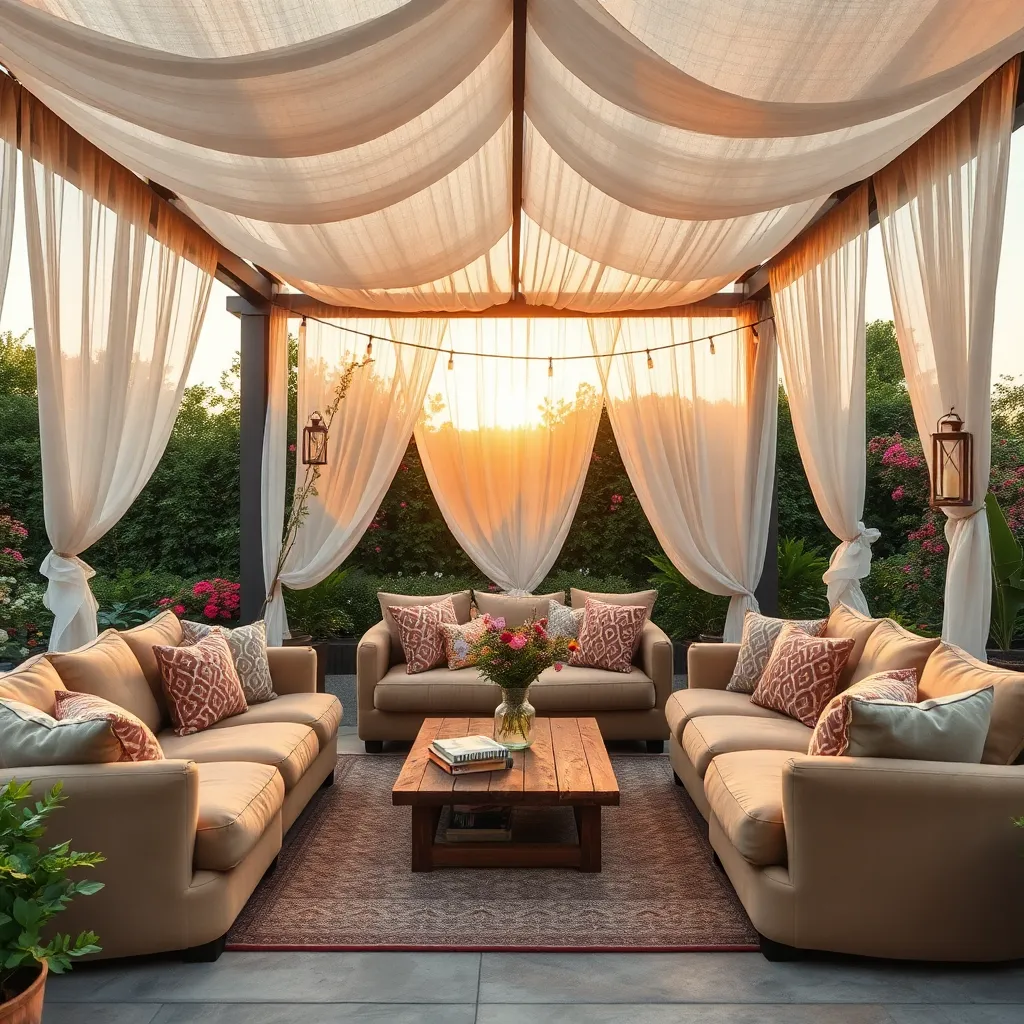
Creating a soft seating area can transform your outdoor shelter into a cozy retreat. Begin with selecting weather-resistant furniture, such as pieces made from teak, cedar, or powder-coated metal. These materials not only withstand the elements but also add a touch of elegance to your space. Consider adding cushions with high-performance outdoor fabric, like solution-dyed acrylic, which is both fade-resistant and easy to clean. For beginners, start with a small seating arrangement, such as a loveseat and a couple of chairs, ensuring enough space to move comfortably around the area.
To elevate comfort further, incorporate layers of textiles and lighting. Add outdoor rugs to define the seating space and provide a soft ground underfoot. Opt for rugs made from polypropylene, which offer durability and are quick-drying. Introduce layered lighting with solar-powered lanterns or string lights to create a warm ambiance during evening gatherings. Advanced gardeners might consider integrating built-in seating with storage beneath, allowing for additional functionality and a clean aesthetic. By thoughtfully arranging these elements, your outdoor shelter will become a favorite spot for relaxation and socializing.
Ensure Adequate Ventilation for Airflow
To ensure adequate ventilation for your outdoor shelter, consider incorporating open sides or strategically placed vents. Open-air designs, like pergolas or gazebos with slatted roofs, allow for natural airflow while providing shade. If you opt for a more enclosed structure, such as a pavilion, include louvered panels or adjustable shutters to control the breeze and keep the air fresh. These elements not only enhance comfort but also help in dissipating heat and moisture, making your space enjoyable even on warmer days.
For optimal airflow, select materials that promote circulation, such as lightweight fabrics or breathable wood like cedar. When building, maintain a minimum 2-3 feet of clearance between the roof and any surrounding walls or barriers. This clearance encourages a cross-breeze effect, which is crucial for cooling and ventilation. Advanced gardeners might consider integrating ceiling fans or solar-powered ventilation systems for enhanced temperature control. These additions can significantly improve the usability of your outdoor shelter throughout the seasons.
Select Low-Maintenance Ground Coverings
For a low-maintenance ground covering around your outdoor shelter, consider options such as gravel, mulch, or ground cover plants like creeping thyme or sedum. These materials are not only easy to maintain but also provide excellent drainage, reducing the risk of water pooling around your structure. When selecting gravel, opt for a size between 1/4 to 3/4 inch for comfort underfoot and ensure a layer of landscape fabric underneath to prevent weeds.
Incorporating mulch offers both aesthetic appeal and functional benefits, such as moisture retention and temperature regulation for surrounding plants. For a more vibrant look, choose colored mulch made from durable materials like cedar or cypress. Advanced gardeners might enjoy using ground cover plants that can withstand foot traffic, such as Irish moss or dwarf mondo grass, to create a lush, living carpet. These choices blend seamlessly with natural landscapes and require minimal upkeep, allowing you to focus on enjoying your outdoor retreat.
Incorporate Privacy Screens Creatively
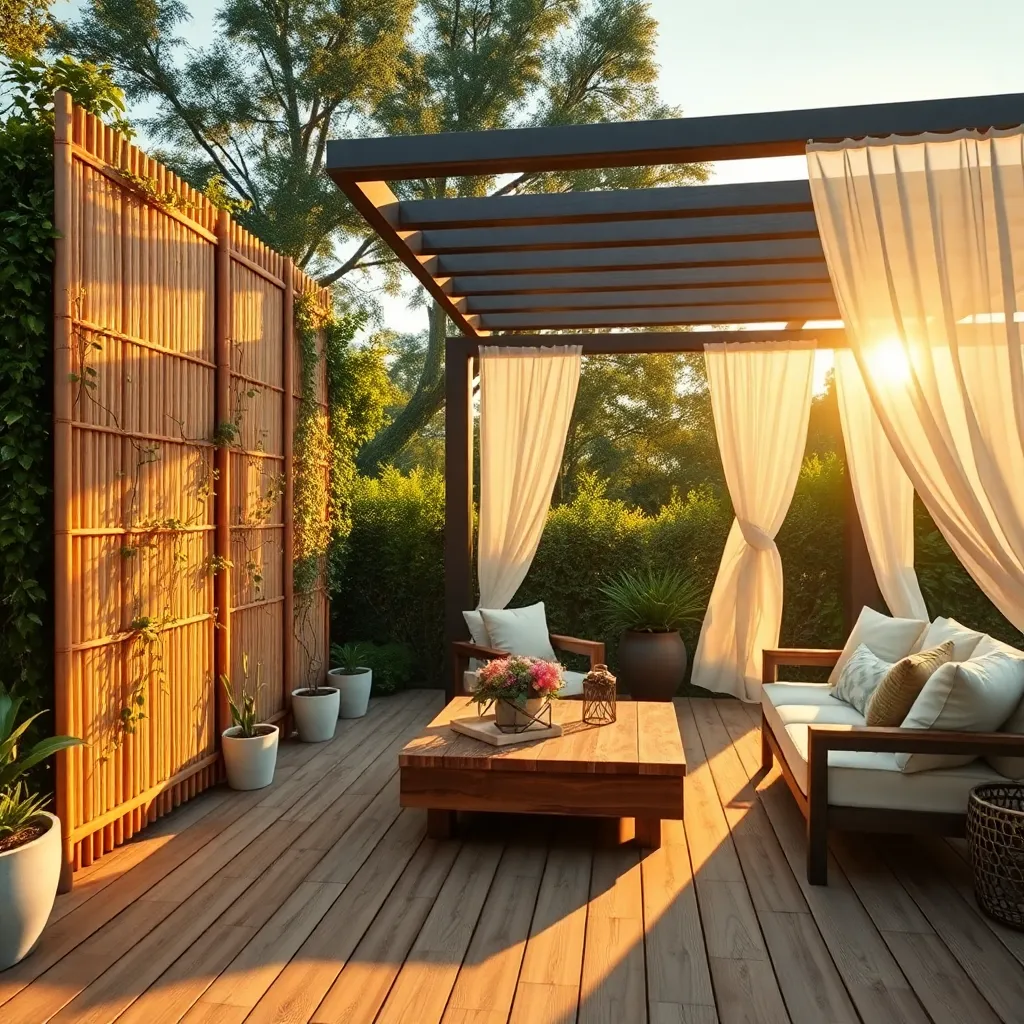
Privacy screens can transform your outdoor space into a secluded sanctuary while adding a touch of style. Consider using natural materials like bamboo or willow for a rustic aesthetic, which are not only eco-friendly but also blend seamlessly with garden landscapes. For a more modern look, you might opt for metal or composite panels, ensuring they are treated to withstand weathering. These screens can be strategically placed around seating areas or patios, offering both privacy and an attractive visual element.
To enhance functionality, install screens that are easily adjustable or movable, allowing you to adapt to changing needs or preferences. Beginners might start with simple DIY wooden lattice screens, which can be painted to match any color scheme. For those with more experience, consider incorporating living walls with vertical planters, which not only provide privacy but also introduce lush greenery into the space. Keep in mind the optimal height for privacy screens is between 6 to 8 feet, ensuring effective coverage without overwhelming the space.
Use Transparent Panels for Natural Light
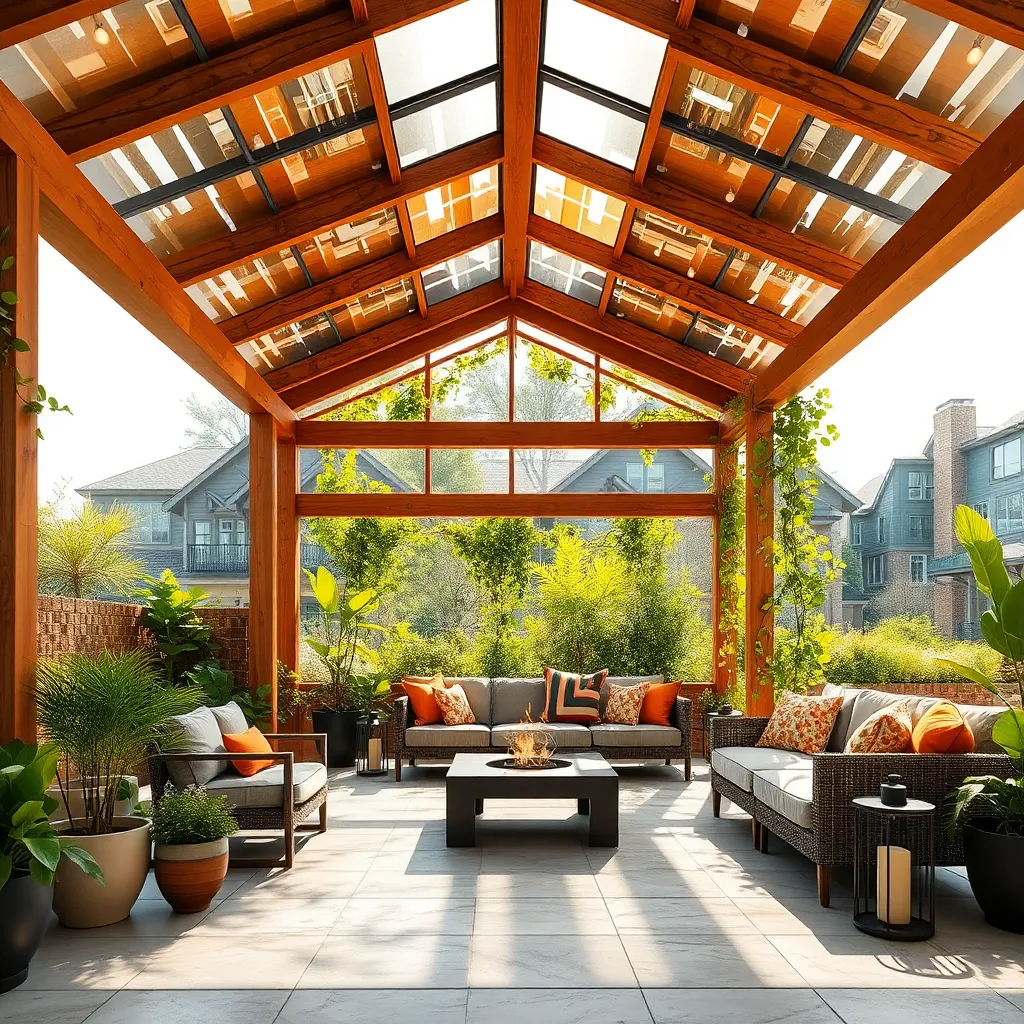
To enhance your outdoor shelter with natural light, consider using transparent panels. These panels, made from materials like polycarbonate or acrylic, allow sunlight to filter through while providing protection from the elements. For a beginner-friendly approach, you can opt for ready-to-install panels that fit standard dimensions, making it easy to add them to existing structures. Ensure the panels are UV-resistant to prevent yellowing and maintain clarity over time.
For a more advanced project, you might integrate these panels into a custom-designed pergola or gazebo. This involves creating a sturdy frame and using high-quality fasteners to secure the panels, ensuring durability and weather resistance. Consider incorporating sliding or removable panels for versatility, allowing you to adjust light exposure based on the season. Remember, proper sealing and ventilation are crucial to prevent moisture build-up and maintain a comfortable environment.
Conclusion: Creating Beautiful Outdoor Spaces
In exploring the ’14 Outdoor Shelter Ideas for Your Next Project’, we’ve delved into transformative concepts that extend beyond physical structures to fortify the foundations of your relationships. From fostering open communication under the stars to creating shared spaces that encourage togetherness, each idea serves as a metaphor for building lasting bonds. Whether it’s crafting a cozy nook that nurtures intimacy or designing an open pavilion for shared dreams and laughter, these shelters symbolize the safety and warmth we all seek in our relationships.
To turn these inspirations into reality, start with a simple step: pick one idea that resonates with you and your partner, and plan a weekend project to bring it to life. As you embark on this journey, remember that these shared experiences lay the groundwork for deeper connections.
Make sure to save or bookmark this article as a trusted resource to revisit whenever you need a spark of inspiration or guidance. As you continue to cultivate these spaces of love and understanding, know that every effort you make today paves the way for a flourishing relationship tomorrow. Embrace the journey with confidence and watch as your bonds grow ever stronger.