
Imagine stepping into your backyard and finding a perfect haven that not only shelters you from the elements but also brings beauty and tranquility to your outdoor space. Whether you’re a beginner ready to dip your toes into the world of outdoor projects or an experienced homeowner seeking fresh inspiration, “15 Budget-Friendly Shelter Ideas for Your Next Project” is your gateway to creating an inviting retreat without breaking the bank.
With our carefully curated list, you’ll discover practical, cost-effective solutions that can transform any outdoor area into a stunning sanctuary. From boosting your property’s aesthetic appeal to enhancing your everyday enjoyment of the great outdoors, these ideas provide the perfect blend of form and function. Get ready to embark on a journey that will fill you with confidence and excitement as you create a space that feels like a dream escape right in your own backyard.
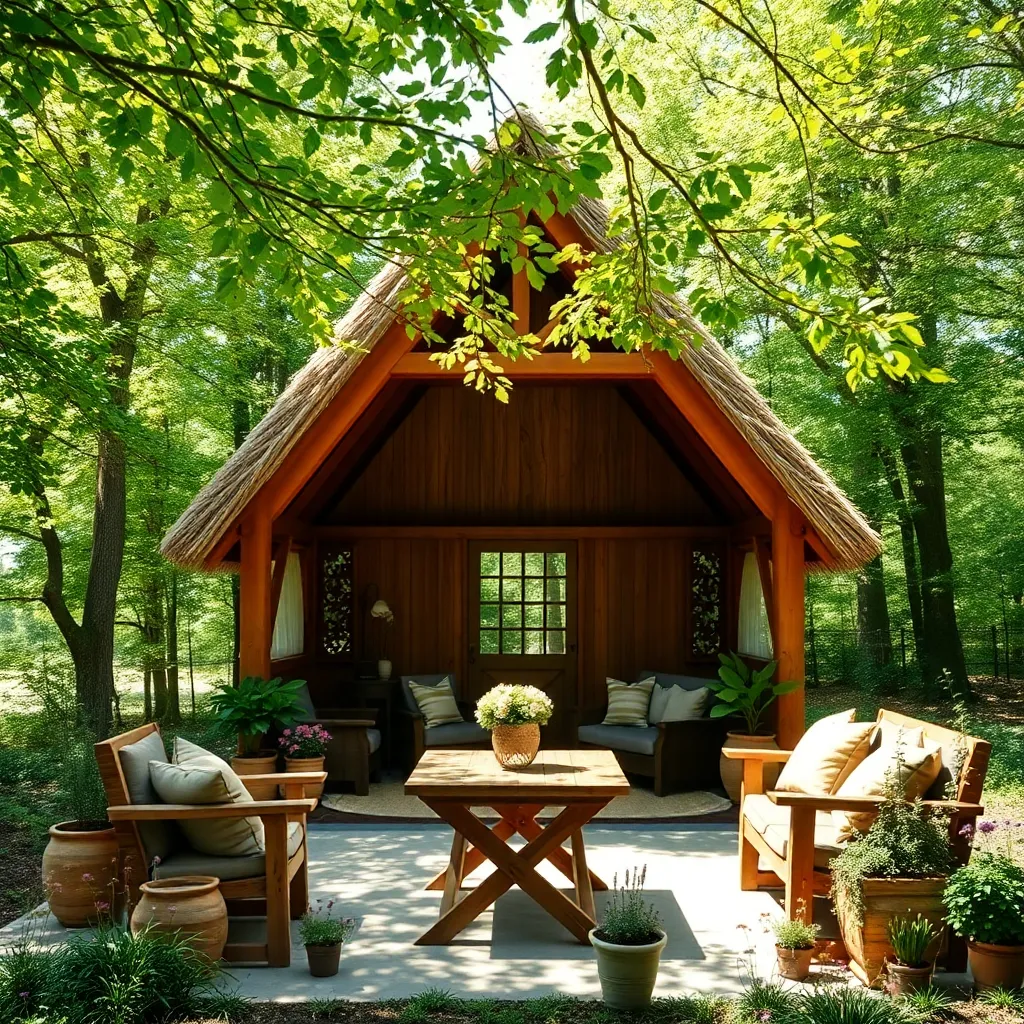
Utilize Reclaimed Wood for Walls
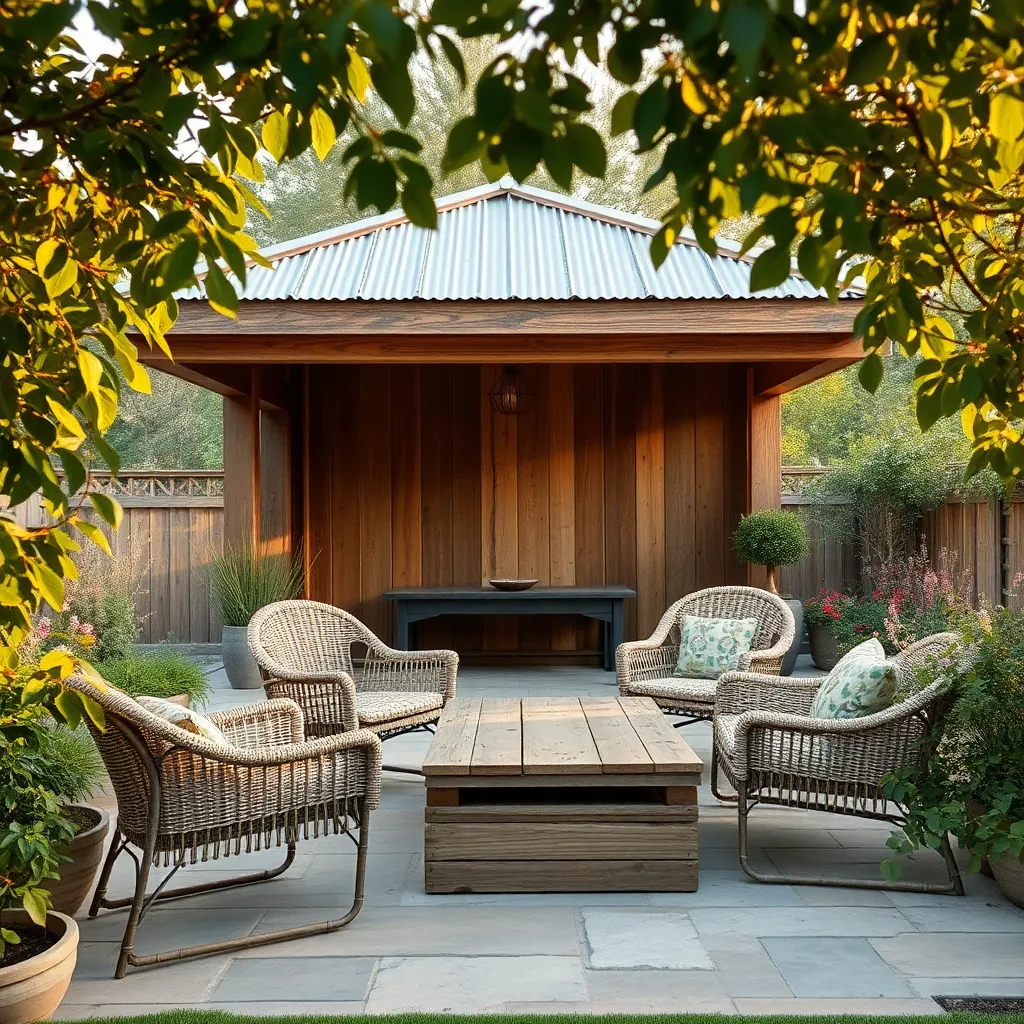
Reclaimed wood offers a cost-effective and environmentally friendly option for constructing walls in your outdoor shelter. Begin by selecting sturdy pieces from sources like pallets, old barns, or shipping crates. Ensure the wood is free of rot and pests by treating it with a wood preservative. For a rustic aesthetic, leave the wood with its natural patina, or sand and stain it for a polished look. Using a mix of different wood types and colors can add unique character to your structure.
When planning your design, consider using a horizontal or vertical board-and-batten style to enhance both stability and visual appeal. Measure your wall dimensions carefully, and aim for boards that are at least 1 inch thick to ensure durability. Secure the boards with galvanized screws or nails, which resist rust and withstand the elements better. For added insulation, consider layering a waterproof membrane behind the wood. This technique not only adds charm but also extends the life of your shelter.
Incorporate Pallets for Temporary Flooring
Consider using wooden pallets for creating a temporary flooring solution in your outdoor shelter. Pallets are affordable, readily available, and easy to assemble, making them an excellent choice for a quick project. To begin, gather pallets of the same size and arrange them tightly together to form a stable base. Ensure they are level by placing them on a flat surface or using shims to adjust as needed. For beginners, start with a simple square or rectangular layout. This approach not only provides a solid foundation but also ensures easy disassembly if you wish to relocate or redesign your shelter.
For those looking to elevate their outdoor space further, consider adding a layer of plywood over the pallets for a smoother finish. Seal the plywood with a weatherproof varnish to protect against the elements, extending the life of your flooring. If you plan to keep the shelter for an extended period, secure the pallets together using screws or brackets to enhance stability. This method not only improves the aesthetics but also provides a more comfortable surface for furniture or activities. By integrating these simple yet effective techniques, you can transform your outdoor area into a functional and inviting space without breaking the bank.
Choose Tarp Roofs for Flexibility
Choosing a tarp roof for your outdoor shelter is a fantastic way to achieve flexibility and cost-effectiveness. Tarps come in various sizes and materials, such as polyethylene and canvas, allowing you to select one that suits your climate and needs. For beginners, using a sturdy frame made from PVC pipes or reclaimed wood can provide a stable base to drape the tarp over. Ensure the tarp is securely fastened with bungee cords or rope to withstand wind and rain.
For those looking to enhance their design, consider adding grommets and reinforced edges to increase durability. Advanced builders can experiment with different tarp angles to create natural drainage paths and improve ventilation. Use a combination of colors and textures to complement your garden aesthetics and create a cozy, inviting space. Remember, the key to a successful tarp roof is regular maintenance and ensuring tension is consistently applied to prevent sagging and water pooling.
Craft Bamboo Fences for Privacy
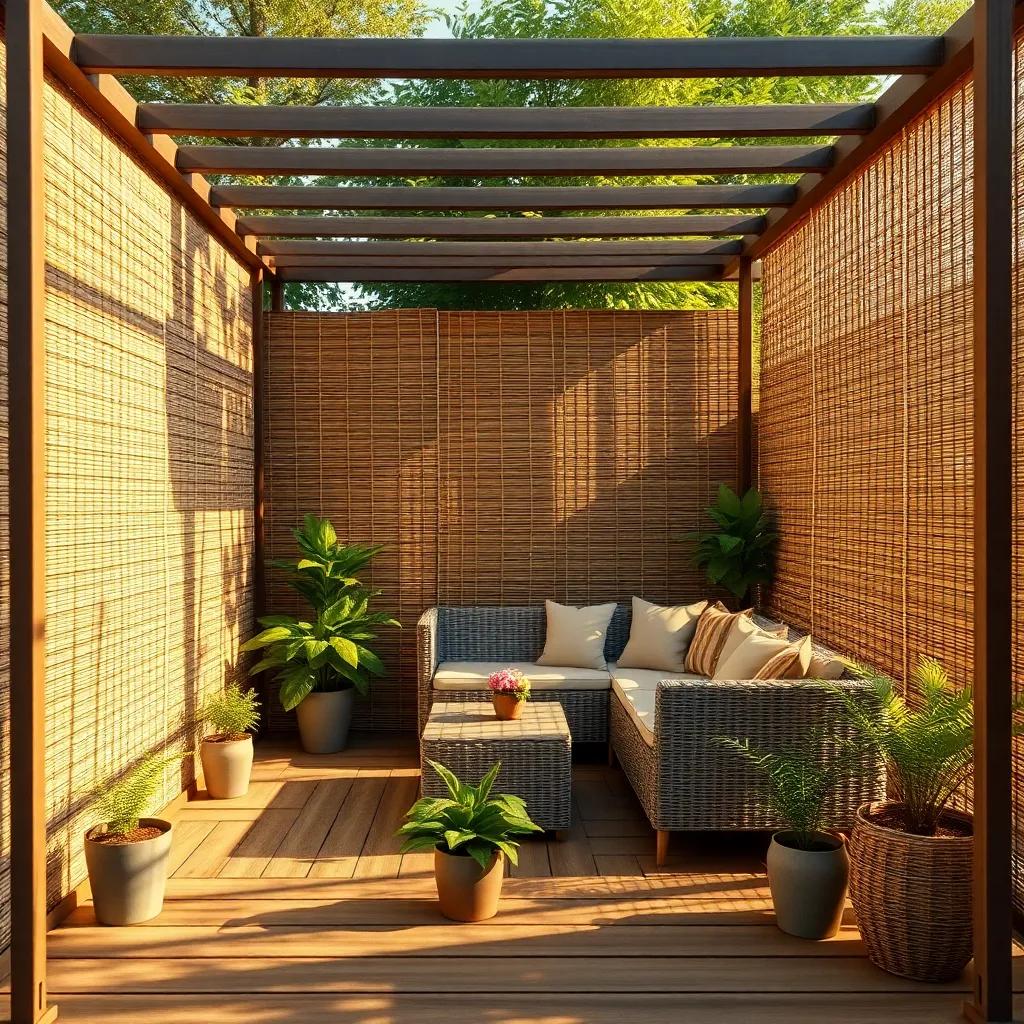
Crafting bamboo fences can transform your outdoor space into a serene retreat, offering both privacy and a touch of natural elegance. Start by gathering bamboo poles, which are both sustainable and durable, and cut them to your desired height—typically between 6 and 8 feet for optimal privacy. Secure the poles in place by using galvanized wire or zip ties, attaching them to horizontal support beams made from treated wood or metal, ensuring stability and longevity.
For a polished finish, consider weaving smaller bamboo pieces horizontally between the vertical poles, which not only reinforces the structure but also enhances its visual appeal. Seal your bamboo fence with a clear outdoor varnish to protect it from the elements, extending its lifespan. If you’re looking to add a unique touch, train climbing plants like jasmine or ivy along the fence for added greenery and fragrance. This project is manageable for beginners but allows room for creativity, making it a rewarding venture for more seasoned DIY enthusiasts.
Assemble PVC Pipe Frames Easily
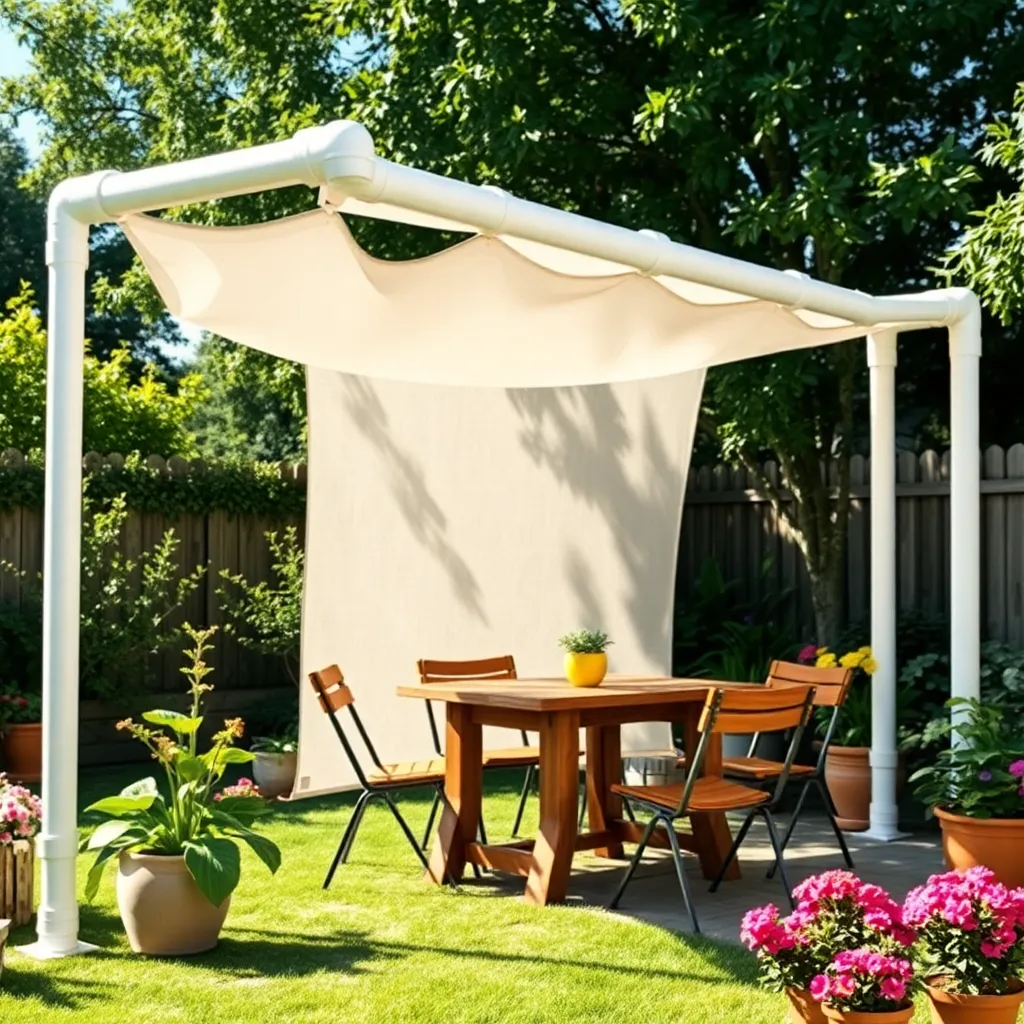
Creating a PVC pipe frame is a budget-friendly way to build a versatile outdoor shelter. Start with 1-inch diameter PVC pipes, which provide a sturdy yet lightweight structure. Use T- and elbow joints to connect the pipes, forming a simple rectangular frame. For a basic design, aim for a height of about 6 feet and a width of 8 feet. This dimension is ideal for covering a small seating area or garden workspace. Remember to secure the pipes with PVC cement for added stability.
To enhance durability and style, consider adding a UV-resistant tarp as a roof, securing it with bungee cords or zip ties. For those with more experience, integrate additional features like side panels or a roll-up curtain using extra PVC or fabric. This allows you to create a more enclosed space, offering protection from both sun and rain. With these straightforward tips, assembling a PVC pipe frame becomes an inviting weekend project that can transform your outdoor space.
Select Canvas Fabric for Durability
When selecting canvas fabric for your outdoor shelter, prioritize durability and weather resistance. Opt for a heavy-duty canvas, such as cotton duck or polyester canvas, which is both breathable and water-resistant. These materials are well-suited for enduring different weather conditions, making them ideal for long-term outdoor use. Beginners can start by choosing canvas treated with a waterproof coating to ensure that the fabric repels moisture effectively.
For those seeking advanced options, consider canvas with UV protection to shield against sun damage, extending the lifespan of your shelter. It’s also advisable to look for canvas that has been mildew-resistant treated, especially in humid climates. When measuring for your project, add at least 10% to your dimensions to account for potential shrinkage and seam allowances. This attention to detail will ensure a snug, tailored fit that withstands the elements and enhances your outdoor space.
Opt for Modular Tent Structures

When considering budget-friendly outdoor shelters, modular tent structures offer a versatile and cost-effective solution. These structures are composed of interlocking components that allow for easy assembly and disassembly, making them perfect for seasonal use or temporary events. For beginners, start with a basic kit featuring weather-resistant materials like polyester or polyethylene, ensuring durability against the elements. For more advanced users, explore options with customizable layouts and additional features like sidewalls or windows to enhance both functionality and aesthetics.
Opt for modular tents that include UV protection and waterproof coatings to ensure longevity and comfort in various climates. Consider the dimensions of your outdoor space to select an appropriate size; popular options range from compact 10×10 feet models to expansive 20×30 feet designs. For added stability, secure your structure with anchor kits, especially in windy areas. Advanced users might integrate modular tents with existing landscape features, such as patios or decks, to create seamless and inviting outdoor living spaces. By choosing modular tent structures, you can effortlessly adapt your shelter to suit your evolving needs and style preferences.
Build with Corrugated Metal Sheets
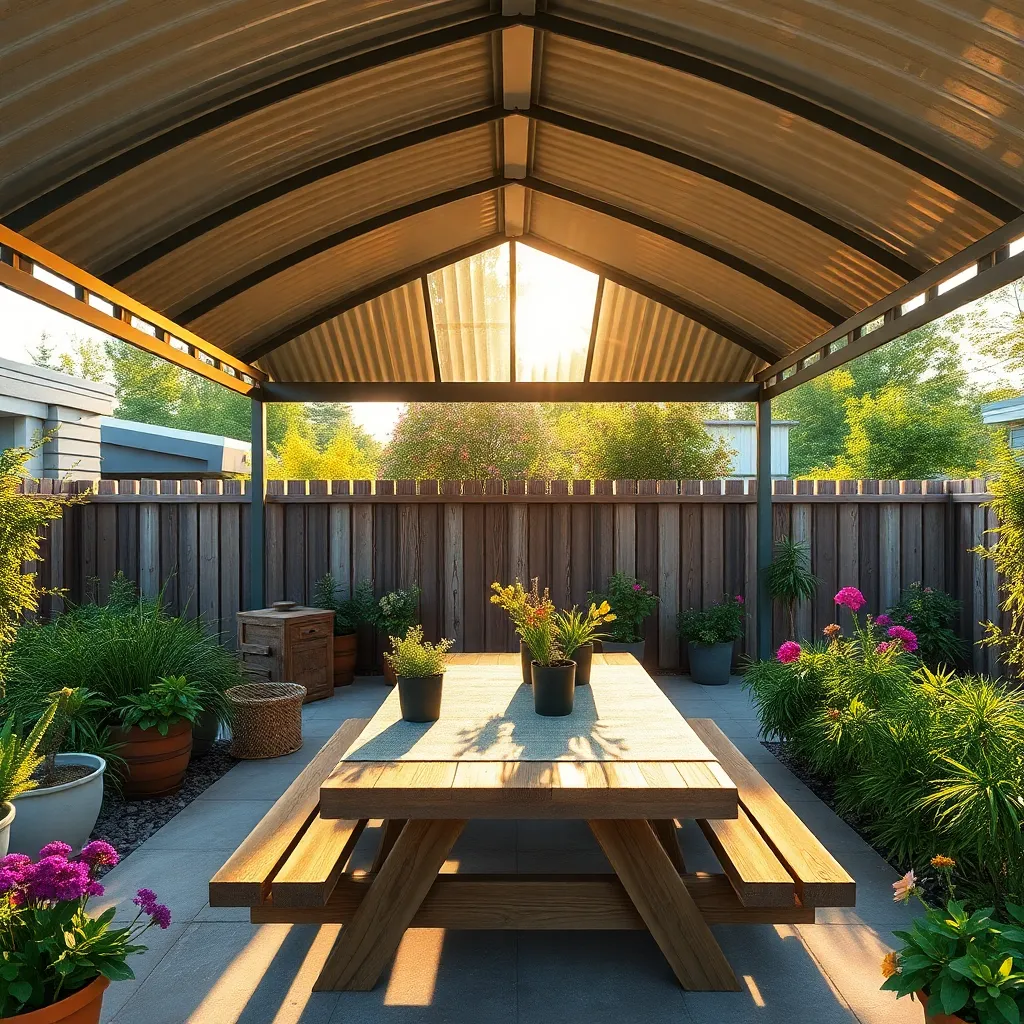
Corrugated metal sheets are an excellent choice for building a budget-friendly outdoor shelter due to their durability and ease of installation. To start, you’ll need to gather materials like corrugated metal panels, supporting beams (such as treated lumber or metal poles), and screws or nails. Ensure the panels are weather-resistant and consider a galvanized coating for added longevity. When constructing, measure the area for a proper fit and use a level to maintain straight lines, ensuring your structure is both sturdy and aesthetically pleasing.
For beginners, begin with a simple lean-to design, which requires fewer materials and is easier to construct. Secure one side of the metal sheets to a wall or existing structure, and slant the panels downward to aid in water runoff. Experienced builders might opt for a freestanding design, which involves creating a frame with cross beams for additional support. Consider adding gutters to direct rainwater away and painting the metal sheets with weatherproof paint to blend seamlessly with your garden’s landscape or home exterior. With these steps, you’ll have a functional and stylish shelter perfect for any outdoor space.
Employ Rope and Ties for Stability
Making your outdoor shelter stable is crucial, and employing rope and ties is an effective, budget-friendly technique. Start by using sturdy ropes, such as polypropylene or nylon, which are both durable and weather-resistant. Secure these ropes to the corners and sides of your shelter, anchoring them to nearby trees or stakes driven into the ground. This not only stabilizes your structure against wind but also ensures it stands firmly over time.
For added stability, consider using adjustable tensioners or ratchet straps, which allow you to tighten the ropes easily and adjust as needed. Ensure the ties are tight but not overly stressed, as this could weaken the rope or damage the shelter’s frame. Beginners can start with simple knots like the bowline or clove hitch, while more advanced builders might explore using tensioning systems for greater control. This straightforward approach maximizes your shelter’s resilience with minimal cost and effort.
Install Solar-Powered Lighting Fixtures
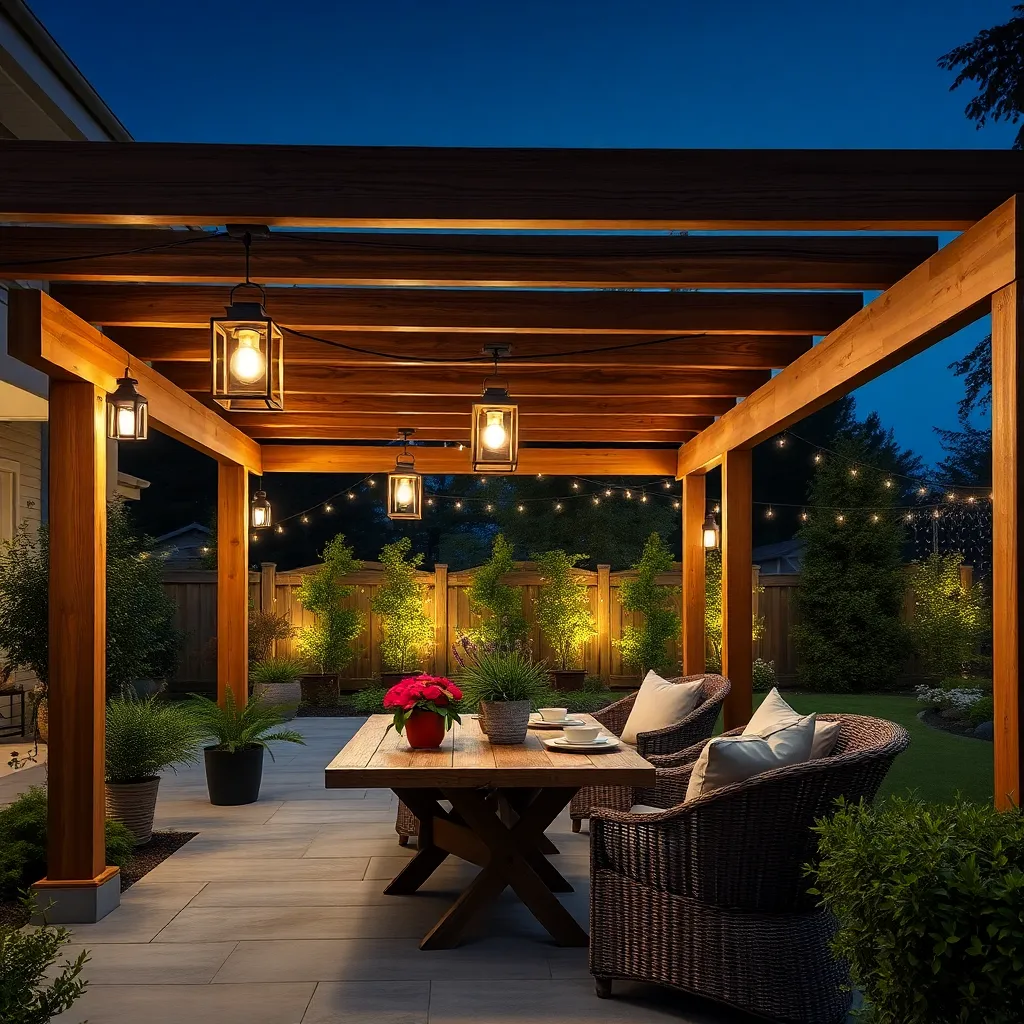
Enhancing your outdoor shelter with solar-powered lighting fixtures is both eco-friendly and cost-effective. Start by choosing fixtures that suit your design—options range from string lights for a cozy ambiance to solar lanterns for a rustic touch. Consider the location of your shelter and ensure it receives ample sunlight during the day to optimize the charging of solar panels. Install the lights securely by using hooks or clips, and ensure the solar panels are angled correctly to capture maximum sunlight throughout the day.
For a more advanced setup, consider integrating motion-sensor solar lights that turn on automatically when someone approaches. This not only adds convenience but also enhances security. When selecting fixtures, look for ones with adjustable brightness settings to tailor the lighting to your needs. For longevity, choose lights made from weather-resistant materials, such as stainless steel or durable plastic. Whether you’re creating a simple retreat or a more elaborate outdoor living space, solar-powered lights can transform your shelter into an inviting haven at night.
Repurpose Old Doors as Walls
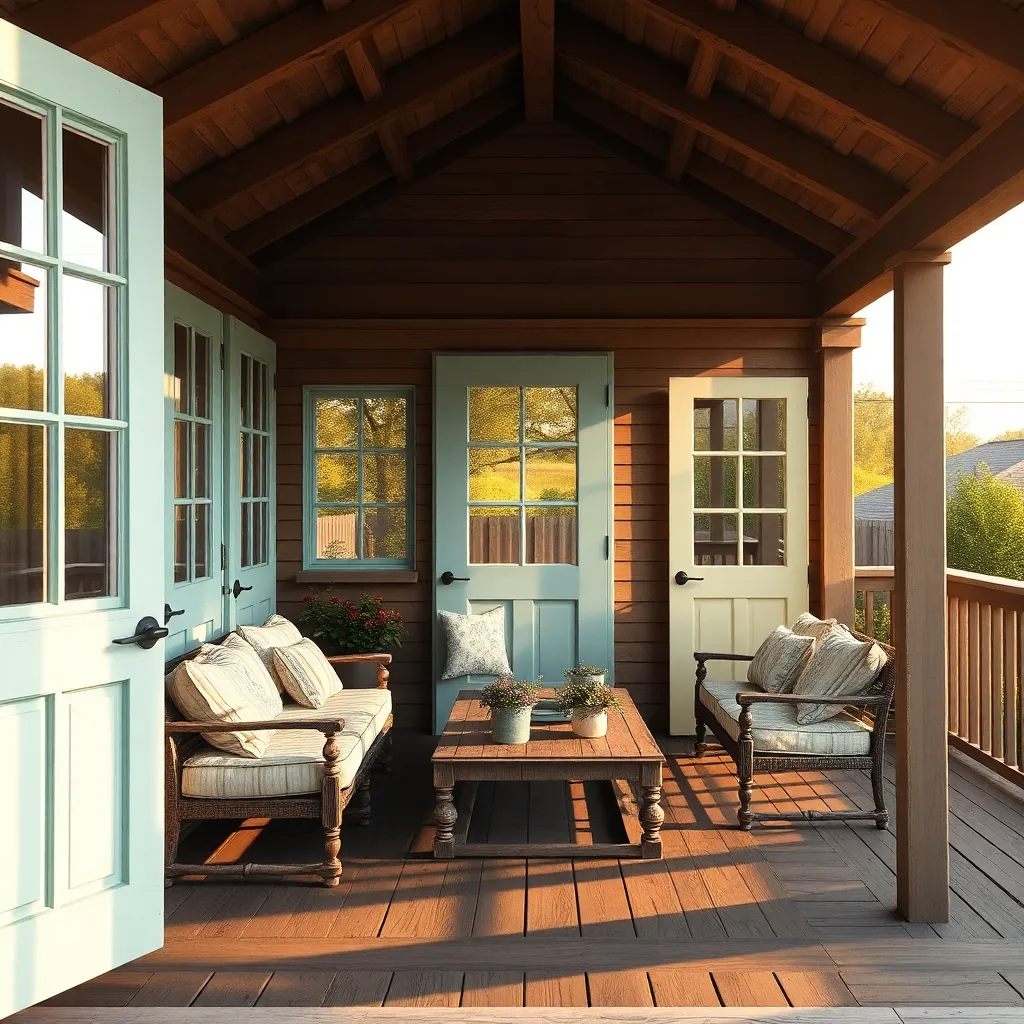
Repurposing old doors as walls for an outdoor shelter is a creative and budget-friendly way to add character and functionality to your space. Begin by sourcing sturdy, weather-resistant doors from salvage yards or second-hand shops. Choose doors of similar height for a cohesive look, and reinforce them with a clear outdoor sealant for added durability. Align the doors vertically and secure them between sturdy posts using metal brackets or hinges for a stable installation. This approach not only provides privacy but also offers a unique backdrop for your outdoor gatherings.
For a more polished appearance, consider painting or staining the doors to match your existing outdoor decor. Advanced DIYers might add shelving or hooks to the doors for additional functionality, such as hanging garden tools or decorative elements. Ensure the base of the doors is slightly elevated from the ground to prevent moisture damage—use concrete blocks or treated wood as a foundation. This versatile project can be adapted to different sizes and styles, making it a fantastic option for both small patios and expansive gardens.
Use Hanging Plants for Aesthetic Appeal
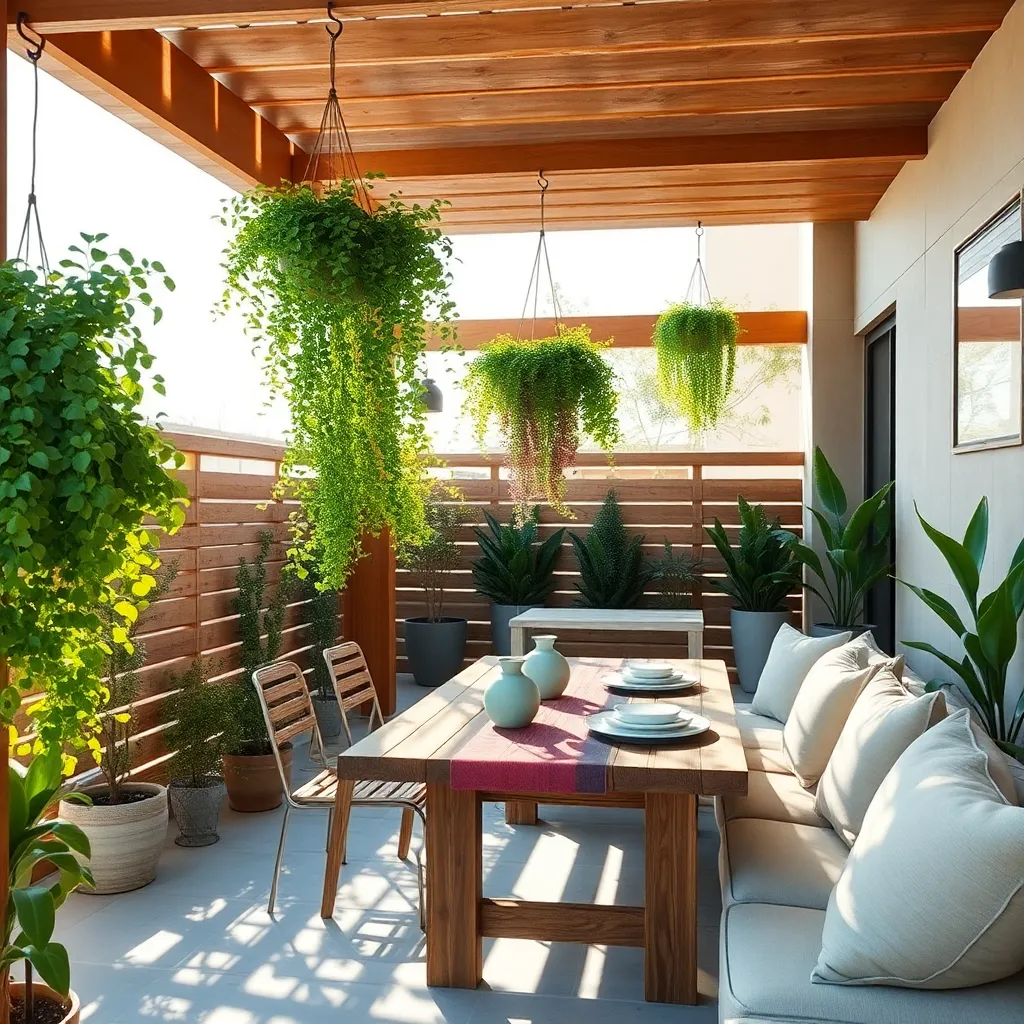
Adding hanging plants to your outdoor shelter is a simple and cost-effective way to enhance its visual appeal. Opt for durable materials like coconut coir or recycled plastic pots that can withstand various weather conditions. Beginners might start with easy-to-care-for plants such as ferns or petunias, which thrive in hanging baskets. For a professional touch, use a mix of plant sizes and colors to create depth and interest. Consider installing sturdy hooks or brackets on the shelter’s beams, spacing them about 12 to 18 inches apart to allow adequate room for each plant to grow.
For those looking to elevate their design, try incorporating cascading plants like trailing ivy or sweet potato vines, which add a lush, layered effect to your space. Advanced gardeners can experiment with vertical gardens using stacked or tiered hanging systems, maximizing plant variety in limited spaces. Use lightweight, breathable fabrics like burlap to line baskets, aiding in moisture retention while allowing excess water to drain. Whether you’re aiming for a tranquil retreat or a vibrant gathering spot, strategically placed hanging plants can transform your shelter into a welcoming oasis.
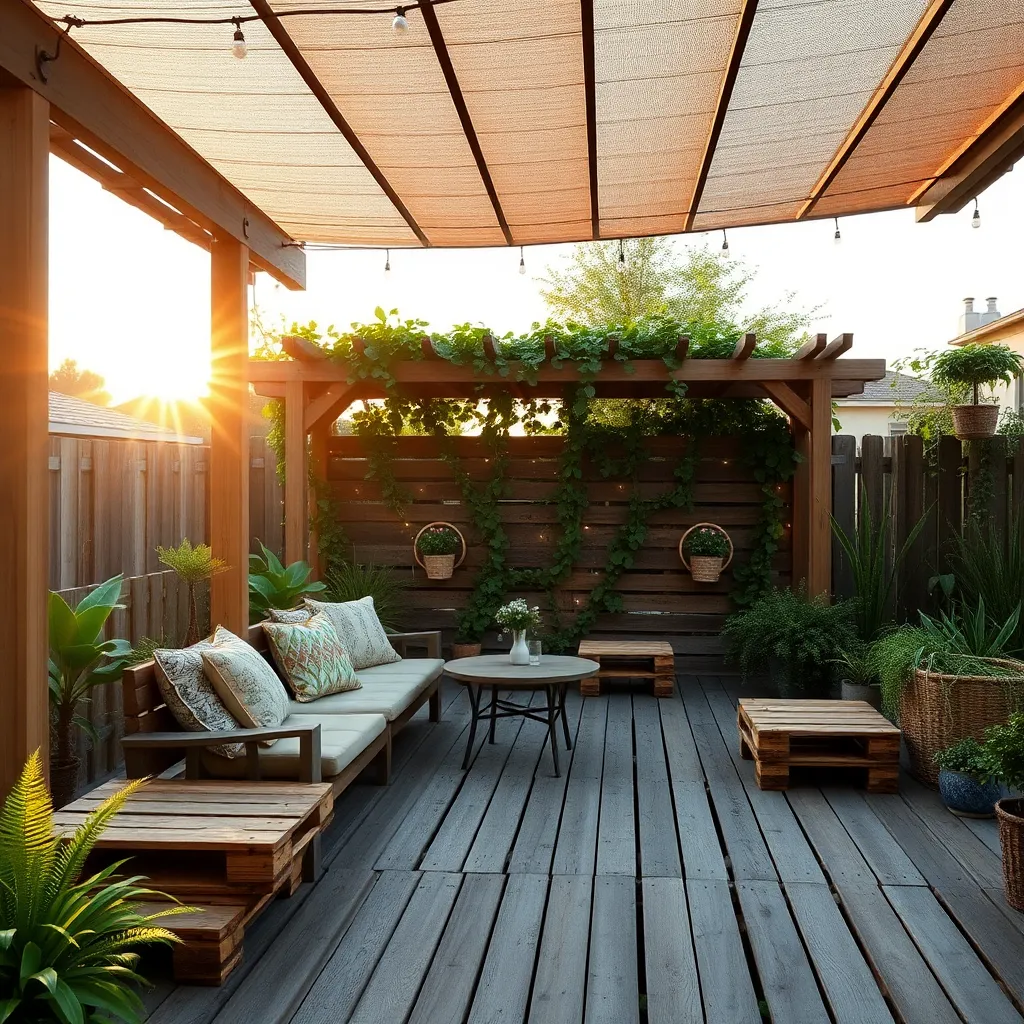
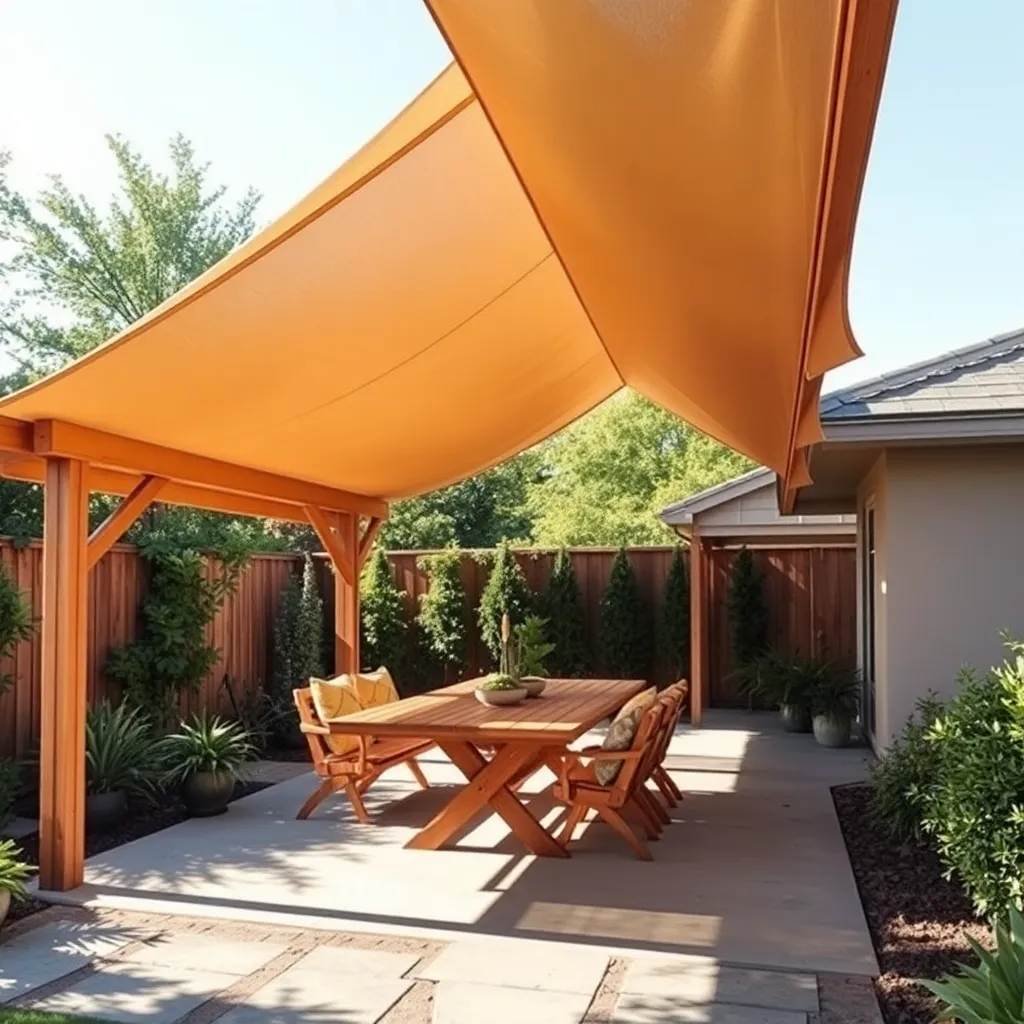
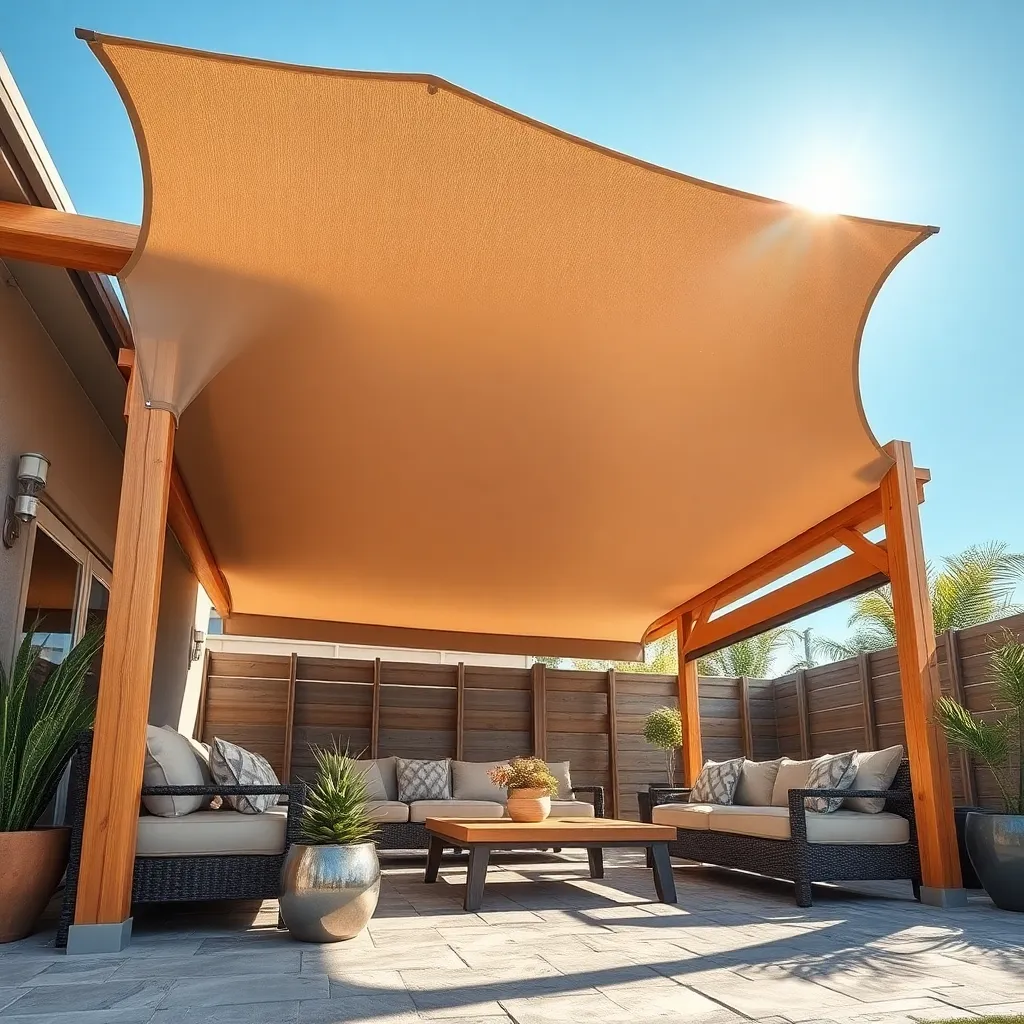
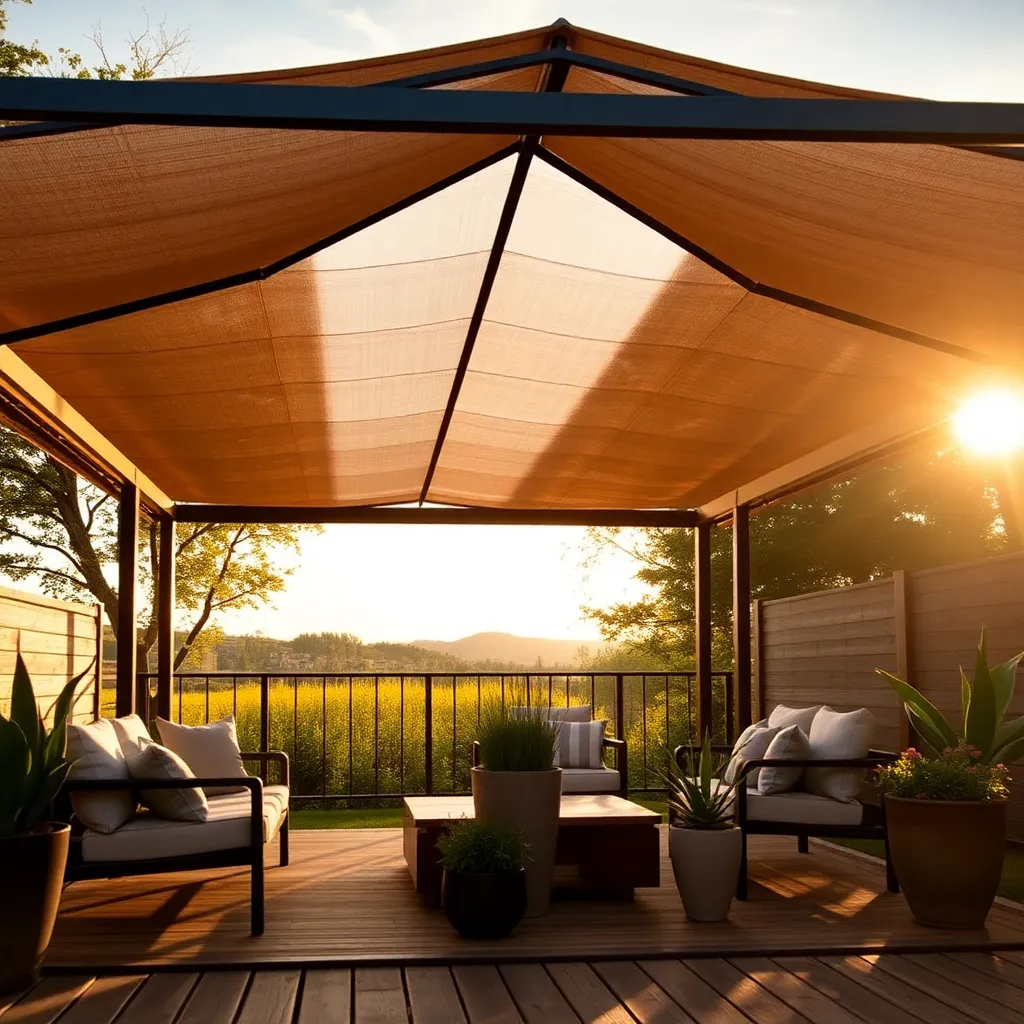
Create Shade with Sail Canopies
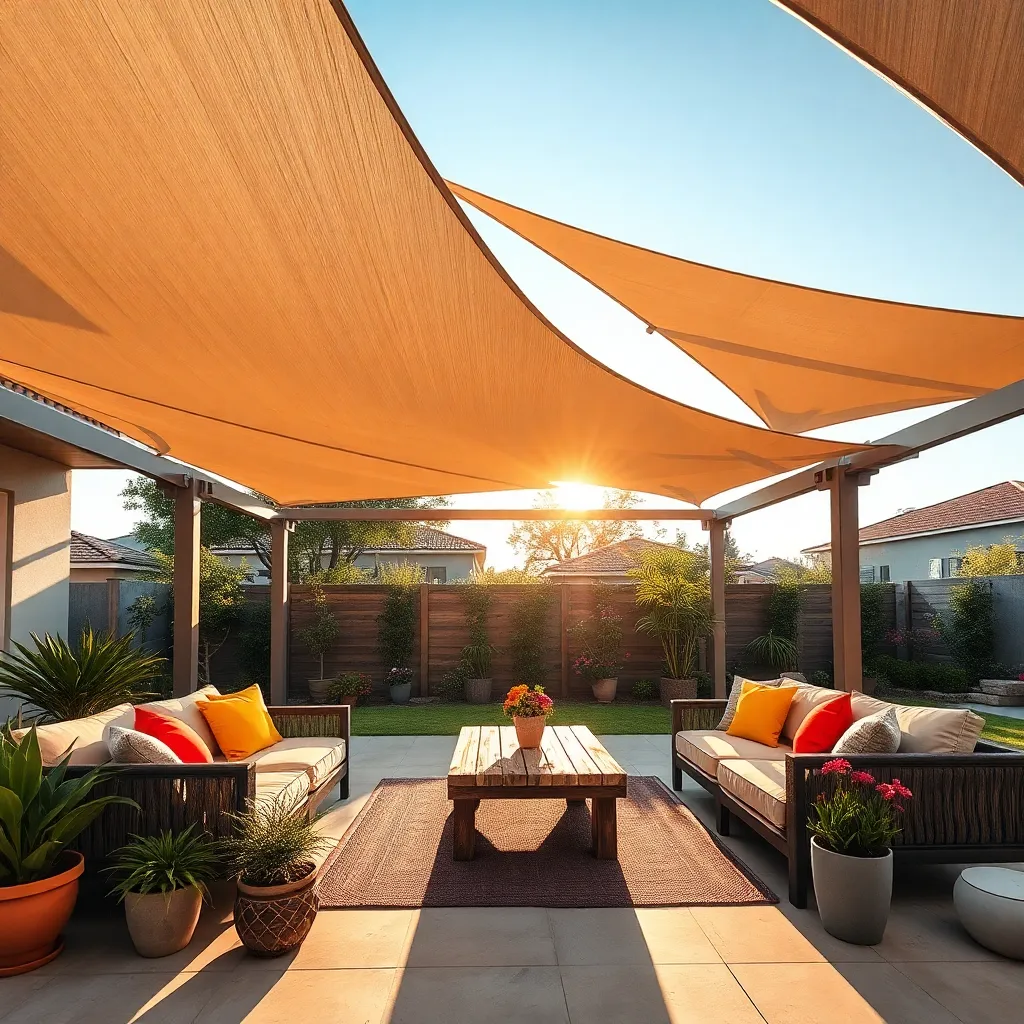
Transform your outdoor space into a cool haven by installing sail canopies, a budget-friendly and stylish solution for creating shade. These versatile canopies are available in various shapes, such as triangles or rectangles, allowing you to tailor the design to fit your specific area. For beginners, opt for durable, UV-resistant fabric like high-density polyethylene (HDPE) to withstand weather conditions and provide lasting protection. Secure the sail using robust hardware kits, which typically include turnbuckles and snap hooks, ensuring a taut and stable installation.
For those looking to add a touch of sophistication, consider layering multiple sails at different angles or heights for a dynamic visual effect and enhanced shade coverage. Ensure each sail is installed with a slight slope to facilitate water runoff during rain, preventing sagging and damage. When measuring, leave a gap of at least 1 foot between the sail’s edge and the anchor point to allow for tension adjustments. With these straightforward steps, you can create a cozy, shaded area perfect for relaxation or entertaining, making your outdoor project both practical and inviting.
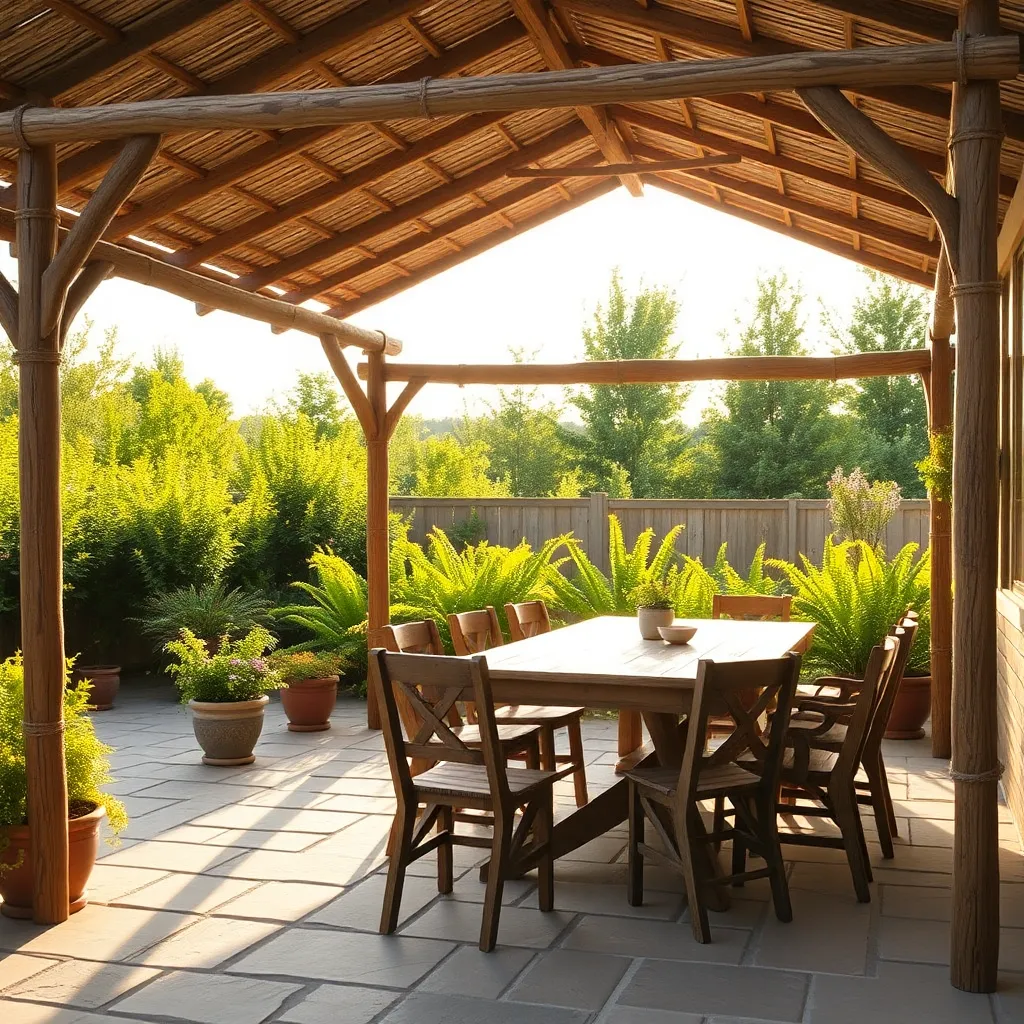
Erect Simple A-Frame Shelters
Building a simple A-frame shelter is a cost-effective way to create a sturdy, weather-resistant outdoor space. Start with two robust, treated wooden beams to form the A-frame’s apex, and use a cross beam at the base for added stability. For the covering, consider using corrugated metal sheets or durable tarp for easy maintenance and longevity. This design not only offers protection from the elements but also provides a rustic charm that complements any backyard.
For beginners, a basic structure with a height of around 6-8 feet and a span of 8 feet works well, while more experienced builders might explore extending the dimensions for larger gatherings. Ensure the ground is level before construction to avoid instability. Advanced builders can enhance the shelter with features like built-in seating or a raised platform for added functionality. By following these guidelines, you’ll have a practical and attractive A-frame shelter that enhances your outdoor living area.
Construct with Lightweight Aluminum Poles
For a budget-friendly and durable outdoor shelter, consider using lightweight aluminum poles. This material is not only affordable but also highly resistant to rust and corrosion, making it perfect for various climates. Begin by selecting poles that are at least 1.5 inches in diameter for stability. To construct a simple yet effective shelter, use a basic design like a lean-to, which requires minimal materials. Lay out your poles in a triangular fashion, ensuring the structure is anchored securely to withstand wind and rain.
Incorporate design elements such as a polyester or canvas tarp for the roof, which will provide excellent protection from the elements. Beginners can start with a basic setup by using bungee cords or zip ties to attach the tarp to the poles, ensuring a snug fit. For a more advanced touch, consider adding adjustable pole connectors to vary the height and angle of your shelter. This flexibility not only enhances functionality but also allows for easy adjustments based on weather conditions or personal preference.
Conclusion: Creating Beautiful Outdoor Spaces
In wrapping up our journey through the ’15 Budget-Friendly Shelter Ideas for Your Next Project,’ we’ve explored innovative and cost-effective ways to create nurturing spaces that bolster relationships. From utilizing shared spaces creatively and engaging in DIY projects, to embracing nature’s tranquility and prioritizing shared experiences over material possessions, each idea underscores the importance of thoughtful, intentional environments in fostering deeper connections. These concepts remind us that the heart of a home isn’t in its grandeur but in the warmth and love it shelters.
As a first step, consider selecting one idea that resonates with you and discuss with your partner or loved ones how you might incorporate it into your own life. This small action can pave the way for more meaningful interactions and a more connected environment.
To ensure these insights are always at your fingertips, don’t forget to bookmark or save this article. It can serve as a handy reference whenever you need a burst of inspiration or a gentle reminder of what’s truly important.
Remember, the journey to relationship success is continuous and ever-evolving. By investing in the spaces we share, we lay the foundation for enduring bonds and a future filled with love and understanding.