
Imagine stepping into your backyard and being greeted by a stunning pergola that not only adds elegance but also provides a practical retreat from the sun. Whether you’re a seasoned DIY enthusiast or just starting your outdoor transformation journey, our guide, “15 Pergola Setup Ideas for Your Next Project,” is designed to inspire and empower you. The joy of creating a beautiful, functional outdoor space is within your reach, and this curated list will help you navigate the possibilities effortlessly.
From enhancing your garden’s aesthetic to creating a cozy nook for family gatherings, these pergola ideas offer something for everyone. Each setup is crafted with both style and practicality in mind, ensuring you can enjoy the benefits of your outdoor oasis for years to come. With clear guidance and creative ideas, you’ll feel confident and excited to embark on your next outdoor adventure, transforming your space into a personal paradise.
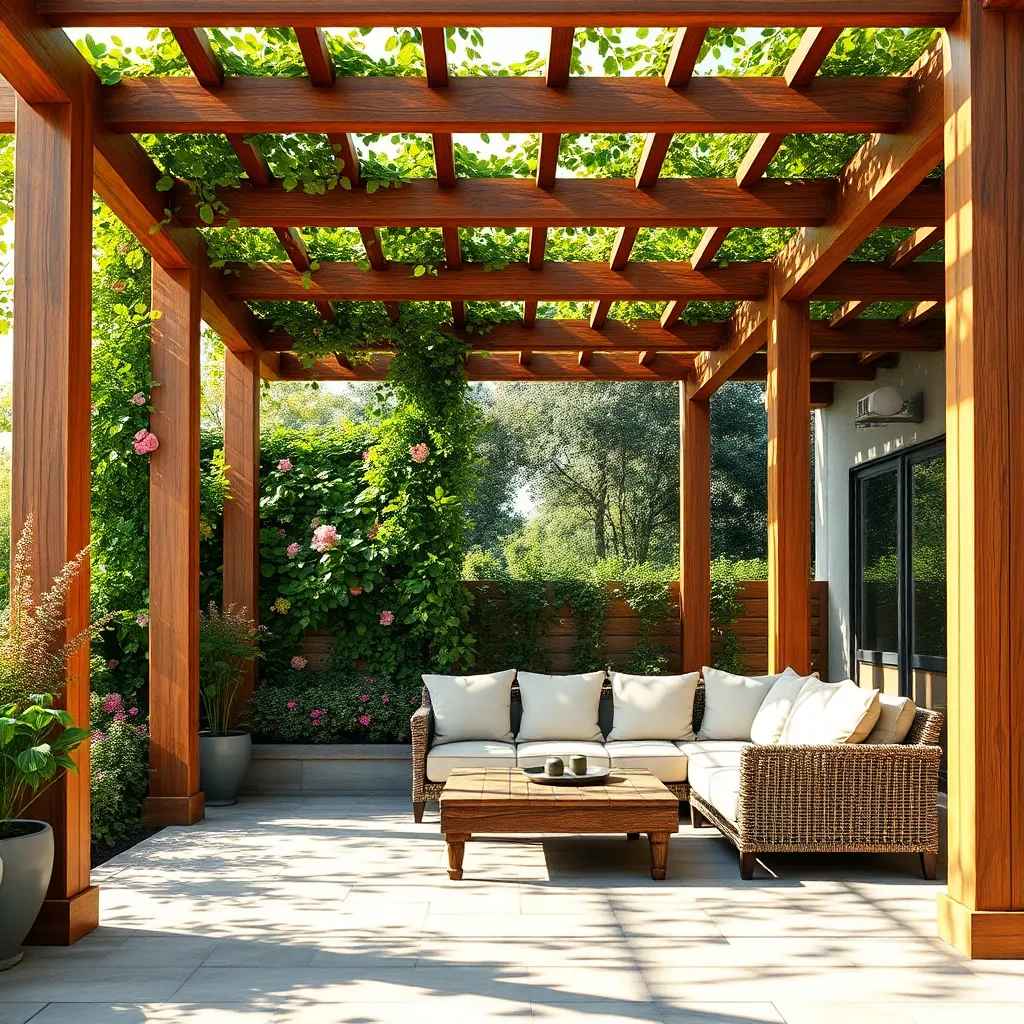
Incorporate Climbing Plants for Shade
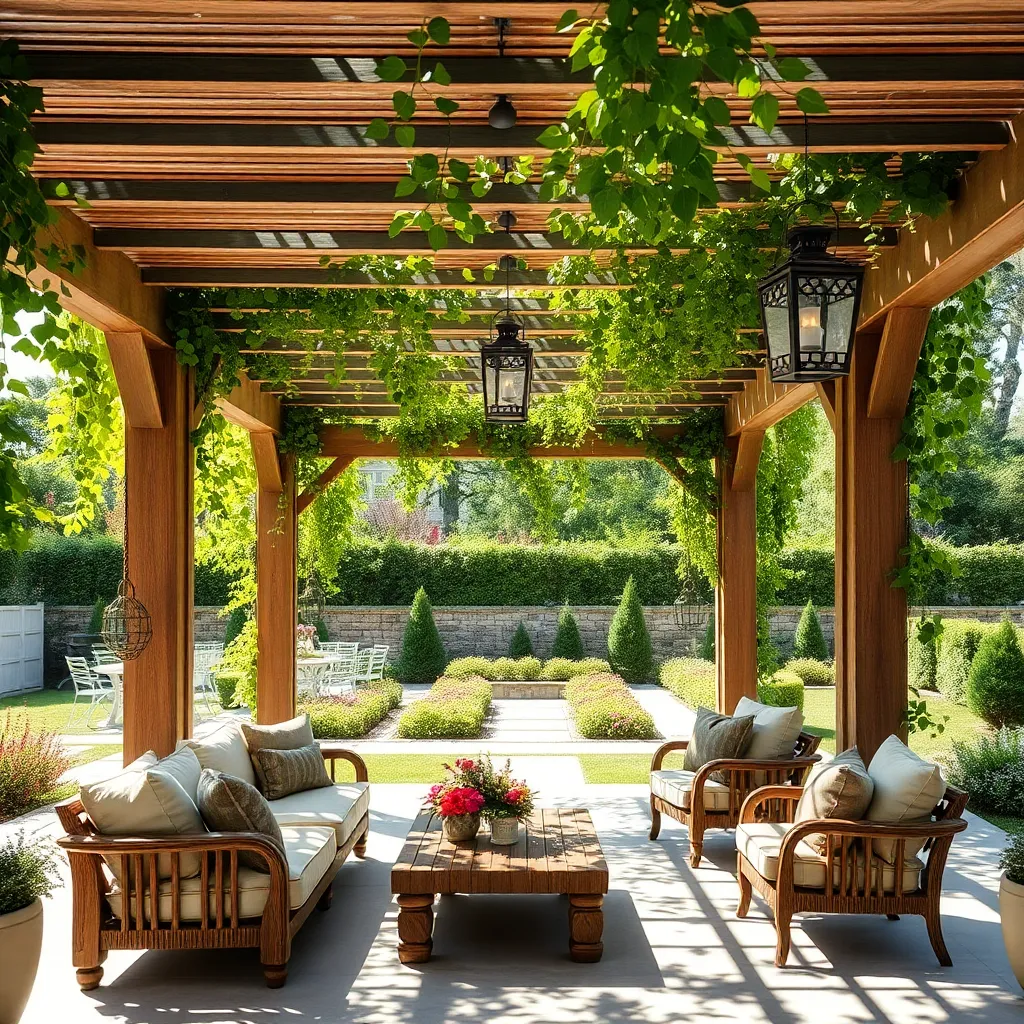
To create a shaded retreat under your pergola, consider incorporating climbing plants that can provide both beauty and functionality. Choose fast-growing vines like Wisteria, Clematis, or Honeysuckle, which not only offer lush coverage but also delightful blooms. Ensure your pergola is sturdy enough to support the weight of mature plants by using materials like cedar or treated wood, which are both durable and weather-resistant. Install a trellis or wire system to guide the plants as they grow, ensuring they cover the structure evenly.
For beginners, start by planting the vines in large pots or directly in the ground at the base of the pergola posts, ensuring they receive ample sunlight and water. More advanced gardeners can experiment with intertwining different species for varied colors and textures, keeping in mind that some plants like Wisteria may need regular pruning to prevent them from becoming overly dense. Spacing is crucial; plant vines about 12 to 18 inches apart to allow room for growth. This thoughtful integration of climbing plants will transform your pergola into a natural canopy, offering shade and an inviting ambiance.
Select Weather-Resistant Materials
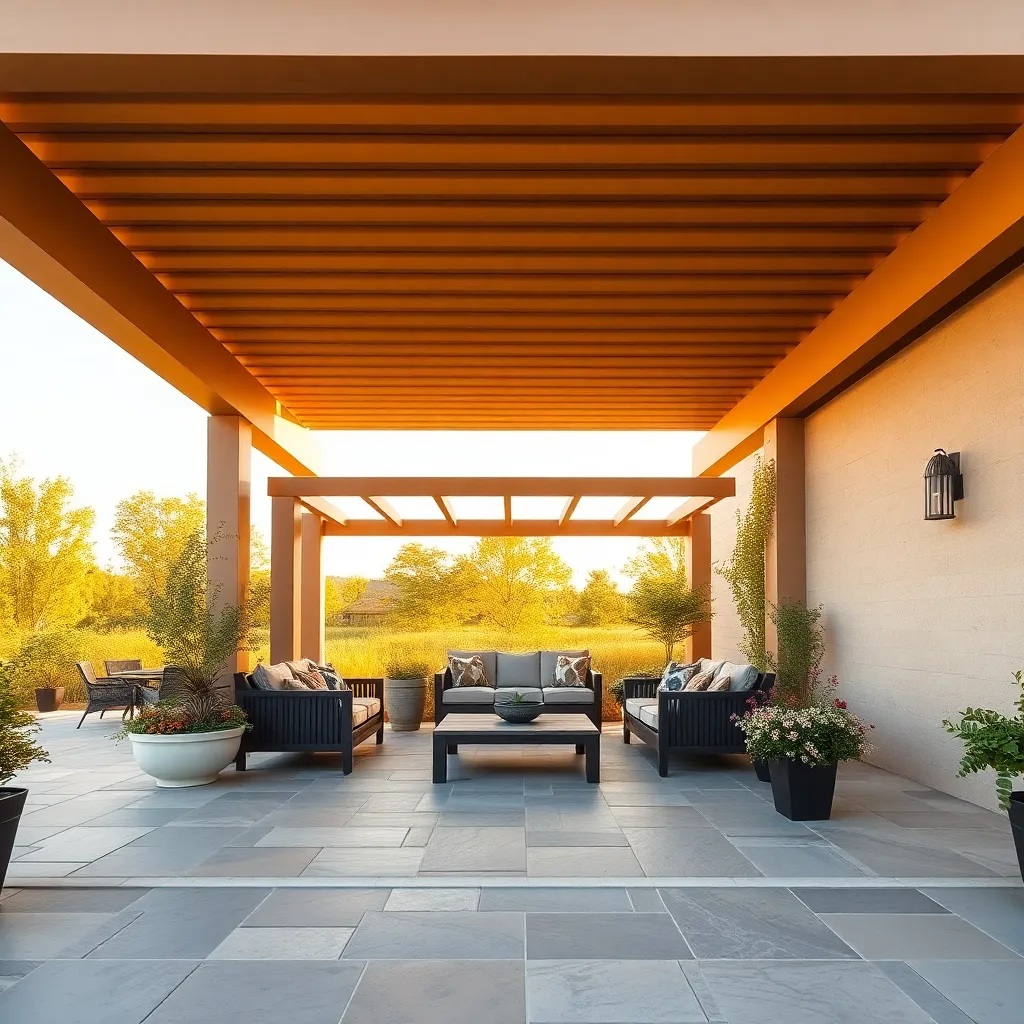
When setting up a pergola, choosing weather-resistant materials is crucial for longevity and minimal maintenance. Opt for materials like cedar, teak, or redwood, which are naturally resistant to rot and pests. For a more modern look, consider using weather-resistant aluminum or powder-coated steel, which not only withstand the elements but also offer a sleek appearance.
Beyond basic material selection, it’s wise to apply protective sealants or finishes to enhance durability. Sealants can prolong the life of wood by preventing moisture absorption and UV damage. For those seeking advanced durability, consider composite materials that combine wood fibers with plastic, offering the beauty of wood with enhanced resilience. Whichever material you choose, ensure it fits your climate and aesthetic preferences, creating a pergola that withstands time and weather beautifully.
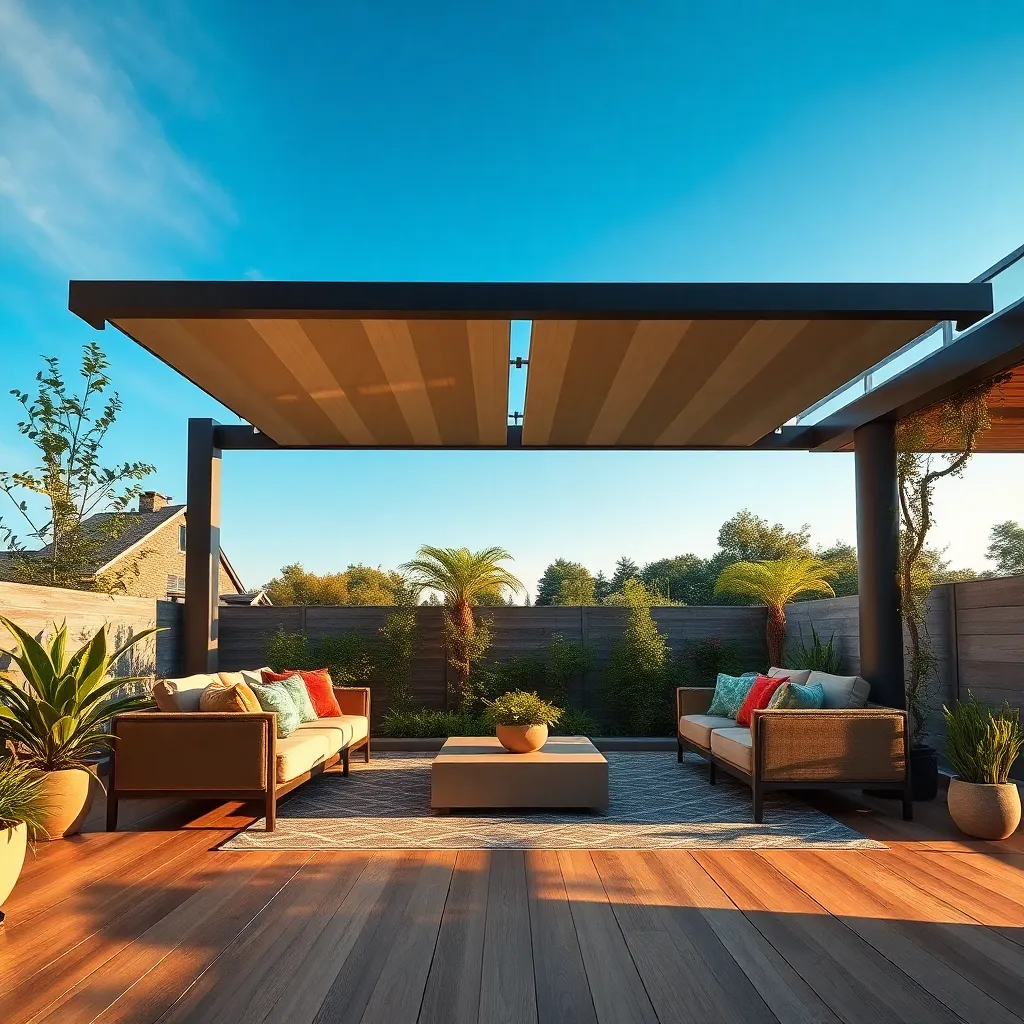
Install Retractable Canopy Systems
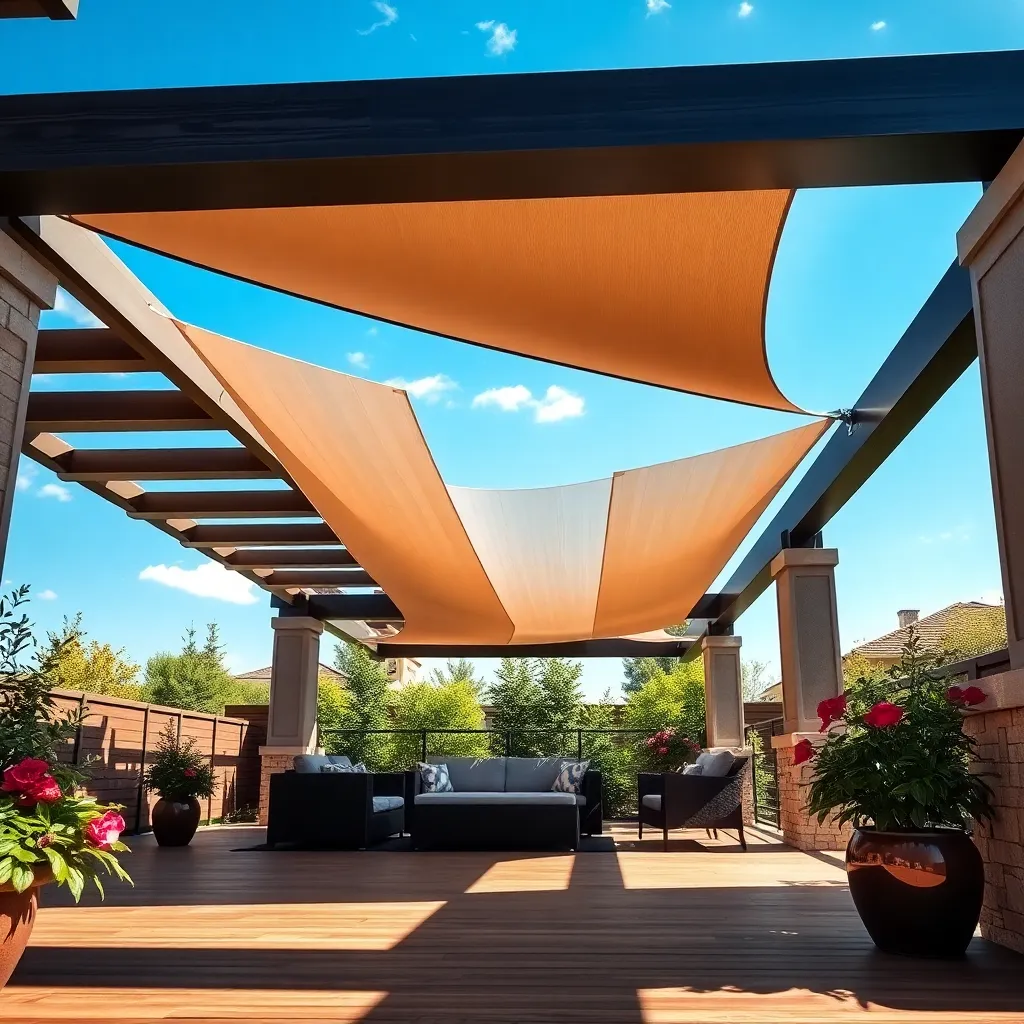
To enhance the functionality of your pergola, consider installing a retractable canopy system. These canopies provide flexible shade and protection from the elements, allowing you to enjoy your outdoor space in varying weather conditions. Look for systems made of durable, weather-resistant fabrics like acrylic or polyester, which offer UV protection and are easy to clean. Beginners can opt for a simple, manual retractable system, while more advanced DIY enthusiasts might explore motorized options for added convenience.
Incorporating a retractable canopy into your pergola design can also add a touch of modernity and elegance. Ensure the canopy system is compatible with your pergola’s dimensions and structure; custom-sizing options are often available to fit unique setups. For a seamless look, match the canopy color with your existing outdoor decor. Advanced users can explore integrating lighting or side curtains for enhanced ambiance and privacy. With the right canopy system, your pergola becomes a versatile retreat that adapts to your needs.
Utilize Modular Pergola Kits
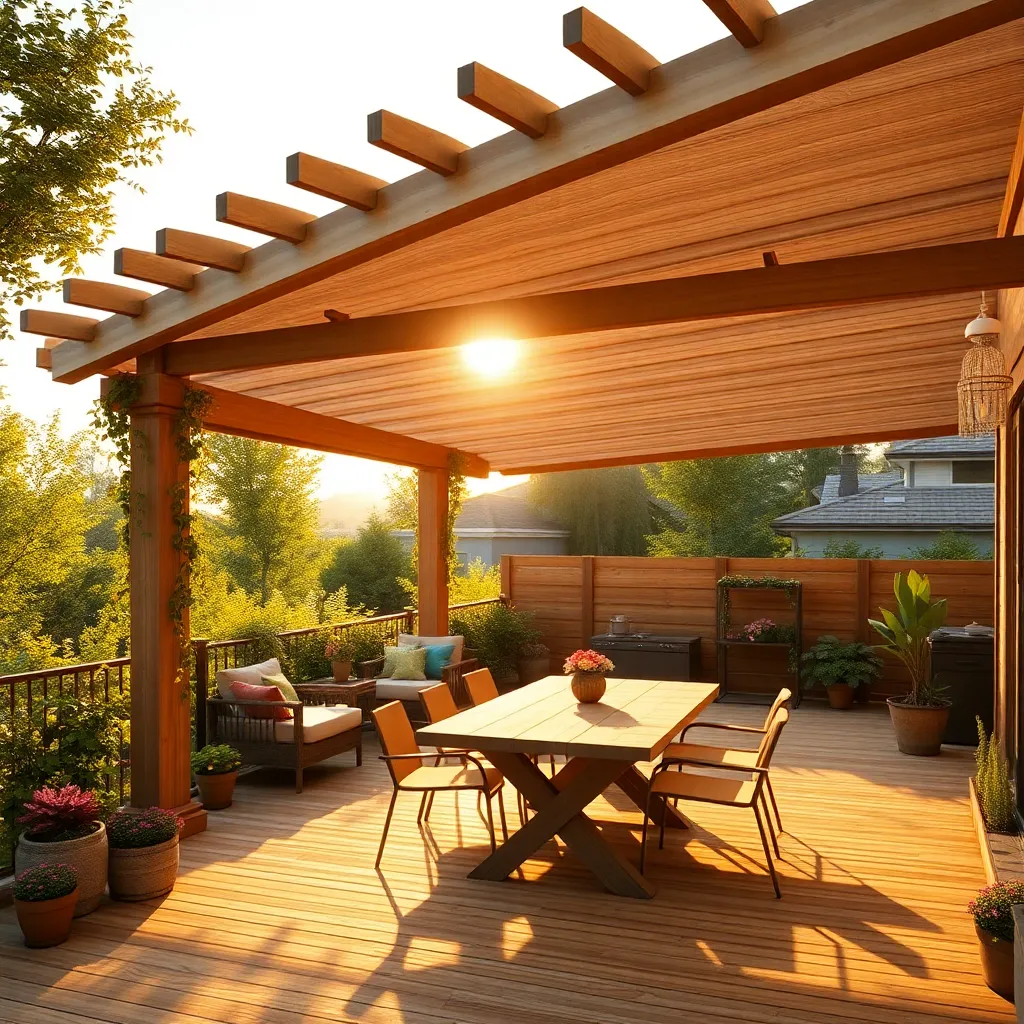
Modular pergola kits offer an accessible and customizable solution for homeowners looking to enhance their outdoor spaces. These kits often come with pre-cut materials and step-by-step instructions, making them ideal for beginners. Most kits are made from durable materials like aluminum or weather-treated wood, ensuring longevity and minimal maintenance. For a straightforward setup, consider a pergola with adjustable dimensions, such as 10×10 feet, which suits most patios or garden areas.
For those seeking a more personalized touch, modular kits can be customized with additional design elements. Incorporate lattice panels for added privacy or to support climbing plants like clematis or wisteria. Advanced users might opt to integrate built-in lighting or attach a retractable canopy for weather versatility. Remember to secure your pergola with concrete footings for stability, especially in windy regions. This approach ensures your pergola not only looks great but also stands up to the elements.
Add Ambient String Lighting

Transform your pergola into an inviting outdoor retreat by adding ambient string lighting. For a basic setup, choose weather-resistant LED string lights, ensuring they are rated for outdoor use to withstand the elements. Wrap the lights around the beams or drape them loosely for a relaxed, charming effect. Beginners can opt for solar-powered string lights to eliminate the need for electrical outlets, making installation a breeze.
For a more advanced design, consider incorporating dimmable string lights that allow you to adjust the brightness according to the occasion. Look for strands with shatterproof bulbs to enhance durability, especially if you live in a region prone to high winds or storms. To achieve a professional look, use a staple gun or hooks specifically designed for lighting installation, ensuring the lights are evenly spaced and securely fastened. With the right lighting, your pergola will become the perfect spot for evening gatherings.
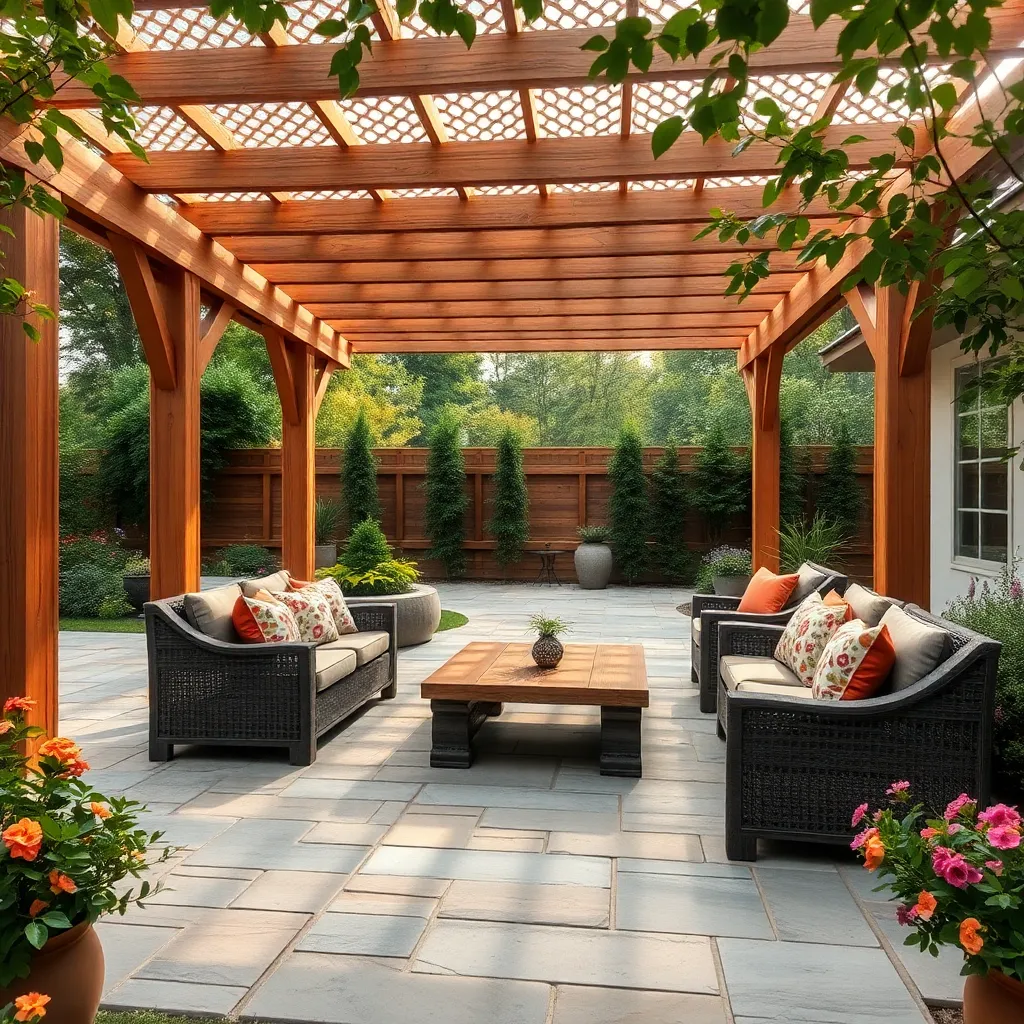
Create a Built-In Seating Area

For a truly integrated outdoor space, consider building a seating area directly into your pergola design. This approach not only maximizes space but also creates a cohesive look that blends seamlessly with your garden. Use durable materials like weather-resistant wood, such as teak or cedar, which stand up well to the elements. Incorporate built-in storage underneath the seats to keep cushions and outdoor essentials dry and organized. Custom cushions in weatherproof fabrics can add comfort and style, ensuring the space is both functional and inviting.
To elevate your built-in seating design, consider adding elements like a corner sectional layout or a curved bench. These designs can enhance the flow and usability of the space. For a more advanced touch, install LED strip lighting beneath the seating for a warm glow during evening gatherings. Ensure the seating height is comfortable, typically around 18 inches, and the depth is about 20 inches for optimal relaxation. By combining aesthetics with functionality, your built-in seating will become a cherished focal point in your pergola setup.
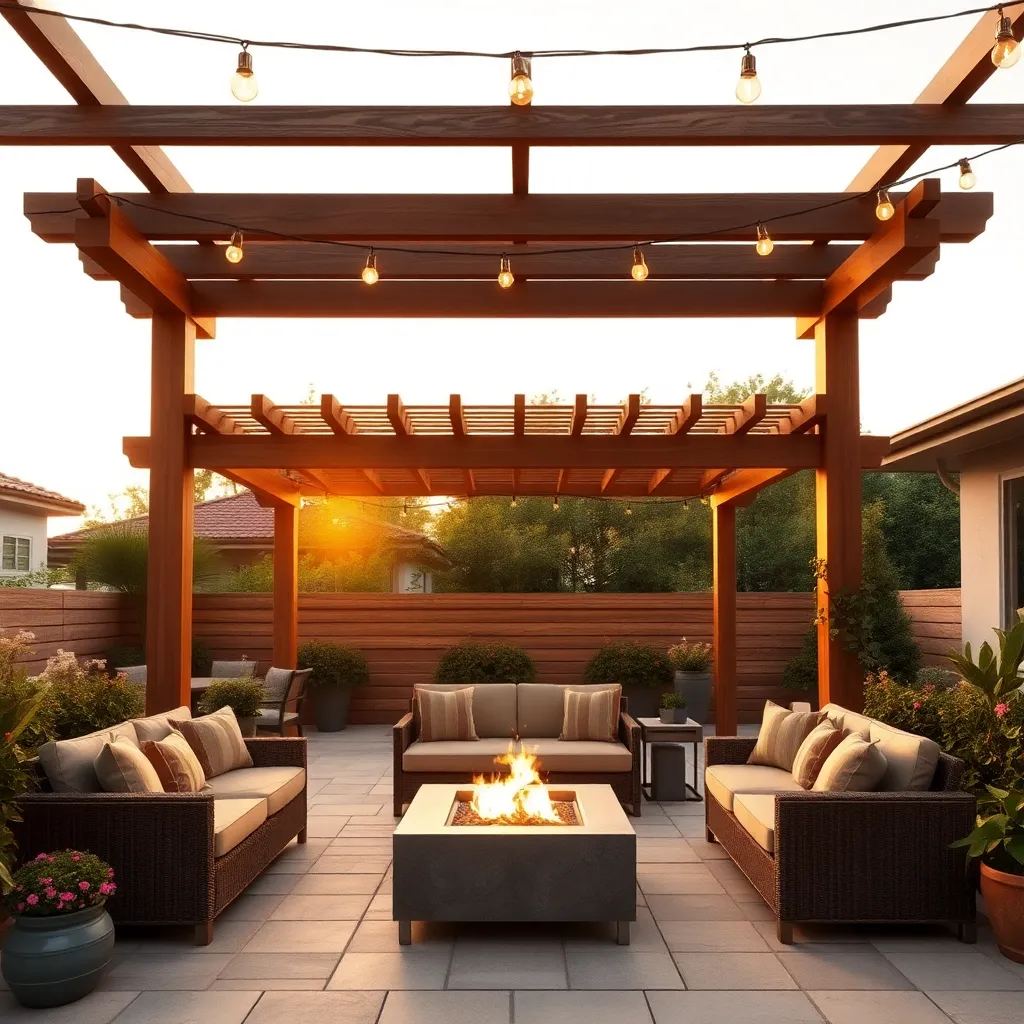
Integrate a Fire Pit Feature
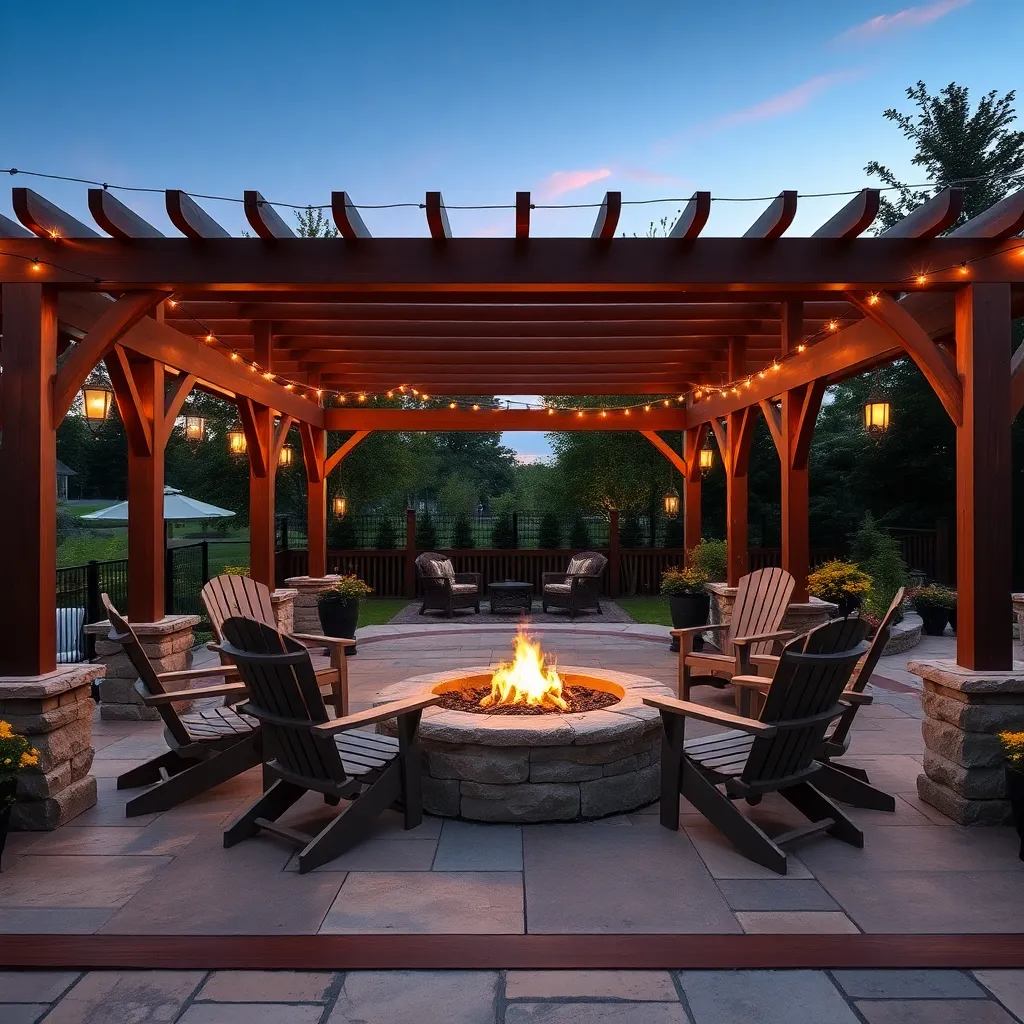
Enhancing your pergola with a fire pit feature can transform your outdoor space into a cozy retreat. For beginners, consider a portable fire pit that offers flexibility and ease of use. They come in various materials, such as steel or cast iron, and require minimal installation. Ensure the fire pit is placed on a non-flammable surface such as stone pavers or a gravel base to prevent any fire hazards.
For a more permanent setup, experienced DIY enthusiasts might opt for a built-in fire pit using materials like brick or natural stone to blend seamlessly with the pergola’s design. When planning your layout, maintain a safe distance from pergola posts and ensure adequate ventilation. Incorporate a seating area around the fire pit with heat-resistant materials like teak or metal to maximize comfort and usability during cooler nights.
Enhance Privacy with Bamboo Screens
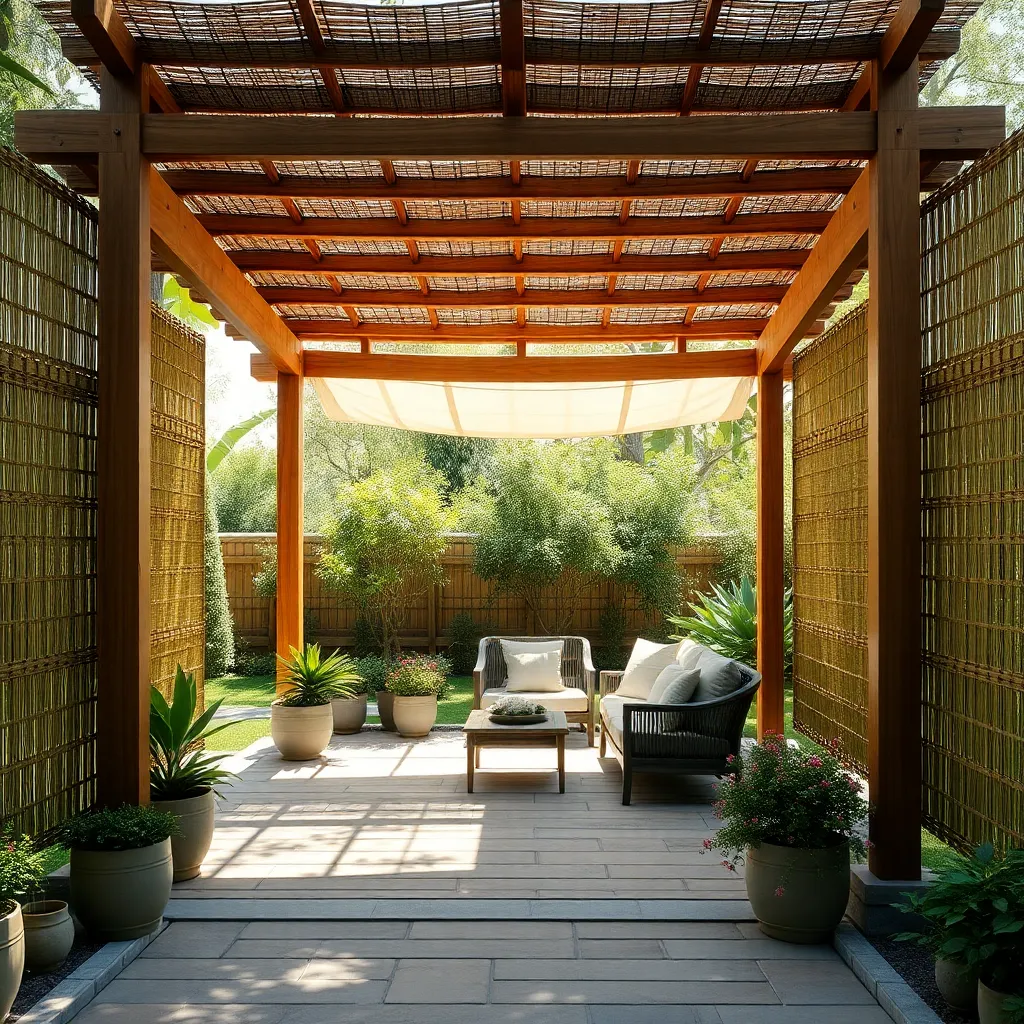
Bamboo screens are an excellent way to enhance privacy while adding a natural element to your pergola. To create an effective bamboo screen, choose well-dried bamboo poles, typically around 1-2 inches in diameter, which can be easily cut to your desired height. For beginners, attaching the bamboo to a simple wooden frame with sturdy zip ties or wire offers a straightforward installation method. Ensure the poles are packed tightly for maximum privacy and a polished look.
For those seeking an advanced approach, consider integrating a sliding or folding bamboo screen design to add versatility to your space. This method allows you to adjust the screen’s position based on the sun’s angle or wind direction, optimizing comfort. To achieve this, install sliding tracks or hinges using corrosion-resistant hardware to withstand outdoor conditions. With a bit of creativity and these practical steps, your pergola will become a serene oasis, shielded from prying eyes and the elements.
Install Adjustable Louvered Roofs
Installing adjustable louvered roofs can transform your pergola into a versatile outdoor space, offering both shade and sunlight with the simple adjustment of the louvers. Consider materials like aluminum or high-quality wood for durability and aesthetic appeal. Aluminum is lightweight and resistant to rust, making it perfect for any climate, while wood offers a natural look that blends beautifully with garden landscapes. For beginners, starting with a kit that includes pre-cut materials and a detailed instruction manual can simplify the process.
Advanced DIYers might explore motorized options, which allow you to control the louvers with a remote or smartphone app for convenience. Ensure the structure is sturdy by using strong posts with a recommended dimension of at least 4×4 inches and anchoring them securely in the ground. When designing your louvered roof, keep in mind the angle of the sun throughout the day to maximize the benefits of adjustable shading. This addition not only enhances comfort and usability but also adds a contemporary touch to your outdoor area.
Design with Water Features Nearby
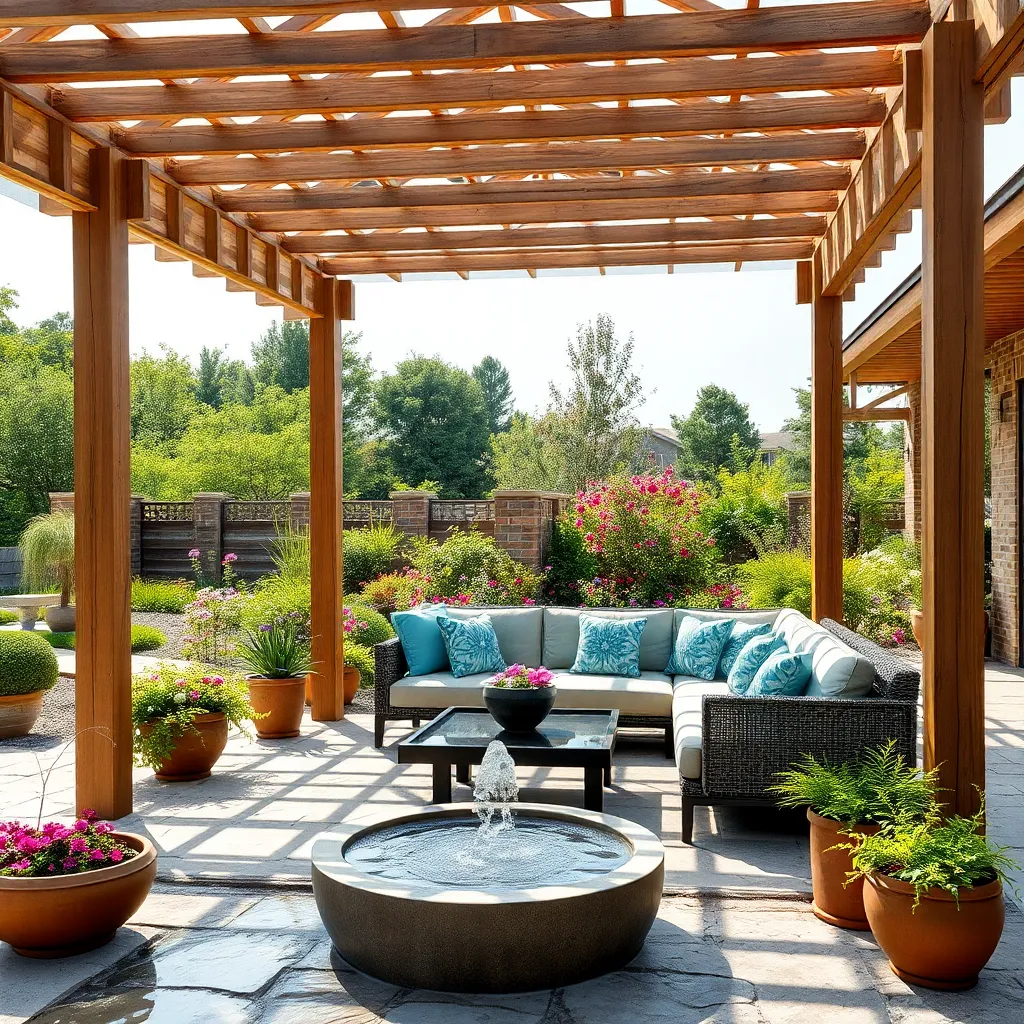
Incorporating a water feature near your pergola can create a tranquil atmosphere and enhance the overall outdoor experience. Consider installing a small pond or a cascading water wall to add a soothing soundscape. Choose materials like natural stone or ceramic tiles that complement your pergola’s design, ensuring seamless integration with the surrounding landscape. For beginners, pre-formed pond liners are a simple option, while more advanced DIYers might explore custom-built water features using concrete or fiberglass.
To maximize the aesthetic appeal, strategically position seating areas within the pergola to face the water feature, allowing guests to enjoy the view and serene sounds. Integrate subtle lighting around the water feature to highlight its beauty during evening gatherings. Use solar-powered lights for an eco-friendly touch and ensure the lighting fixtures are weather-resistant. For those looking to further customize, consider adding aquatic plants like water lilies or fish to your pond to create a lively ecosystem. This not only enhances visual interest but also contributes to a peaceful, natural setting.
Incorporate Solar Panel Roofing
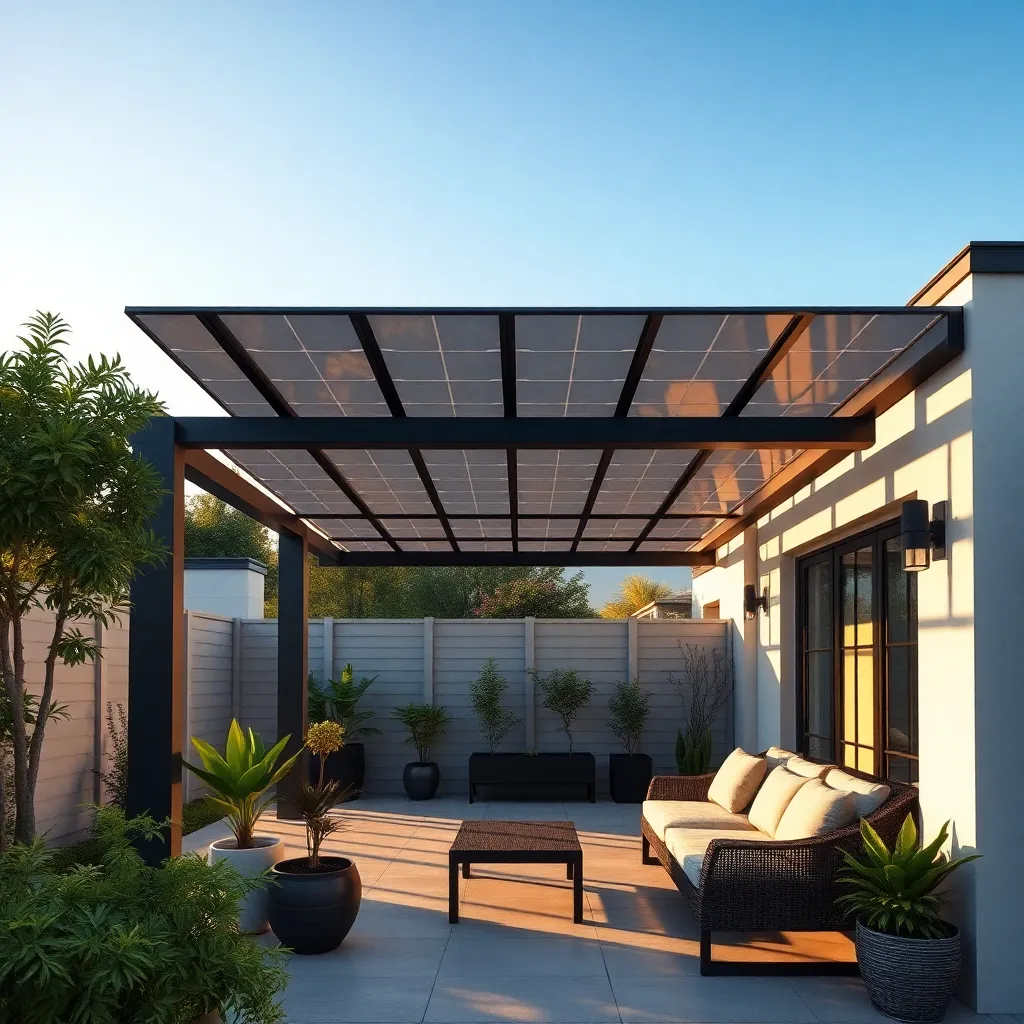
Incorporating solar panel roofing into your pergola setup not only enhances its functionality but also promotes sustainability. Opt for lightweight, flexible solar panels that can be easily integrated onto the roof structure. For beginners, start with a basic setup using solar panels that are plug-and-play, allowing you to power low-energy accessories like LED lights or small fans. Ensure your pergola is positioned to maximize sun exposure, ideally facing south in the northern hemisphere, to harness the most solar energy.
For those with more experience, consider creating a more advanced system by connecting your solar panels to a battery storage unit. This setup allows you to store energy for later use, powering more demanding devices such as outdoor kitchens or entertainment systems. Use durable materials like aluminum or steel for the pergola frame to support the weight of the panels while ensuring longevity and stability. Regularly clean and maintain the solar panels to optimize their efficiency, ensuring they remain an efficient and eco-friendly addition to your outdoor space.
Use Natural Stone Flooring
Transform your pergola area by incorporating natural stone flooring, which not only enhances the aesthetic appeal but also offers durability and low maintenance. Options like slate, limestone, or granite are excellent choices for outdoor settings, as they can withstand various weather conditions. For beginners, consider starting with flat stones, which are easier to lay down, ensuring a smooth, stable surface. For a more advanced touch, mix different stone sizes and colors to create a unique mosaic effect that reflects your personal style.
When installing natural stone flooring, it’s crucial to prepare the ground properly. Level the area and lay a base of gravel and sand to ensure adequate drainage and stability. Use a spirit level to check that each stone is even with its neighbors, preventing trip hazards. If you’re feeling adventurous, integrate decorative inlays like pebbles or small tiles for added visual interest. Seal the stones with a suitable outdoor sealant to protect against stains and weathering, keeping your pergola’s flooring looking pristine for years to come.
Introduce Vertical Garden Walls
Transform your pergola into a lush oasis by introducing vertical garden walls, which offer a stunning way to incorporate greenery without taking up ground space. For beginners, consider using modular panels or pre-made kits that can be easily attached to your pergola frame. These panels often come with built-in irrigation systems, simplifying plant care and ensuring your vertical garden thrives. Choose hardy plants like ferns, ivy, or succulents that require minimal maintenance and can withstand varying outdoor conditions.
More advanced gardeners might opt to build their own custom vertical garden wall. This can be achieved by attaching a sturdy mesh or trellis to the pergola structure, creating a framework for climbing plants to grow. Ensure the materials used are weather-resistant and capable of supporting the weight of the plants. Consider adding an automated drip irrigation system to maintain consistent moisture levels, particularly if you select plants with higher water needs. With these tips, you can craft a personalized and verdant backdrop that elevates your outdoor living space.
Include Outdoor Heating Options
To enhance the comfort of your pergola, consider incorporating outdoor heating options that allow you to enjoy your space year-round. Infrared heaters are an excellent choice as they provide efficient, directional warmth and can be mounted on the pergola beams for a sleek, unobtrusive look. For a cozy ambiance, fire pits or chimeneas add both warmth and a focal point to your outdoor setting. When selecting heating elements, ensure they’re rated for outdoor use and positioned safely away from flammable materials.
For those seeking a more advanced setup, consider installing a gas-powered patio heater that can be incorporated into your pergola’s design. These heaters often come with adjustable heat settings and can be strategically placed to maximize coverage. If you’re looking for eco-friendly options, explore solar-powered heaters that harness sunlight to provide warmth while reducing energy consumption. Remember to check local regulations regarding outdoor heating devices to ensure compliance with safety standards.
Position for Optimal Sun Exposure

To ensure your pergola offers the perfect blend of shade and sunlight, position it to take advantage of your yard’s natural sun patterns. Ideally, place the pergola on the south or southwest side of your home to capture the most sun during the day, which is especially beneficial in cooler climates. For those in hotter regions, positioning your pergola so that it receives morning sun and afternoon shade can help keep the area cooler. Consider using materials like retractable fabric or adjustable louvers to control the amount of sunlight filtering through.
For a more advanced approach, integrate design elements like angled slats or a sloped roof to optimize sun exposure and create interesting light patterns. Using materials such as weather-resistant wood, aluminum, or vinyl ensures durability and low maintenance. For an eco-friendly touch, consider installing solar panels on top of your pergola to harness sunlight for energy. Additionally, incorporating climbing plants like wisteria or grapevines not only provides natural shade but also adds a touch of greenery, enhancing the aesthetic appeal of your outdoor space.
Conclusion: Creating Beautiful Outdoor Spaces
In exploring the ’15 Pergola Setup Ideas for Your Next Project,’ you’ve discovered a treasure trove of concepts that are as crucial in nurturing your relationships as they are in creating a beautiful outdoor space. We’ve covered the importance of building a strong foundation, the beauty of shared experiences, the art of flexibility, and the power of personal touches. Each idea is a metaphor for relationship success—whether it’s the open design of a pergola encouraging communication or the cozy corners fostering intimacy.
Now, take the next step: choose one concept that resonates with you and implement it in your relationship this week. Perhaps it’s planning a shared project or creating a dedicated space for meaningful conversations.
To keep these insights at your fingertips, save or bookmark this article. It will serve as a valuable reference as you continue to cultivate and enrich your connections. Remember, just as a pergola thrives with care and attention, so too will your relationships. Your journey toward relationship success is ongoing, and with these tools, you’re well on your way to building lasting, meaningful connections.