
Imagine transforming your backyard into a cozy retreat with just a weekend’s worth of effort. Whether you’re a seasoned DIY enthusiast or a beginner eager to dip your toes into the world of outdoor projects, creating a personalized shade shelter can significantly elevate your outdoor living experience. In our bustling lives, these havens provide the perfect spot to unwind, entertain, or simply enjoy nature’s beauty, all while being shielded from the sun’s harsh rays.
In this article, we’ll guide you through ten unique outdoor shade shelters that are not only achievable in a weekend but also tailored to suit various skill levels and styles. From charming pergolas to innovative sail shades, you’ll discover projects that enhance both functionality and aesthetic appeal. Dive in and find inspiration to craft a space that reflects your vision, making your outdoor area a true extension of your home.
Choosing the Right Shelter Design
When choosing a shelter design, consider the purpose and size of your outdoor space. If you need a quick escape from the sun, a simple pergola made from pressure-treated wood or metal can be erected over a weekend. For those seeking more comprehensive coverage, a gazebo with a canvas or polycarbonate roof might be ideal. Ensure you measure your space accurately and select materials that can withstand local weather conditions, such as cedar for its natural resistance to rot or metal for its durability.
Incorporating design elements like adjustable louvers or retractable canopies can add versatility to your shelter, allowing you to control sunlight and ventilation. More advanced builders might consider integrating solar panels into a pergola design, providing both shade and sustainable energy. When planning your project, use straightforward construction techniques like pre-drilled kits or modular components to simplify assembly. Always check local building codes to ensure compliance, especially if installing a permanent structure.
Essential Tools and Materials Checklist
Embracing a DIY approach to building your outdoor shade shelter requires gathering the right tools and materials. For a basic setup, you’ll need essential tools like a drill, saw, measuring tape, and level. Key materials include pressure-treated wood, galvanized screws, and weather-resistant fabric to ensure longevity and durability. Additionally, consider using a post hole digger if your design involves anchoring posts into the ground.
To ensure your project is both sturdy and aesthetically pleasing, think about adding advanced elements like decorative brackets or adjustable shade panels. These can enhance the functionality and look of your shelter. For those more experienced, including LED lighting strips can turn your structure into an inviting evening space without much extra effort. Remember, selecting materials that match the style of your home and withstand local weather conditions will make your shelter a seamless, lasting addition to your outdoor space.
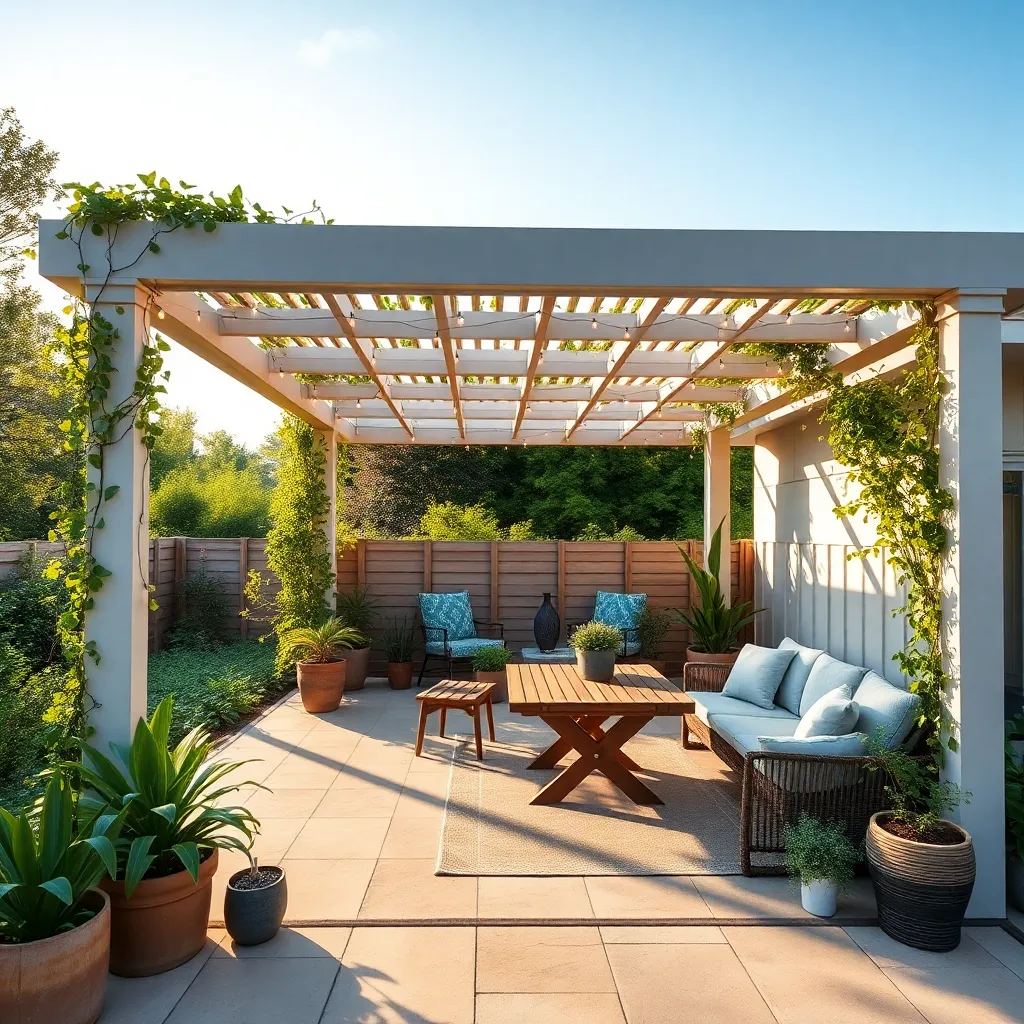
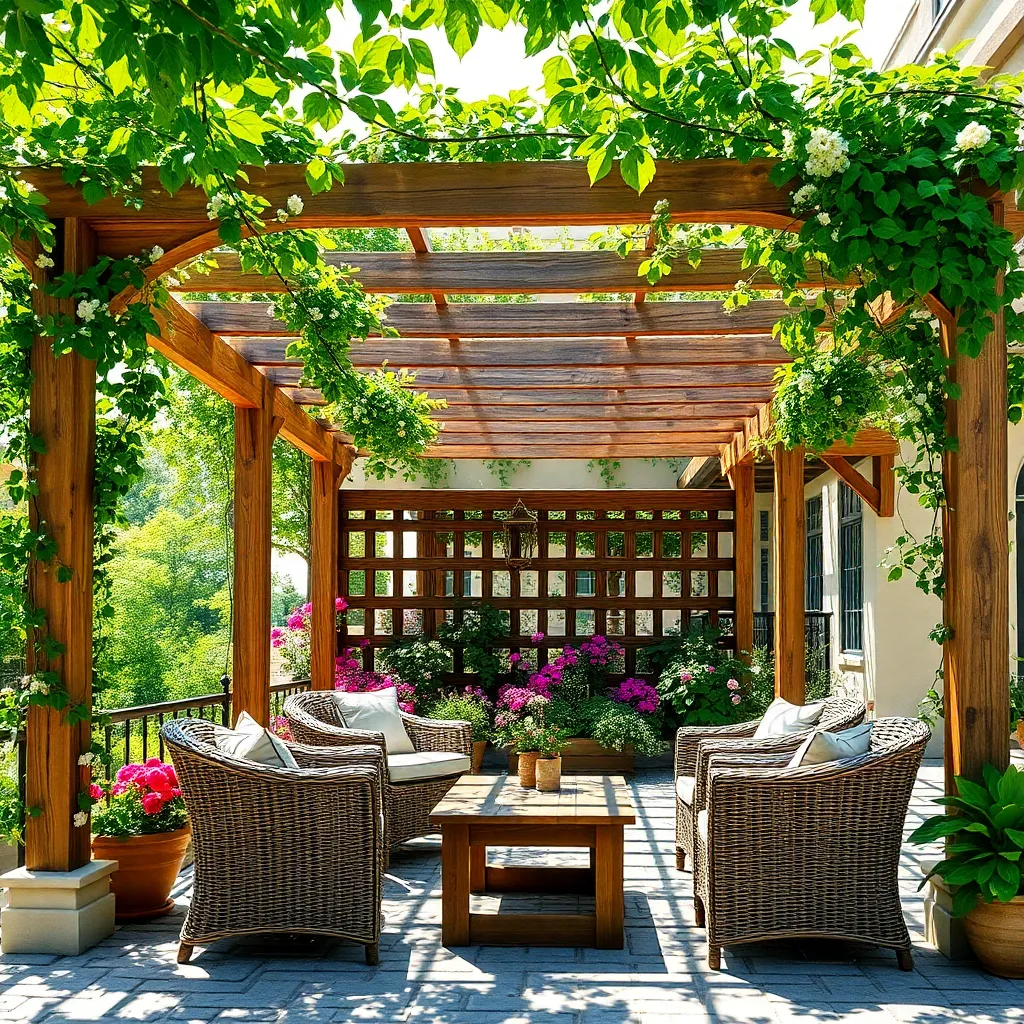
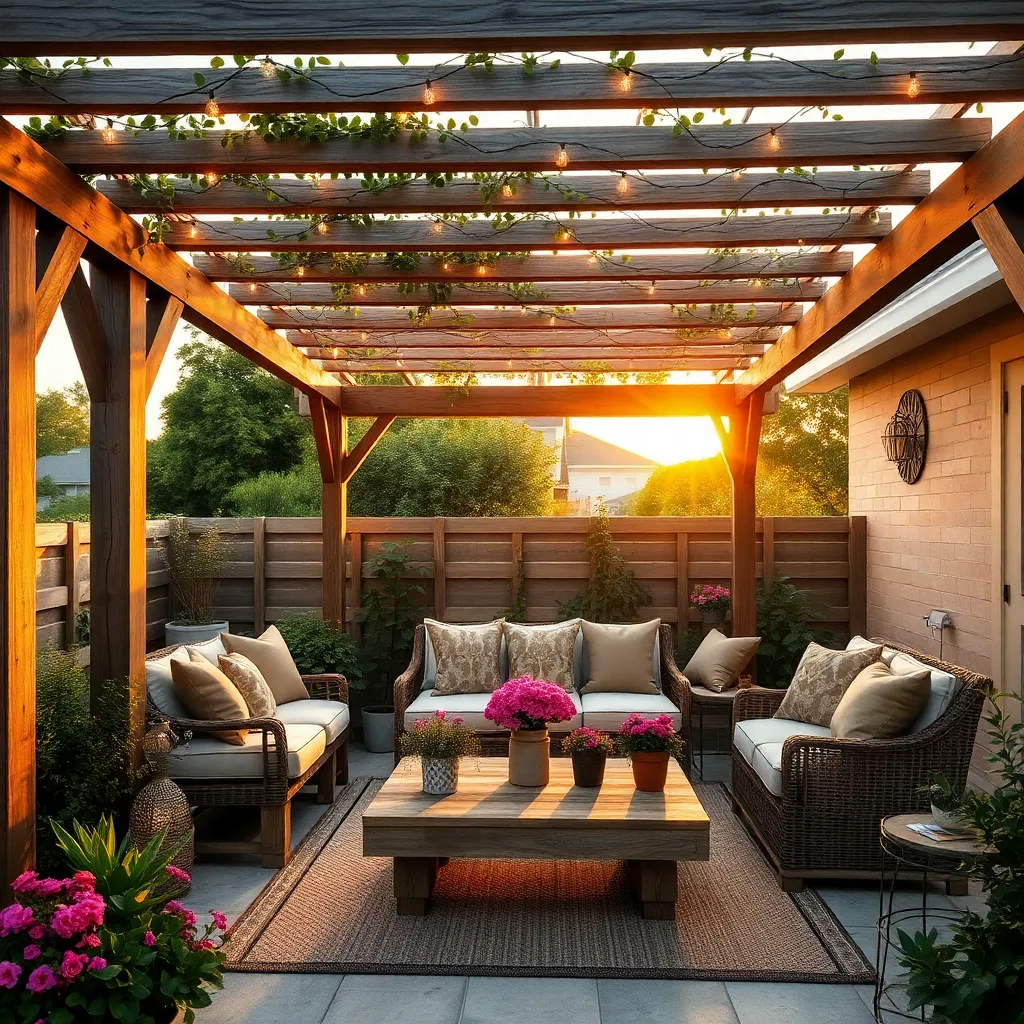
Building a Classic Pergola
Building a classic pergola is a fantastic way to add both shade and style to your outdoor space. Start with pressure-treated lumber, which stands up well to the elements, and consider using 4×4 posts for the frame. For a basic design, place your posts about eight feet apart and use 2×6 beams to create the roof structure. Secure the posts into the ground using concrete for stability, and ensure all cuts are precise to maintain structural integrity. This simple yet elegant structure can be customized with climbing plants like wisteria or jasmine to enhance its aesthetic appeal.
For those looking to add a touch of sophistication, consider incorporating lattice panels or decorative end cuts on the beams. Use galvanized screws and brackets to ensure longevity and resistance to rust. If you have basic woodworking skills, adding a slight arch to the cross beams can elevate the design without complicating the build. Always remember to sand and seal the wood to protect against weathering. With a clear plan and the right materials, constructing a pergola can be a rewarding weekend project that transforms your backyard into a charming retreat.
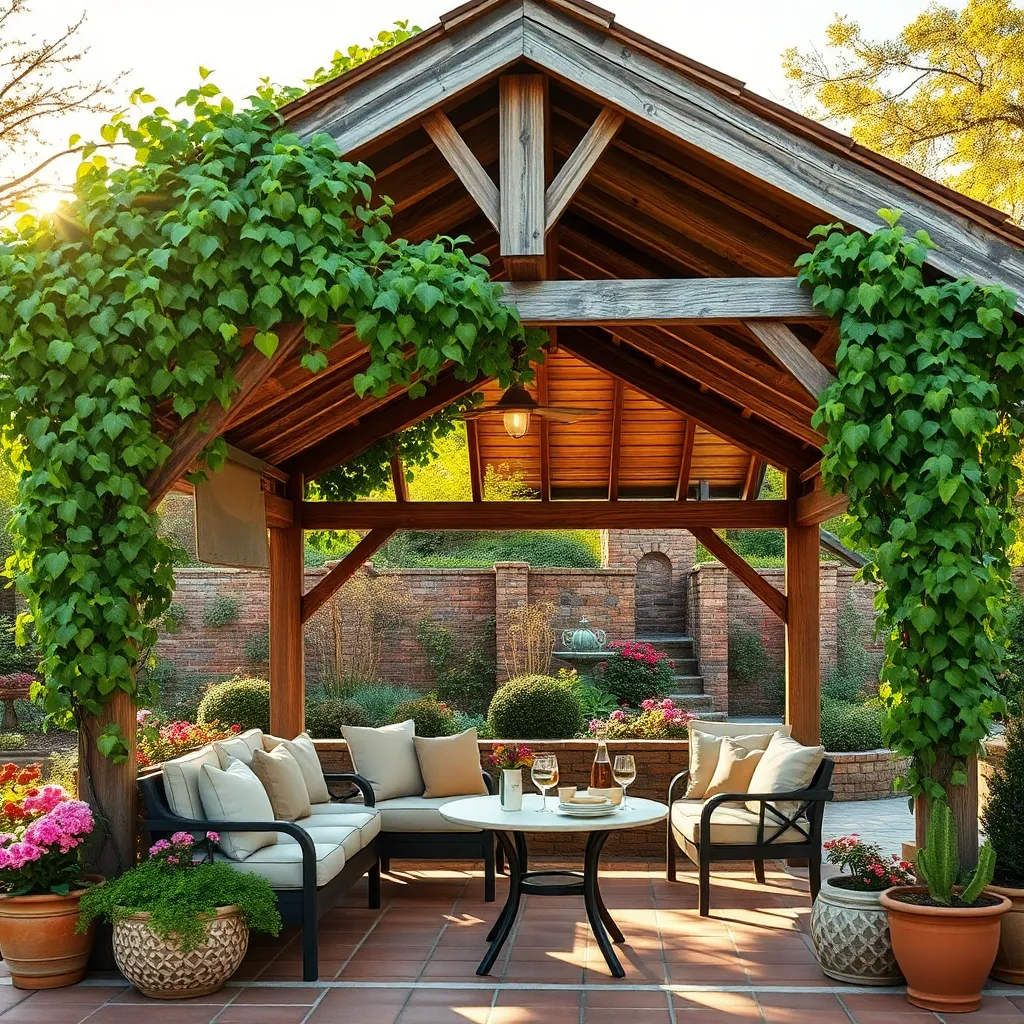
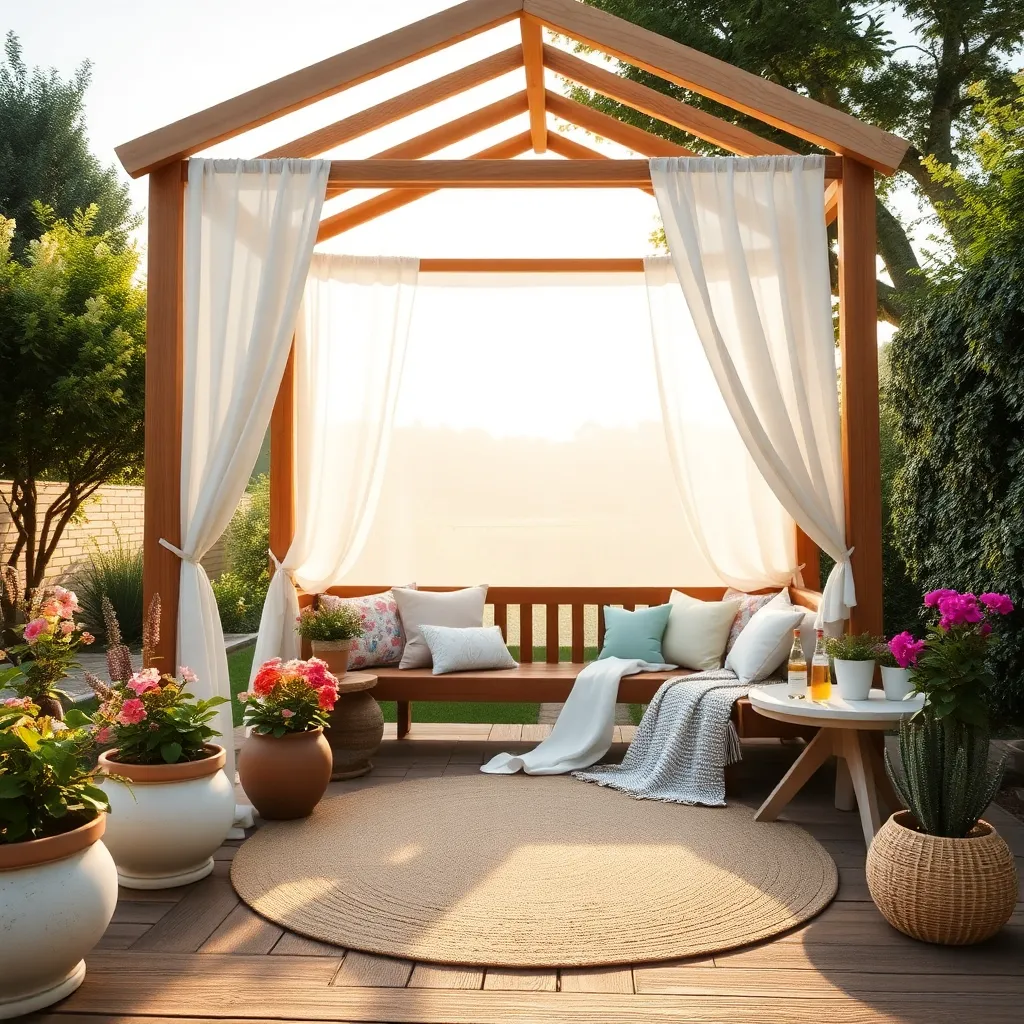
Constructing a Simple Gazebo
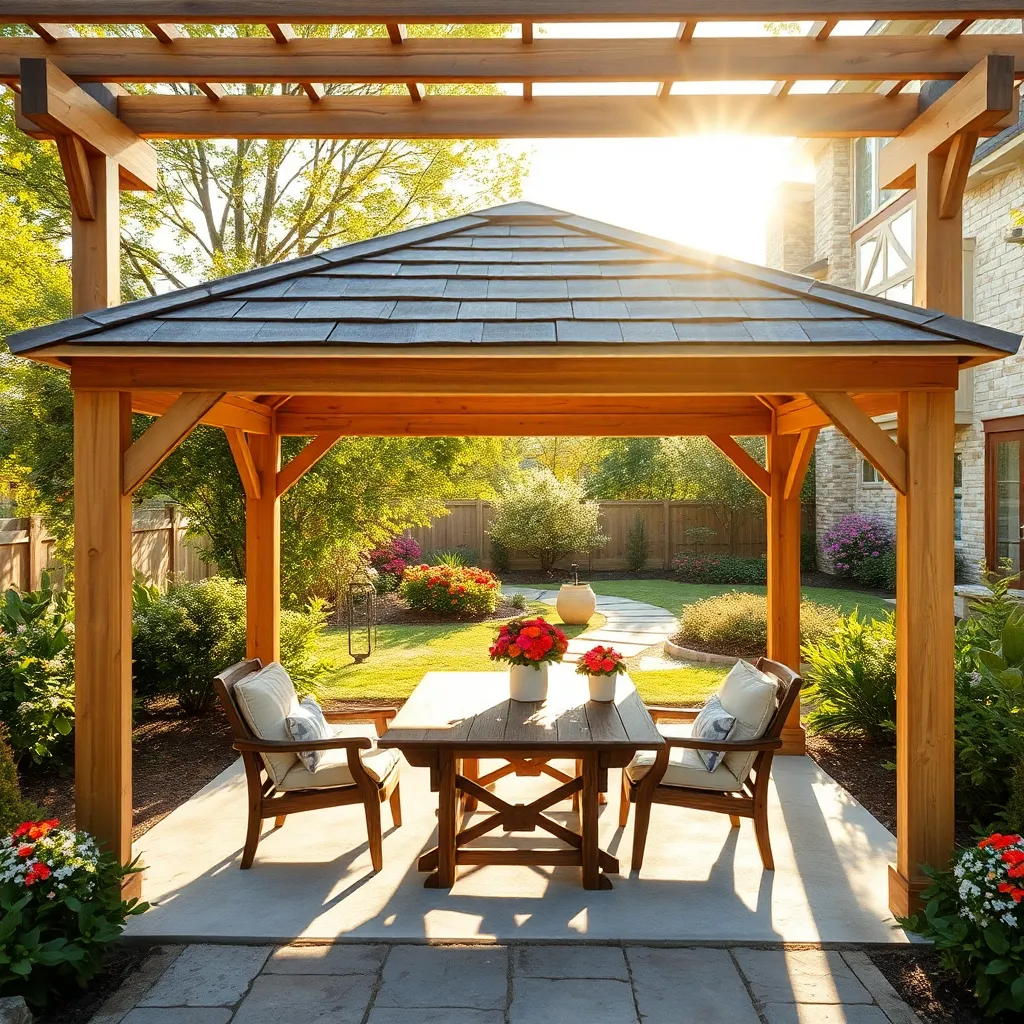
Creating a simple gazebo can transform your backyard into a cozy retreat. Begin with a square or hexagonal base using pressure-treated wood, which is durable and weather-resistant. For a basic 10×10 ft gazebo, you’ll need eight posts for the corners and sides, secured in concrete footings to ensure stability. Use crossbeams to connect the posts and form the roof structure, opting for a simple gabled or hip roof design. This not only provides shade but also adds architectural elegance to your outdoor space.
For the roofing material, consider using corrugated metal sheets or polycarbonate panels to ensure both longevity and protection from the elements. Beginners might prefer a kit that includes pre-cut materials and detailed instructions, making the process more manageable. If you’re more experienced, try incorporating decorative elements like lattice panels or climbing plants for an inviting ambiance. Remember to treat the wood with a sealant to protect against moisture and UV damage, ensuring your gazebo remains a delightful feature in your garden for years to come.
DIY A-Frame Canopy Setup
An A-frame canopy is a versatile and straightforward project perfect for any weekend DIY enthusiast. Start by gathering essential materials: you’ll need sturdy wooden beams (2x4s work well), a waterproof tarp, and heavy-duty screws. Cut the beams to form two triangular frames, and use crossbeams to connect them at the top and base for stability. For a standard-sized canopy, aim for a height of 8 feet and a width of 10 feet to provide ample shade. Ensure stability by securing the frame firmly into the ground using metal anchors or stakes.
Once the frame is in place, drape your tarp over it, fastening it securely with bungee cords or ropes through grommets. Choose a UV-resistant tarp to protect against harsh sunlight and extend the lifespan of your canopy. For added stability, consider reinforcing the tarp with additional crossbeams or even decorative lattice panels for a touch of elegance. Beginners will find the basic setup easy to tackle, while more experienced DIYers can experiment with custom embellishments like side curtains or integrated plant hangers. Enjoy this stylish, functional addition to your outdoor space in just a weekend!
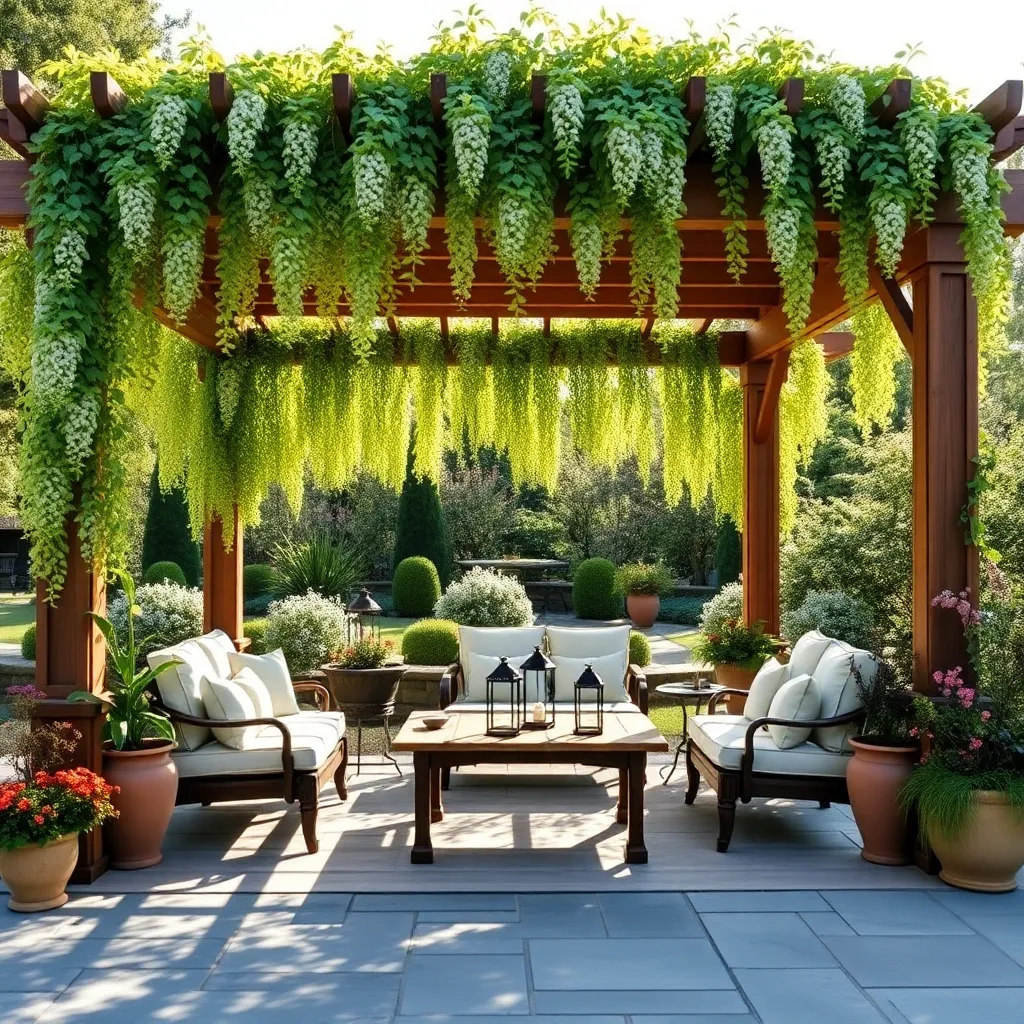
Crafting a Rustic Wooden Arbor
Creating a rustic wooden arbor is a delightful way to add charm and functionality to your garden. Start by selecting durable wood such as cedar or redwood, which are naturally resistant to rot and insects. For a basic structure, you’ll need four sturdy posts at least 8 feet tall and crossbeams to add support and visual appeal. Consider adding lattice panels on the sides to encourage climbing plants, which can enhance shade over time.
When constructing your arbor, ensure that the posts are securely anchored in concrete to withstand weather conditions. Use a level to check that your beams are aligned properly, ensuring stability and aesthetic appeal. For a more advanced touch, think about adding decorative elements like curved beams or trellis patterns to personalize your design. Remember, the key to a successful arbor is a balance between structural integrity and artistic expression, allowing your creativity to flourish while providing a functional retreat.
Assembling a Sail Shade Structure

For an elegant and functional addition to your backyard, consider installing a sail shade structure. Begin by selecting a durable, UV-resistant fabric, such as high-density polyethylene, which is ideal for withstanding various weather conditions. Measure the area you wish to cover, allowing extra material for tensioning, and choose anchor points like sturdy posts or existing structures, ensuring they can support the tension of the sail. Use stainless steel hardware, such as turnbuckles and pad eyes, to secure the sail, providing both stability and adjustability.
When installing your sail shade, plan for optimal sun coverage and airflow. Position the sail at an angle to allow rainwater to run off and to maximize shade during peak sun hours. Beginners should start with a basic triangular or rectangular design, while more experienced DIYers might try a multi-sail setup for a dynamic look. For added flair, choose a color that complements your outdoor decor. Regularly check your structure for tension and wear, adjusting as needed to maintain its effectiveness and appearance.
Creating a Bamboo Shade Oasis
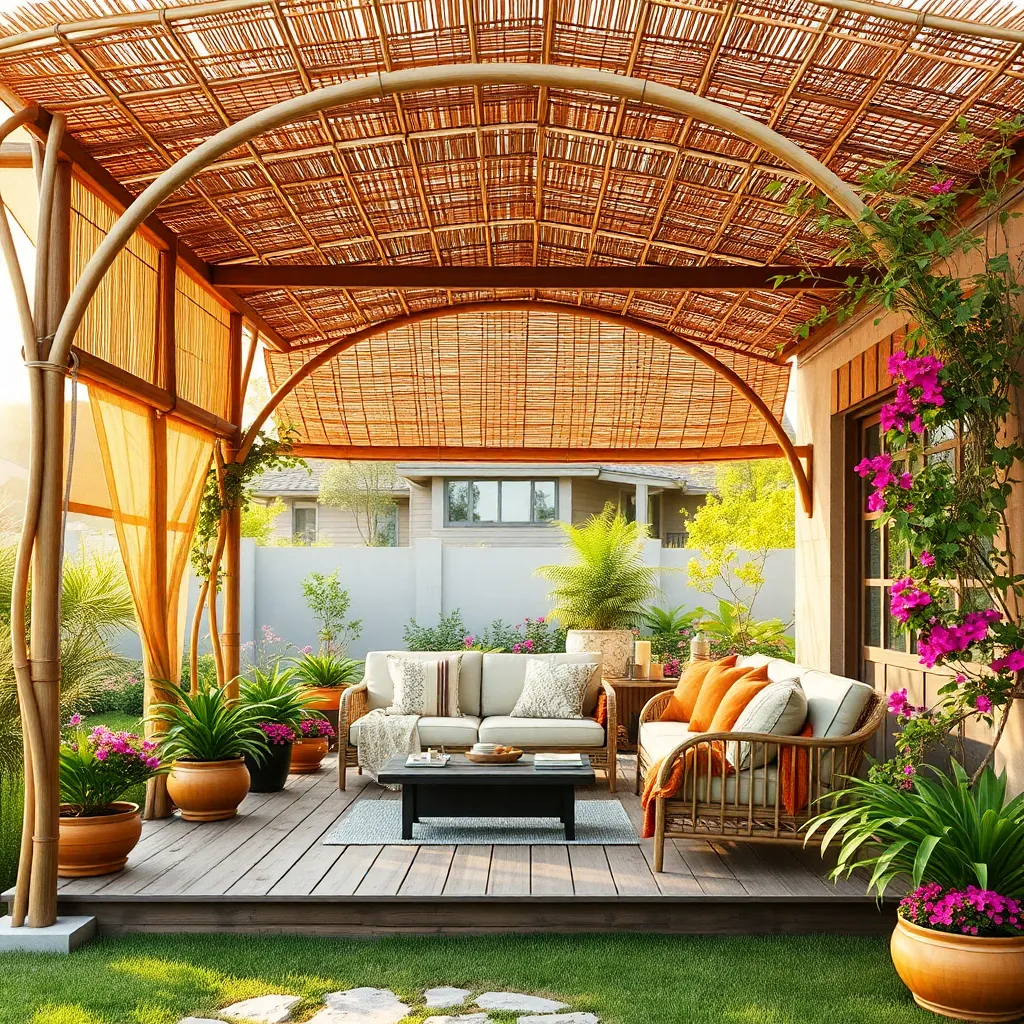
Transform your backyard into a tranquil retreat by creating a bamboo shade oasis. Start by sourcing sturdy bamboo poles, ideally about 10 feet in length, as they provide both height and stability. You’ll need enough poles to form a basic frame—typically a rectangle or square—depending on the area you want to cover. Secure the poles by sinking them at least 2 feet into the ground, ensuring they’re firmly anchored. Consider using rope or twine to bind the corners for additional support, creating a natural and rustic look that blends seamlessly with your garden.
For the canopy, use woven bamboo mats or reed fencing, which can be easily draped over the frame to provide shade. Attach the mats to the frame using zip ties or natural fiber rope, ensuring they are taut to withstand wind. To enhance the oasis, integrate climbing plants like jasmine or clematis, which can grow around the bamboo structure, adding fragrance and an extra layer of shade. Beginners can enjoy the straightforward setup, while seasoned gardeners might experiment with different bamboo varieties or decorative elements like hanging lanterns for ambiance. This simple yet effective setup offers both a practical and aesthetic enhancement to your outdoor space.
Erecting a Pop-Up Tent Shelter
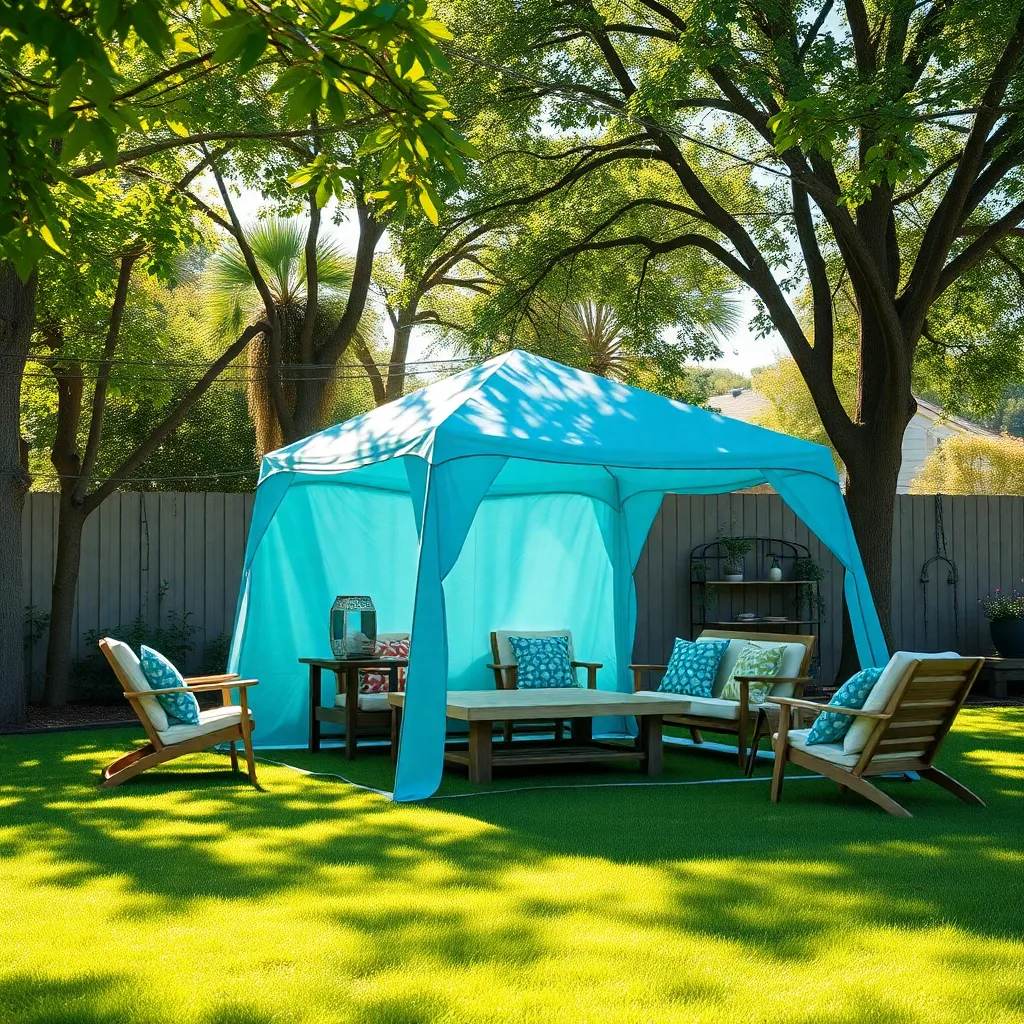
For a quick and effective solution to outdoor shading, consider erecting a pop-up tent shelter. These tents are convenient and require minimal tools to set up, making them ideal for a weekend project. Start by selecting a level area in your garden, ensuring it’s free of debris and has enough space for the tent’s footprint. Choose a pop-up tent that complements your outdoor aesthetic—common dimensions include 10×10 feet or 12×12 feet. Look for tents made of durable materials such as polyester for the canopy and a sturdy steel frame to withstand varied weather conditions.
When setting up your pop-up tent, follow the manufacturer’s instructions closely. Typically, this involves expanding the frame and securing the canopy using Velcro or ties. For added stability, use ground stakes or sandbags at each corner. Consider adding sidewalls or netting for extra shade and protection from insects. For those with more experience, enhancing the space beneath your tent with outdoor rugs or string lights can create a cozy and inviting atmosphere. Remember to regularly check for wear and tear, ensuring your pop-up tent remains a reliable shade solution.
Finishing Touches for Outdoor Comfort
Enhancing your outdoor shade shelter with thoughtful finishing touches can greatly improve comfort and functionality. Consider adding weather-resistant outdoor rugs to define the space and provide a cozy underfoot feel. For lighting, opt for solar-powered LED string lights to create a warm, inviting atmosphere without the need for electrical wiring.
Including versatile furniture is crucial to maximizing the use of your shelter. Choose seating options with durable, weatherproof materials like teak or resin wicker, and add cushions made from fade-resistant fabrics for comfort. To further personalize your space, incorporate plants in decorative pots, which can serve as natural dividers or focal points. These elements not only elevate the aesthetic but also enhance the overall enjoyment of your outdoor retreat.
Conclusion: Creating Beautiful Outdoor Spaces
As we explored the ’10 Outdoor Shade Shelters You Can Build in a Weekend,’ we also uncovered 10 key relationship concepts that create a solid foundation for love and connection. From the importance of communication and collaboration, to the joys of shared creativity and problem-solving, each shelter project reflects vital elements of a thriving relationship. We learned the value of compromise, patience, setting mutual goals, and celebrating small victories together. Just like constructing a shelter, building a relationship requires trust, adaptability, and a shared vision.
Now, take the first step in fortifying your relationship by planning a weekend project with your partner. Whether it’s building a physical shelter or embarking on a new joint venture, the time spent together will strengthen your bond. Remember, moments of shared effort are the building blocks of lasting love.
Bookmark this article as your go-to guide for practical relationship insights and inspiration. As you nurture your connection, may your relationship grow like a well-crafted shelter—strong, enduring, and full of warmth. Embrace these lessons, and watch your partnership flourish into a haven of happiness and resilience.