
Imagine stepping into your backyard oasis, where a beautifully crafted shelter seamlessly blends style with functionality, inviting you to enjoy the outdoors regardless of the weather. Whether you’re a beginner eager to embark on your first project or an experienced homeowner looking to elevate your outdoor living space, our guide to “14 Weatherproof Shelter Ideas for Your Next Project” is your gateway to inspiration and practicality.
From cozy pergolas to versatile gazebos, each idea in this guide promises not just to enhance your home’s aesthetic but also to expand your living space into the great outdoors. With these innovative solutions, you’ll confidently transform your backyard into a year-round retreat, offering both protection from the elements and a perfect setting for gatherings, relaxation, and endless enjoyment.
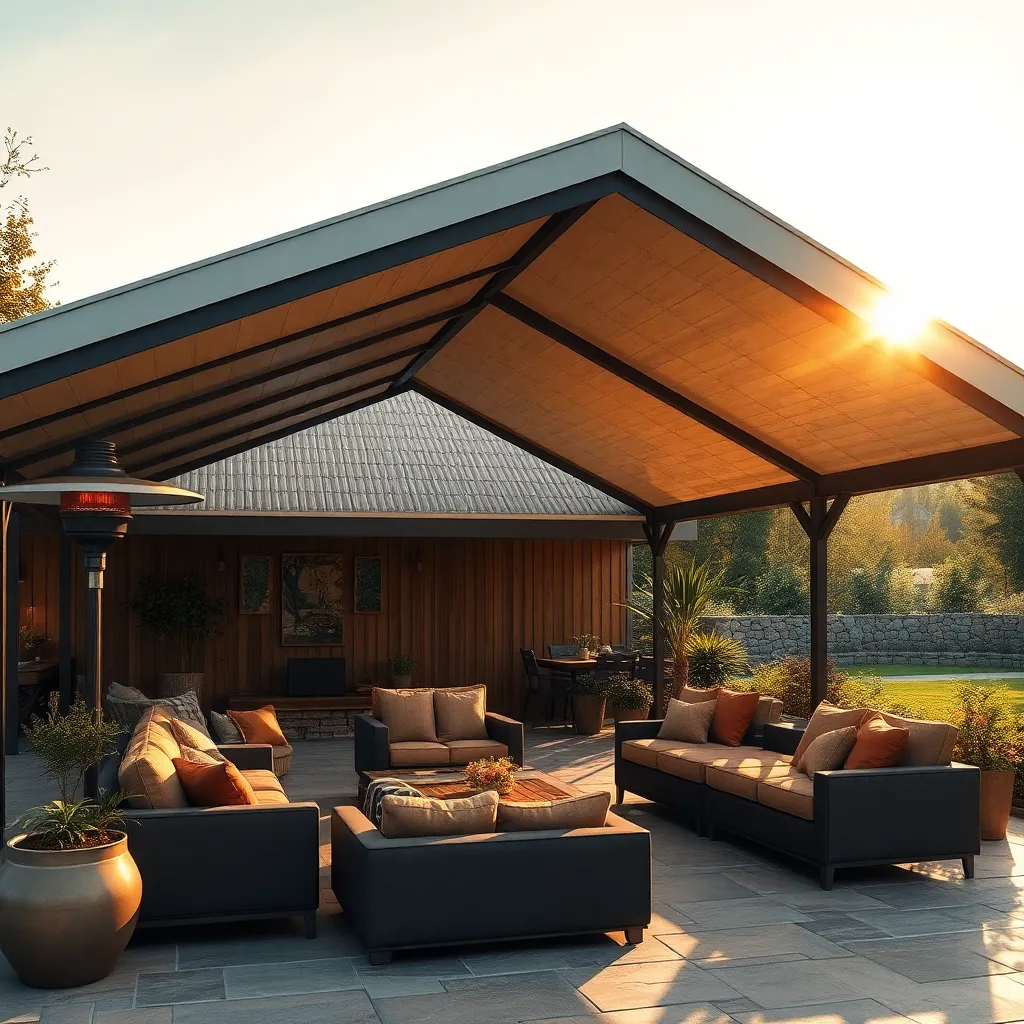
Select Durable, Waterproof Materials
When selecting materials for a weatherproof outdoor shelter, prioritize those that are both durable and waterproof to ensure longevity and protection from the elements. Consider using pressure-treated wood, aluminum, or galvanized steel for the frame, as these materials resist rot and corrosion effectively. For roofing, options like polycarbonate panels or TPO (Thermoplastic Polyolefin) membrane are excellent choices, providing both UV resistance and weatherproofing. Beginners should start with simple, modular designs that can be easily assembled and modified, whereas more experienced builders might explore custom structures with integrated drainage systems.
Additionally, incorporating design elements such as sloped roofs and overhangs can significantly enhance your shelter’s ability to withstand harsh weather conditions. Ensure that all joints and seams are sealed with high-quality silicone or outdoor-grade caulking to prevent leaks. For those looking to add a touch of elegance, consider using marine-grade fabrics for shade canopies, which offer both style and functionality. Advanced builders might explore incorporating solar panels for an eco-friendly and self-sufficient shelter. By carefully selecting and combining these materials, homeowners can create a robust outdoor space that stands the test of time.
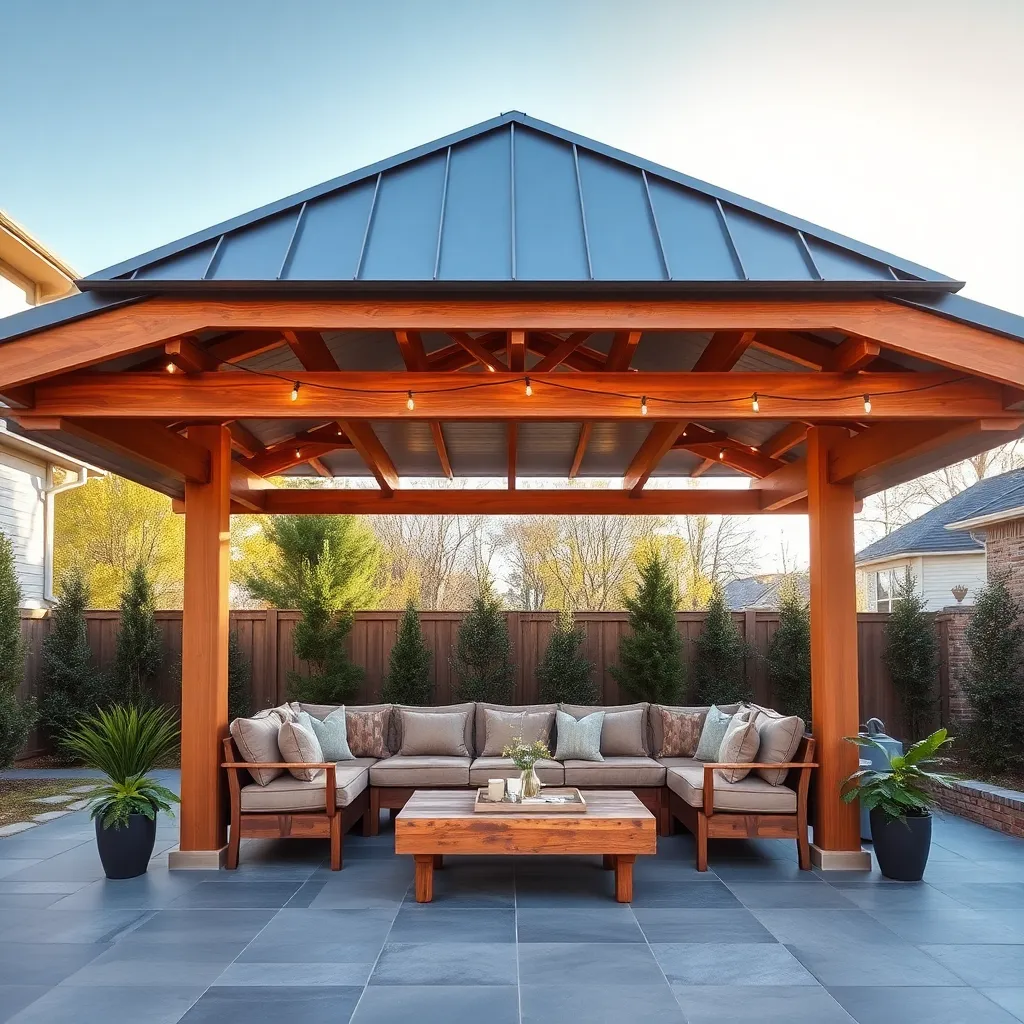
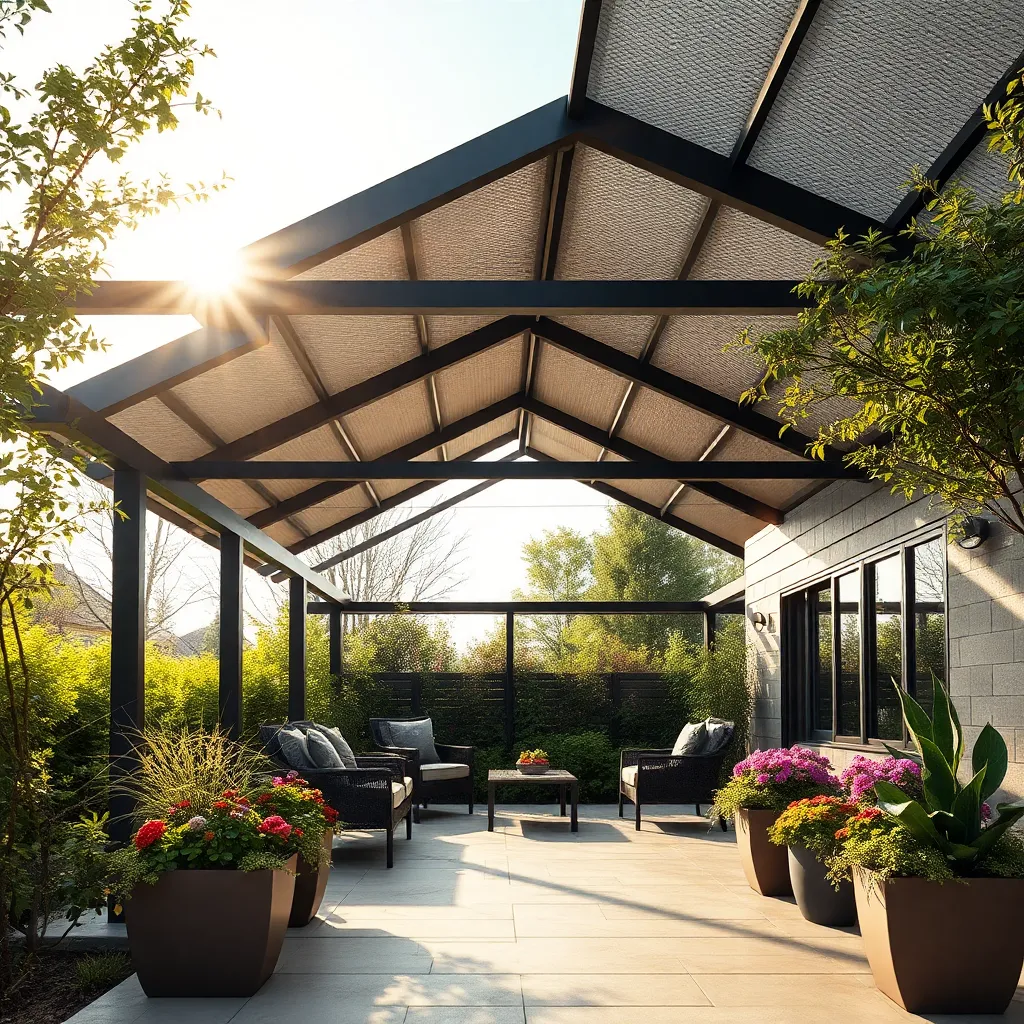
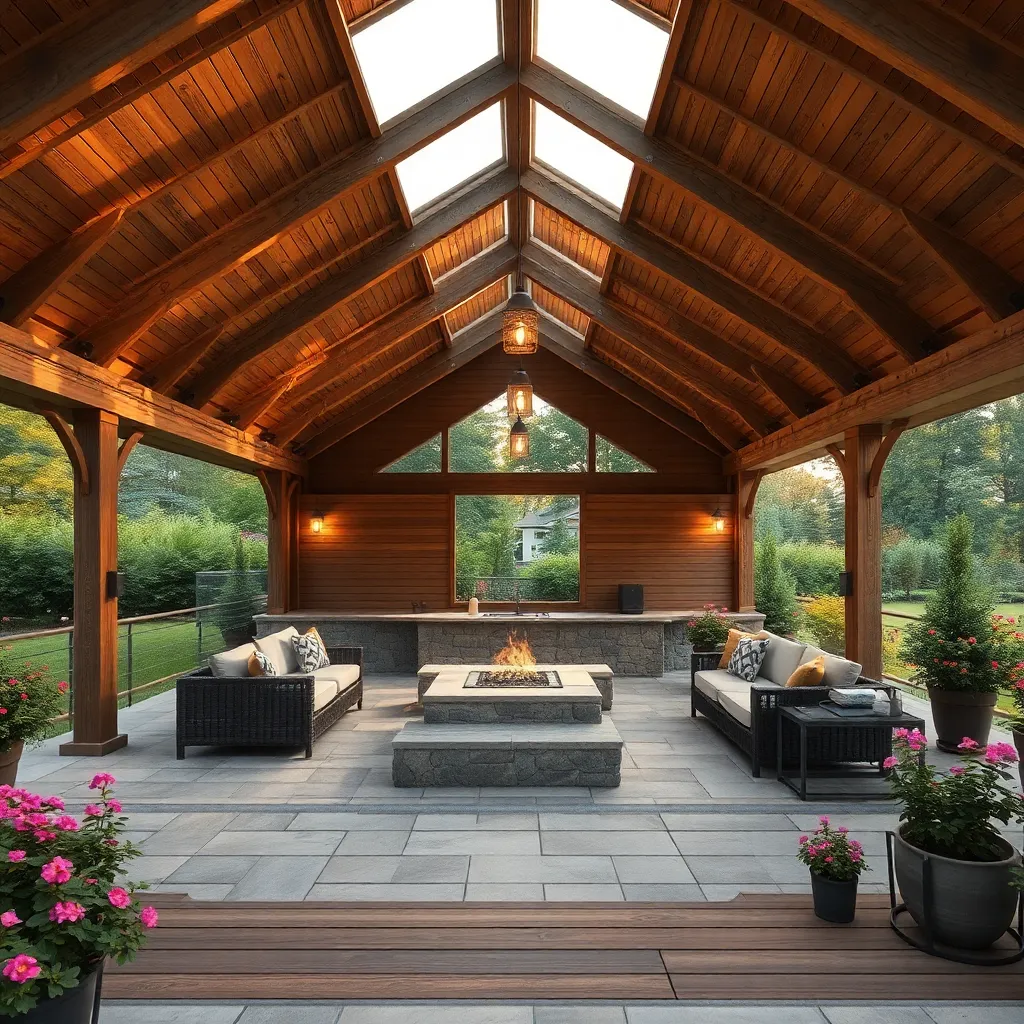
Incorporate Sloped Roof Designs
Incorporating a sloped roof design into your outdoor shelter can provide effective water runoff, ensuring your space remains dry and comfortable. Consider using materials such as corrugated metal or polycarbonate panels, which are both durable and water-resistant. These materials are available in various colors and finishes, allowing you to match your shelter to your existing exterior decor. For beginners, a basic pitch angle of 15 to 30 degrees is often ideal, balancing aesthetics and function without overly complex construction techniques.
For those looking to elevate their design, integrating a steeper slope or adding a gable can enhance airflow and add a touch of architectural flair. Ensure the frame of your shelter is strong enough to support the roof and withstand local weather conditions—pressure-treated lumber or galvanized steel are excellent choices. Additionally, installing gutters along the lower edge of the roof can further improve water management. By carefully planning your sloped roof, you’ll create a stylish and functional outdoor space that stands up against the elements.
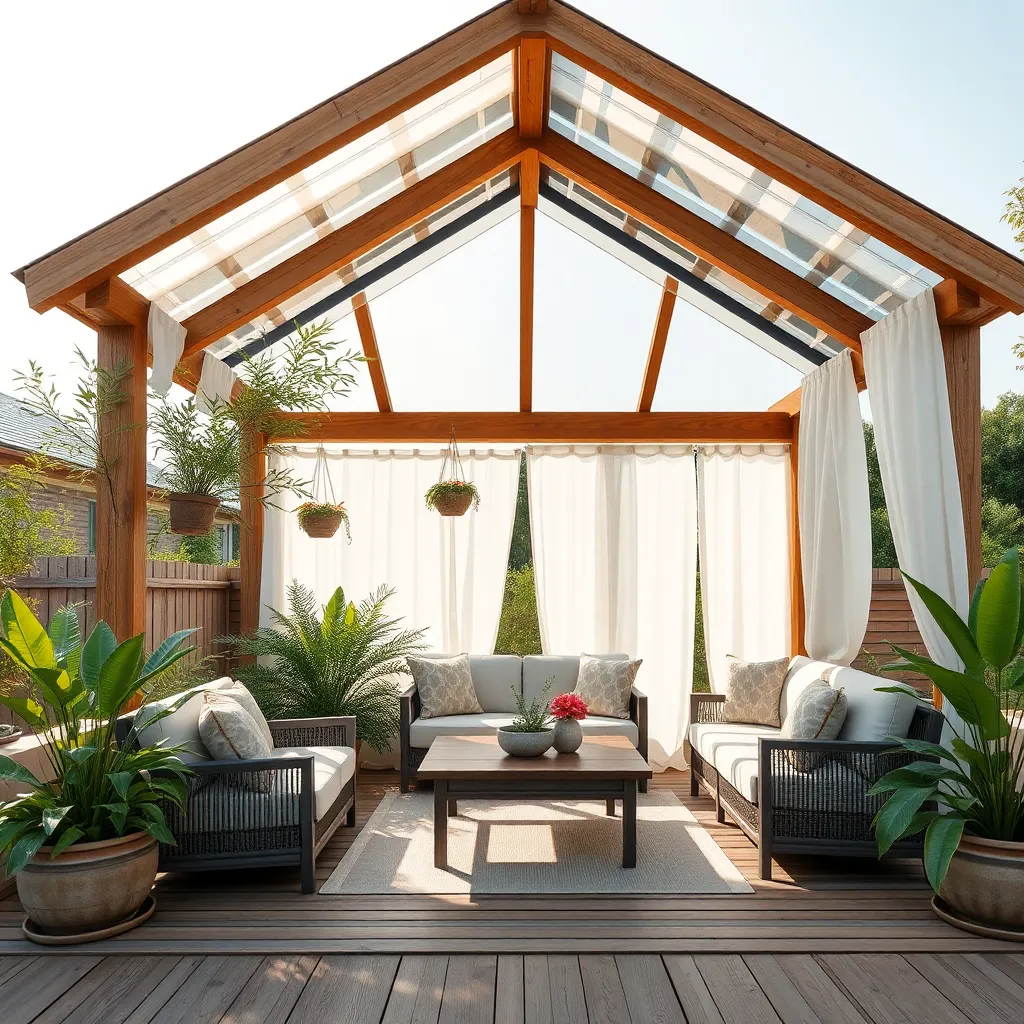
Use UV-Resistant Fabrics for Shade
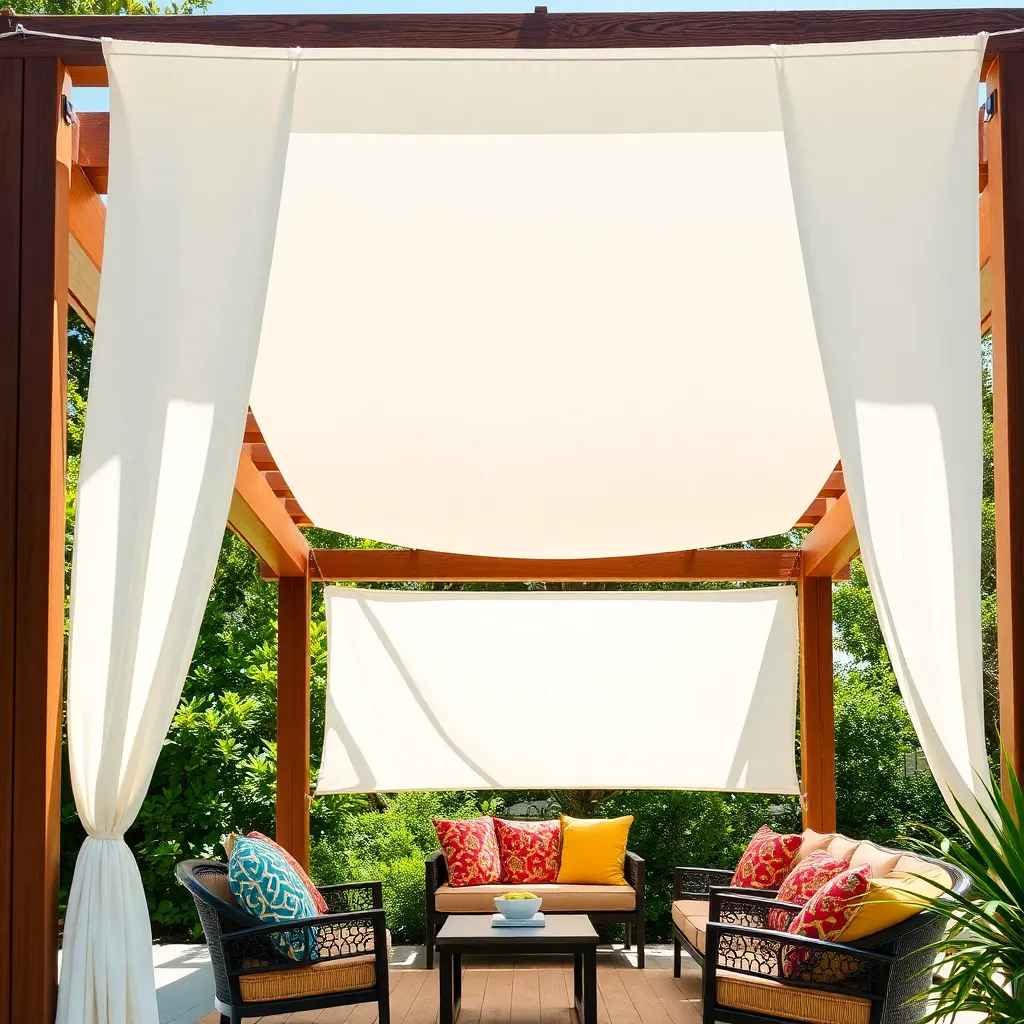
Choosing UV-resistant fabrics for your outdoor shelter is crucial in ensuring long-lasting shade and protection. These materials are specifically designed to withstand harsh sunlight, preventing fading and degradation over time. Whether you’re using them for a pergola, canopy, or awning, opting for UV-rated fabric like Sunbrella or Coolaroo can extend the life of your shelter significantly.
For beginners, start by measuring the area that needs shading to select the right amount of fabric. Experienced DIYers can explore advanced features such as integrating retractable systems for versatility. Consider using fabrics that offer at least 98% UV protection to safeguard both your space and anyone enjoying it. By investing in quality materials, you create a durable and inviting outdoor area perfect for relaxation and gatherings.
Add Wind-Resistant Anchoring Systems
When constructing an outdoor shelter, incorporating wind-resistant anchoring systems is crucial for stability and safety. For beginners, using ground anchors or stakes made from galvanized steel can offer a simple yet effective solution. These anchors should be driven deep into the ground at an angle, providing a strong hold against gusty winds. For more advanced projects, consider using concrete footings or helical anchors, which provide enhanced support and durability for larger structures.
Besides choosing the right materials, the placement and spacing of anchors play a significant role in their effectiveness. It’s advisable to place anchors at each corner and at regular intervals along the structure’s base, approximately every 4 to 6 feet. This ensures even distribution of tension and minimizes movement. For those in wind-prone areas, adding cross-bracing with tension cables can further reinforce the structure, offering peace of mind during stormy weather.
Install Rainwater Collection Gutters
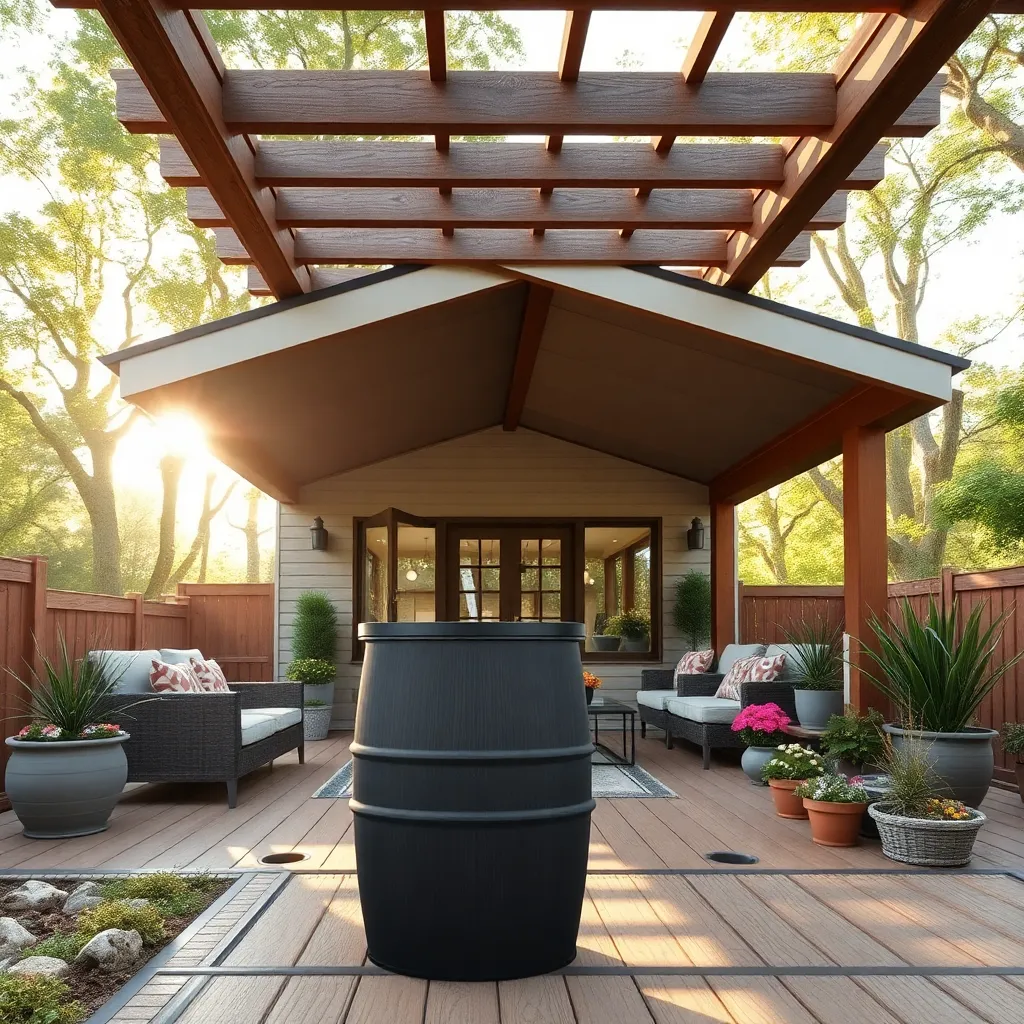
Enhancing your outdoor shelter with rainwater collection gutters can significantly improve its functionality while promoting sustainability. Choose durable materials like aluminum or galvanized steel that can withstand the elements and ensure longevity. For a basic setup, install gutters along the edges of your shelter’s roof to channel rainwater into a storage system, such as a rain barrel. This not only conserves water but also reduces runoff, protecting your garden and landscape from erosion.
It’s crucial to ensure that gutters are installed at the correct slope, typically about 1/4 inch for every 10 feet, to allow water to flow smoothly towards the downspouts. Advanced users can integrate a first-flush diverter, which helps keep debris out of your storage barrels by diverting the initial flow of water. Consider incorporating leaf guards to minimize maintenance and keep your system running efficiently. With these enhancements, your shelter will not only be a place of refuge but also a contributor to an eco-friendly home.
Choose Rust-Resistant Metal Fixtures
When selecting metal fixtures for your outdoor shelter, choosing materials that are resistant to rust is crucial for longevity and maintenance ease. Opt for metals like stainless steel, aluminum, or galvanized steel, which naturally resist corrosion and withstand harsh weather conditions. These materials not only provide durability but also offer a sleek, modern look that can enhance the aesthetic appeal of your shelter.
For homeowners looking to add a touch of sophistication, consider powder-coated finishes on your metal fixtures. This extra layer of protection not only boosts rust resistance but also allows for custom color choices to match your outdoor design palette. Advanced tip: Ensure proper ventilation and drainage in your shelter design to prevent moisture accumulation, a common cause of rust, further extending the lifespan of your fixtures.
Opt for Modular Building Components
Embracing modular building components can significantly streamline the construction of your outdoor shelter, making it both customizable and efficient. These prefabricated pieces allow you to easily adjust the size and shape of your shelter to fit any space. Begin with simple materials like wood or aluminum frames, which are both durable and easy to work with. For beginners, consider starting with a basic kit that includes pre-cut components, while more advanced builders might explore creating a bespoke design by combining various modules.
For a truly weatherproof structure, select materials that offer protection against the elements, such as polycarbonate panels for roofing, which provide UV protection and are shatter-resistant. Incorporating interlocking wall panels not only enhances stability but also makes assembly a breeze, eliminating the need for complex tools. Consider using adjustable feet to keep your shelter level on uneven ground, and remember to anchor it securely to withstand strong winds. With these practical tips, your modular shelter will be both functional and stylish, tailored perfectly to your outdoor space.
Integrate Drainage Solutions in Foundations

When designing the foundation for your outdoor shelter, it’s crucial to integrate effective drainage solutions to prevent water accumulation and potential damage. Begin by ensuring the foundation is slightly sloped, directing water away from the structure. Use gravel or crushed stone as a base material to promote drainage, and consider installing a French drain system around the perimeter for areas prone to heavy rain. This will help maintain the integrity of your shelter throughout the seasons.
Another practical tip involves selecting the right materials for the foundation itself. Opt for permeable pavers, which allow water to pass through, reducing runoff and enhancing drainage. If you’re an experienced DIY enthusiast, consider incorporating a rain garden adjacent to the shelter, which not only adds aesthetic value but also naturally absorbs excess water. By combining these elements, you’ll create a resilient, weatherproof outdoor space that can withstand even the heaviest downpours.
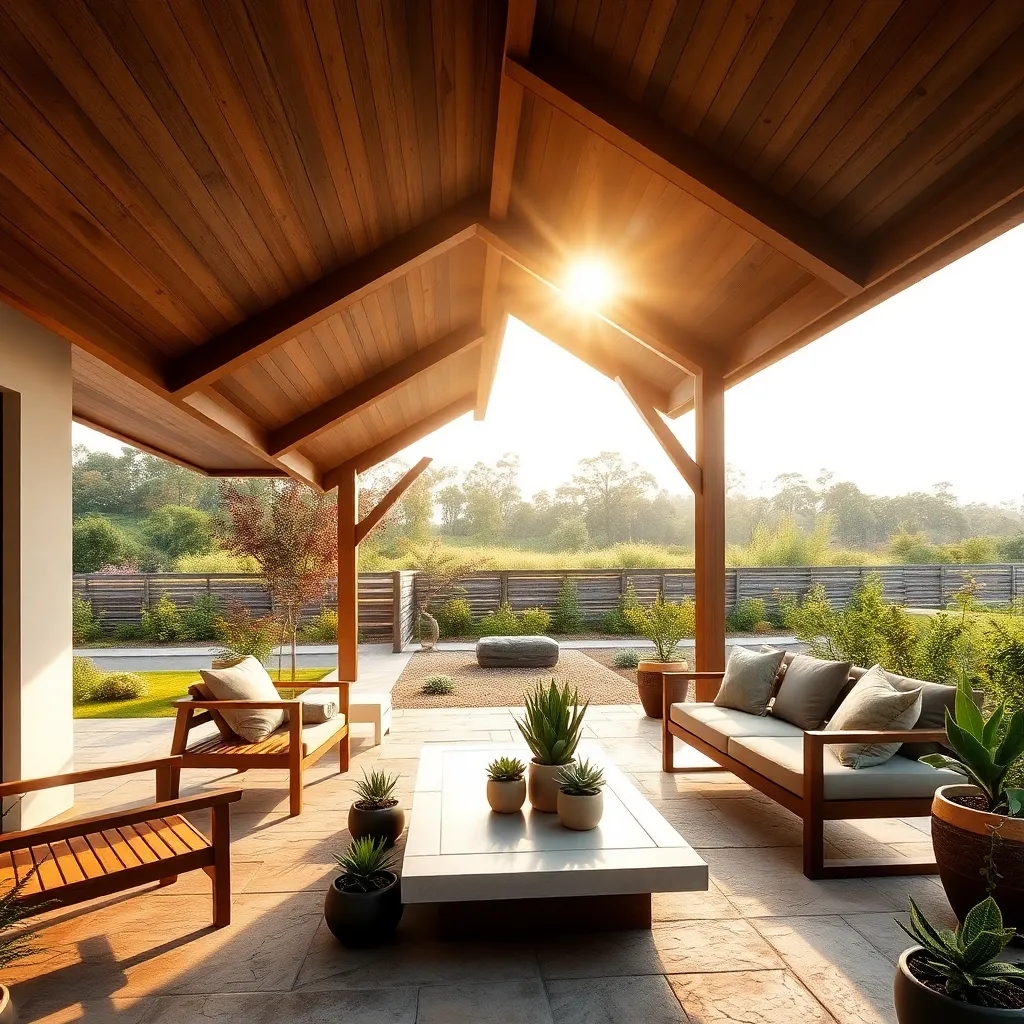
Utilize Natural Landscapes for Shelter
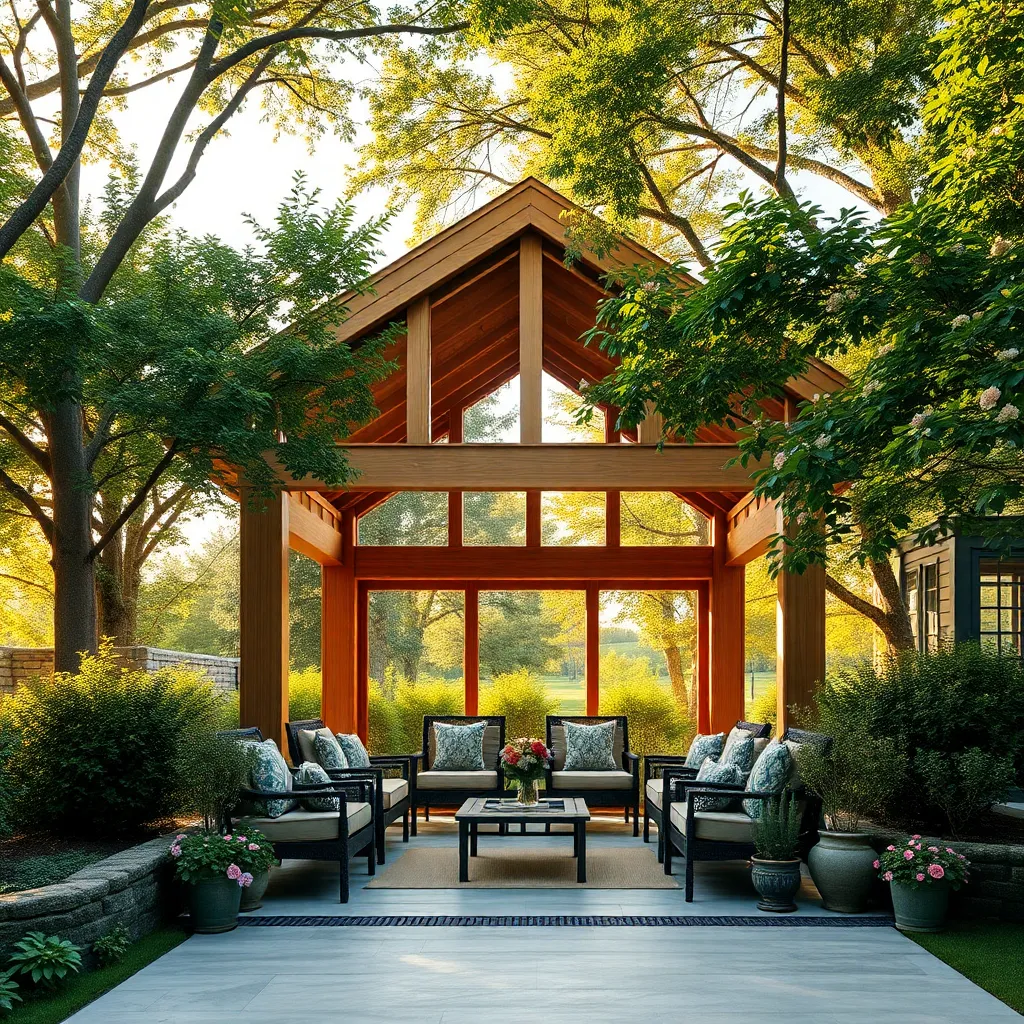
Leveraging existing natural landscapes can significantly enhance your outdoor shelter projects. Consider using an existing tree canopy to provide natural shade, reducing the need for additional roofing materials. Carefully choose durable materials like stone or wood for your structure to seamlessly integrate with the surroundings. For beginners, start with simple designs like a pergola or gazebo that complements the landscape. Advanced builders might incorporate natural rock formations as part of the shelter’s foundation or walls, adding both stability and aesthetic appeal.
Incorporate elements such as native plants and shrubs to create windbreaks, providing additional protection from the elements. When selecting these plants, aim for species that thrive in your local climate for minimal maintenance. Advanced gardeners can design multi-layered plantings that enhance biodiversity and shelter efficiency. Consider using natural materials like bamboo or willow for constructing walls or fences, which can blend beautifully with the landscape. By working with nature, you can create a sustainable and visually appealing shelter that stands up to the weather.
Apply Weatherproofing Sealants Regularly

Regularly applying weatherproofing sealants is crucial for maintaining the integrity of your outdoor shelter. These sealants help protect against moisture, UV damage, and temperature fluctuations, ensuring your structure remains durable and visually appealing. For beginners, start with a basic silicone-based sealant that provides excellent waterproofing and flexibility. Advanced gardeners might consider polyether-based sealants, known for their superior adhesion and resistance to harsh weather conditions.
Begin by cleaning the surfaces thoroughly to remove any dirt or old sealant. Apply sealant every 12 to 24 months, depending on your local climate and the shelter’s exposure to elements. Use a caulking gun for precise application, focusing on seams, joints, and any areas susceptible to water ingress. Opt for a clear or tinted finish to match your design aesthetic and enhance the natural beauty of wood or other materials. By incorporating this simple maintenance step, you’ll extend the life of your shelter and keep it looking pristine.
Incorporate Ventilation for Airflow
Ensuring proper ventilation in your outdoor shelter is crucial for maintaining air quality and preventing moisture buildup. Consider incorporating vents or louvers into the design to allow hot air to escape, especially in enclosed structures like gazebos or pergolas with solid roofs. For beginners, using pre-made vents made of durable materials like aluminum or PVC can simplify installation. Position these vents near the roofline or on opposite walls to facilitate cross-ventilation, keeping your shelter comfortable and dry.
For a more advanced approach, consider integrating ventilated roof panels or ridge vents, which can be particularly effective in larger structures. These elements can be subtly incorporated into the roof design without compromising aesthetics. Use materials such as treated wood or metal with a powder-coated finish to ensure longevity and resistance to weather conditions. By paying attention to airflow, you not only enhance comfort but also extend the lifespan of your outdoor shelter, making it a welcoming space year-round.
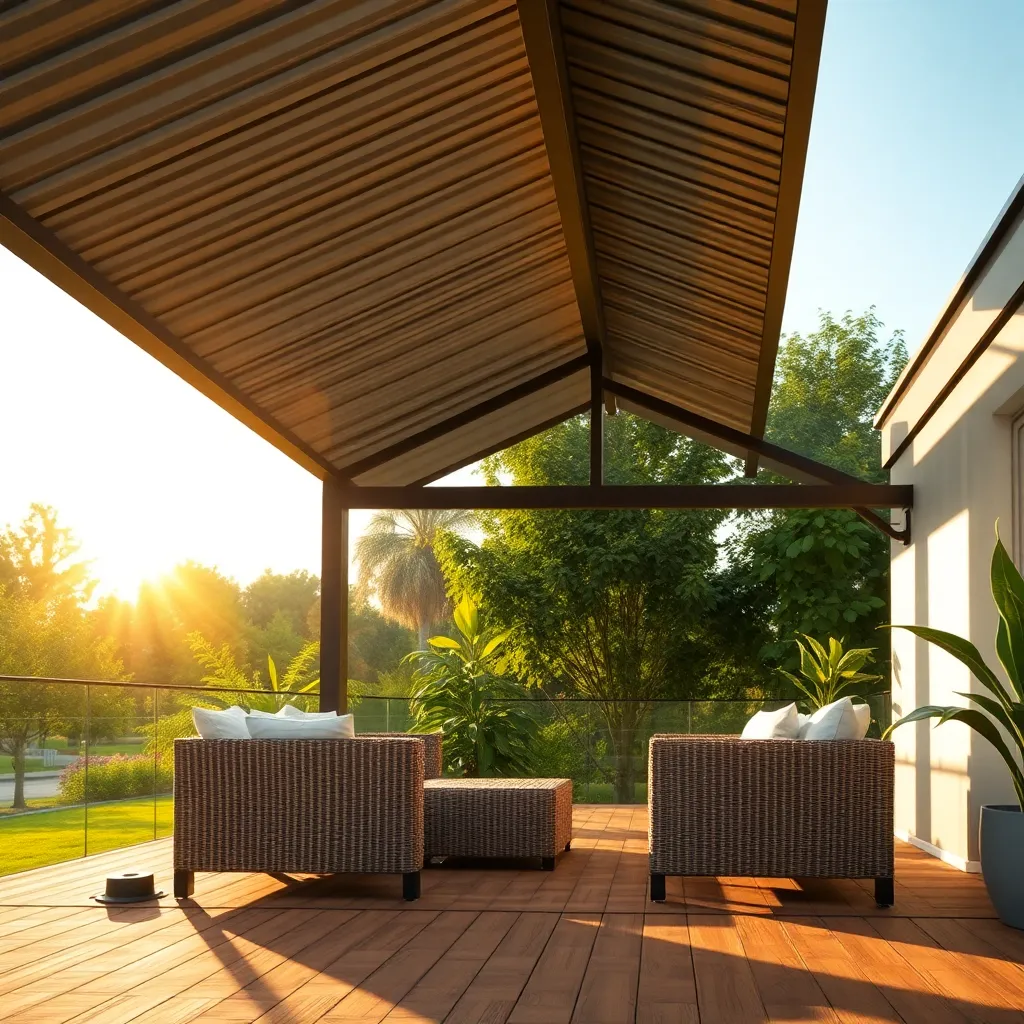
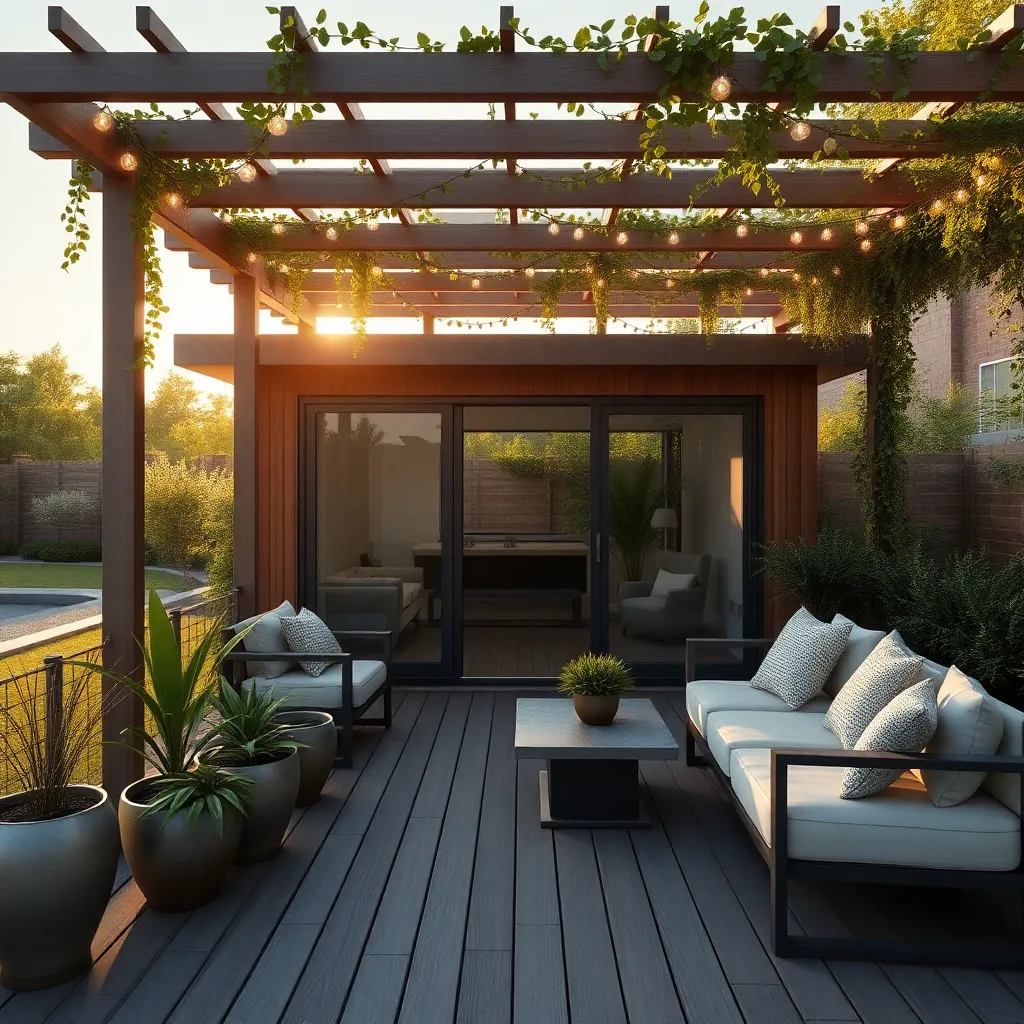
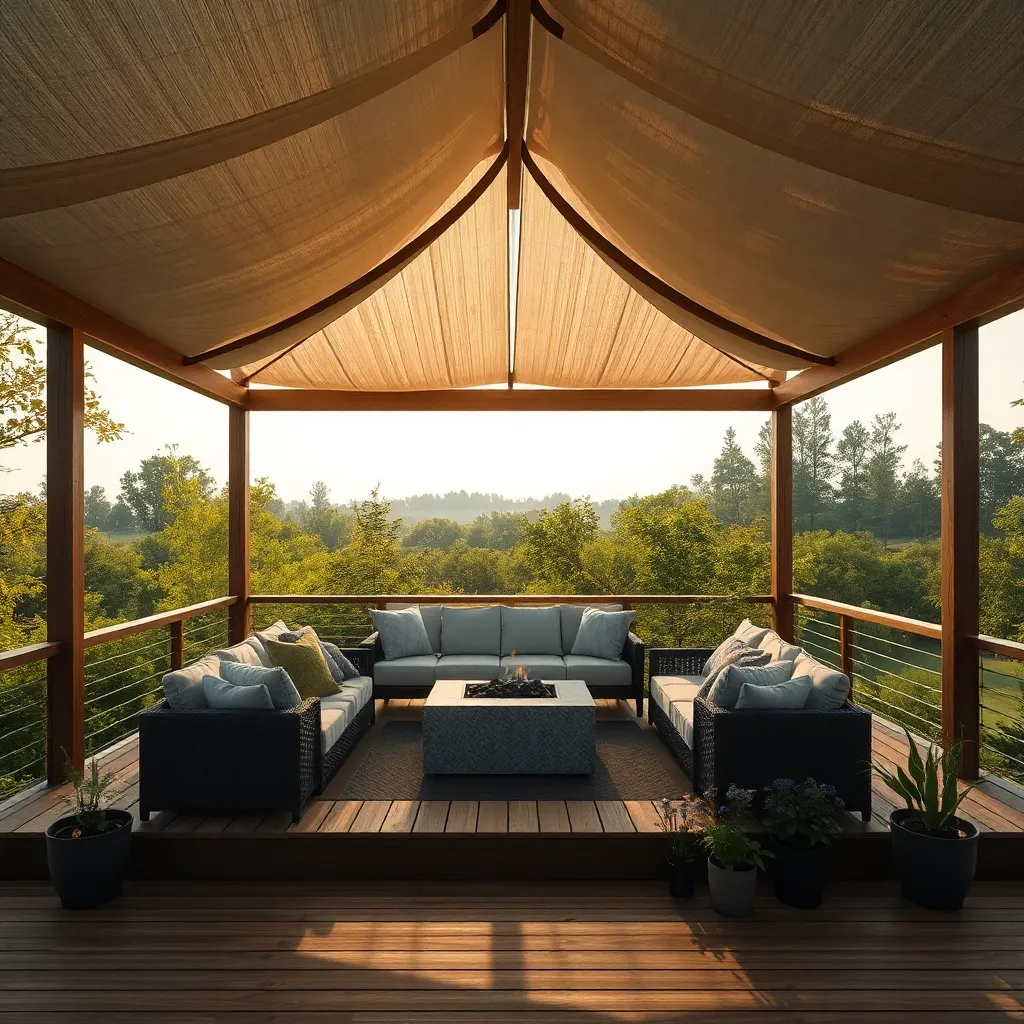
Design Flexible, Multi-Use Spaces
Creating flexible, multi-use outdoor spaces is an excellent way to maximize utility and enjoyment in your garden or backyard. Start by considering modular furniture options, such as weather-resistant wicker or aluminum that can be easily rearranged to suit different needs. Incorporate retractable features like awnings or pergola covers to effortlessly transition between open-air and sheltered settings, allowing you to adapt to changing weather conditions with ease.
Think about adding movable partitions or screens to create distinct areas within your space, such as a dining nook or a relaxing reading corner, while still maintaining a cohesive design. For added versatility, install outdoor power outlets strategically to accommodate everything from cooking appliances to entertainment systems. By integrating these adaptable elements, you can ensure your outdoor area remains functional and inviting throughout the year.
Implement Thermal Insulation Strategies
To enhance the comfort of your outdoor shelter, consider implementing thermal insulation strategies that cater to varying weather conditions. Start by selecting insulating materials like fiberglass or rigid foam boards to line the walls and roof. These materials are effective in maintaining a stable internal temperature, reducing heat loss in winter and keeping the shelter cool during summer. For a more natural look, consider using straw bales or sheep’s wool, which are both sustainable and efficient insulators.
Incorporating thermal insulation doesn’t have to be complex. You can add thermal curtains or insulated panels that can be easily attached and removed, providing flexibility to adjust for seasonal changes. For additional warmth, consider integrating a radiant floor heating system, especially if your shelter includes a solid foundation. These systems are energy-efficient and offer a luxurious touch to your outdoor space. Remember, even simple measures like sealing gaps and installing weatherstripping around doors and windows can significantly improve insulation.
Employ Raised Flooring for Flood Zones
To effectively protect your shelter in flood-prone areas, consider employing raised flooring techniques. This design strategy not only elevates the structure above potential floodwaters but also enhances ventilation underneath, reducing moisture accumulation. Beginners can start by using pressure-treated wood or composite decking materials, which are durable and resistant to water damage. For added stability, ensure your raised platform is supported by concrete piers or helical piles, spaced approximately 6 to 10 feet apart, depending on the shelter’s size.
Advanced builders might explore using adjustable steel pedestals, allowing for easy leveling on uneven terrain. Integrating a drainage system beneath the raised floor can further protect your shelter by channeling water away effectively. Consider adding skirting around the base to prevent debris buildup and enhance aesthetic appeal. By adopting these construction techniques, you can create a resilient outdoor space that withstands harsh weather conditions while maintaining an inviting atmosphere.
Conclusion: Creating Beautiful Outdoor Spaces
In exploring the 14 innovative weatherproof shelter ideas, we’ve delved into key relationship concepts such as resilience, adaptability, communication, trust, and creativity. Just as a sturdy shelter provides comfort and safety amidst unpredictable weather, these principles fortify and sustain our relationships through life’s inevitable storms. By integrating these concepts, we cultivate a foundation that withstands challenges and nurtures growth.
Now, take an actionable step by choosing one concept to focus on this week. Whether it’s enhancing communication or building trust, commit to a small, meaningful change that can significantly impact your relationship’s health.
Remember, this article serves as a toolkit for your relationship journey. Bookmark it for future reference, ensuring that you can revisit these insights whenever needed. Empower yourself with the knowledge that successful relationships are built on continuous effort, understanding, and love.
Looking ahead, envision a future where your relationship thrives, buoyed by the strength of these weatherproof strategies. With each step, you are crafting a bond that is not only enduring but deeply fulfilling. Save this article as your go-to resource, and embrace the path to lasting relationship success.