
Imagine stepping into your backyard and feeling as if you’ve entered your own private oasis, a space that reflects your creativity and meets your needs without breaking the bank. Whether you’re a newcomer eager to dip your toes into the world of outdoor projects or a seasoned pro looking to add fresh charm to your space, “14 Budget-Friendly Shelter Ideas for Your Next Project” is here to inspire and guide you.
With this guide, you’ll discover an array of innovative and cost-effective solutions that promise to transform your outdoor area into a haven of comfort and style. From enhancing your home’s aesthetic to providing practical protection from the elements, these ideas offer the joy of a beautiful outdoor living space. Get ready to feel empowered and confident as you embark on creating a delightful retreat right outside your door.
Utilize Recycled Materials Creatively
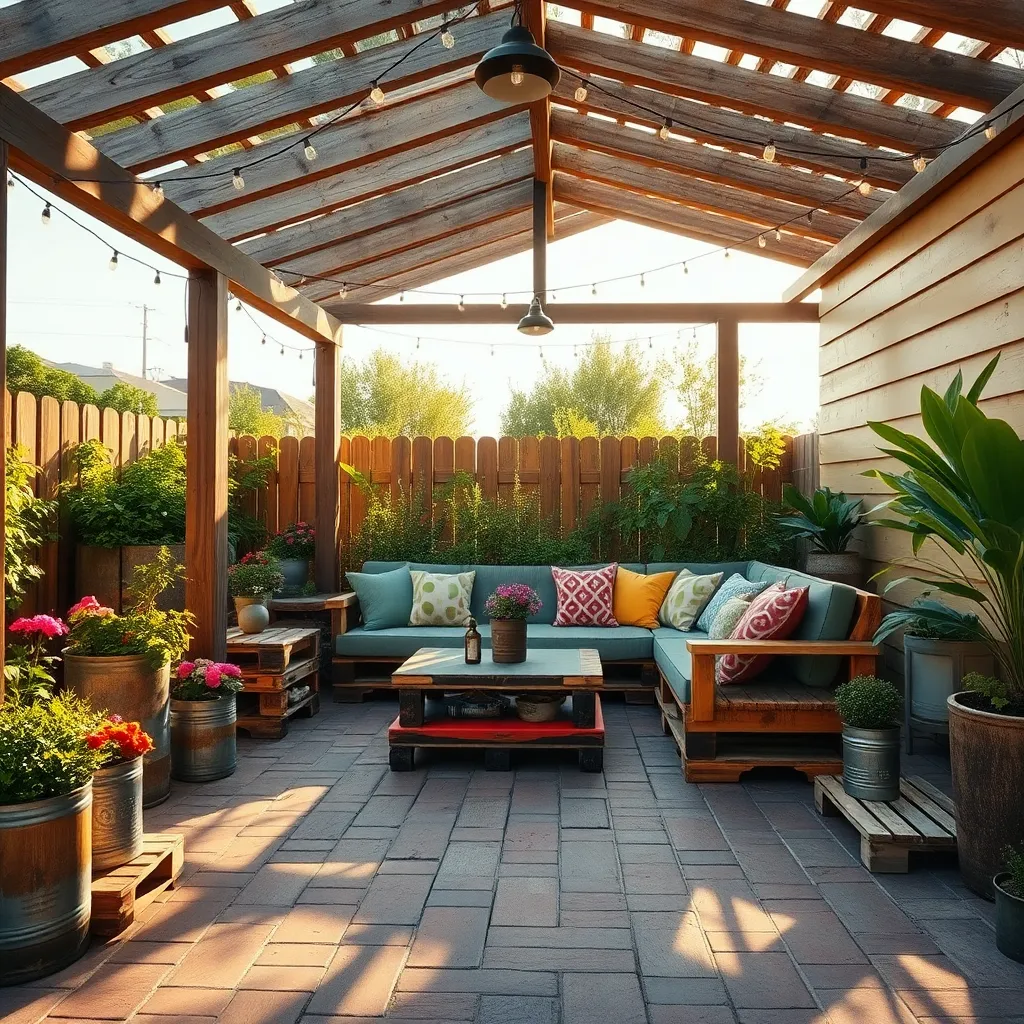
One way to build an outdoor shelter without breaking the bank is to utilize recycled materials creatively. Start by sourcing old wooden pallets, which can be transformed into the framework for a simple pergola or gazebo. Ensure the pallets are in good condition and sand them down to avoid splinters. For a sturdy structure, use weather-resistant screws to assemble the pallets into walls or a roof, and consider adding a coat of sealant to protect against the elements.
Advanced builders might explore using reclaimed metal sheets or salvaged windows for unique roofing or wall panels. Metal sheets can be cut to size and attached with rivets or screws, providing a durable and weatherproof cover. Alternatively, old windows can create a greenhouse effect, offering shelter while letting in natural light. When using glass, be sure to reinforce with wooden or metal frames for added stability. These materials not only reduce waste but also add character and charm to your outdoor space.
Incorporate Pallet Wood Structures

Transforming pallet wood into a functional shelter is an economical way to create a cozy outdoor space. Select sturdy pallets, typically made from hardwoods like oak or maple, which can withstand the elements better than softer woods. Start by dismantling the pallets to use the planks for walls and roofs. For a simple setup, consider constructing a lean-to design by attaching the planks to a wooden frame. Beginners should focus on using basic tools like a hammer and nails, while more experienced DIYers might incorporate power tools for precision and speed.
To enhance durability and appearance, seal the wood with a weather-resistant finish. This not only prolongs the life of the structure but also adds to its aesthetic appeal. Consider adding a corrugated metal or polycarbonate sheet roof to ensure the shelter remains waterproof. For an advanced touch, integrate shelving or a small bench using the leftover wood pieces. Remember to sand all surfaces thoroughly to prevent splinters and ensure a smooth finish. These measures will help you create a robust, attractive outdoor shelter that fits seamlessly into any garden setting.
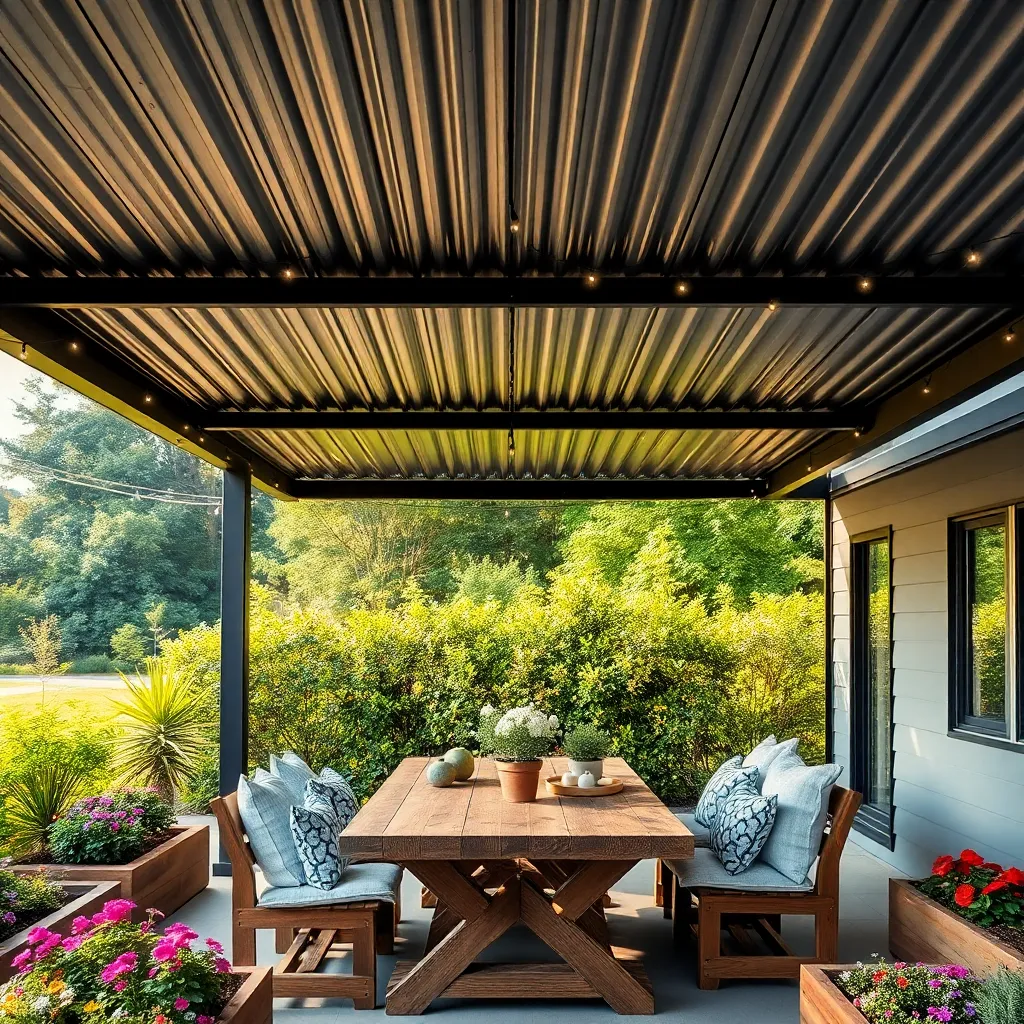
Choose Durable Tarps for Roofing
When selecting tarps for roofing, prioritize durability to ensure your shelter withstands the elements. Opt for heavy-duty tarps made from materials like polyethylene or vinyl, which are known for their resilience and weather resistance. For added protection, choose tarps with reinforced corners and UV resistance, especially if your shelter will be exposed to prolonged sunlight.
Consider the size and coverage area to avoid gaps that might let in rain or wind. Secure your tarp with bungee cords or sturdy rope, looping through grommets for a tight fit. For a more advanced setup, you can install a slight pitch in your structure to help water run off efficiently, reducing the risk of pooling. This practical approach not only extends the life of your shelter but also provides a reliable, budget-friendly roofing solution.
Build with Lightweight PVC Pipes
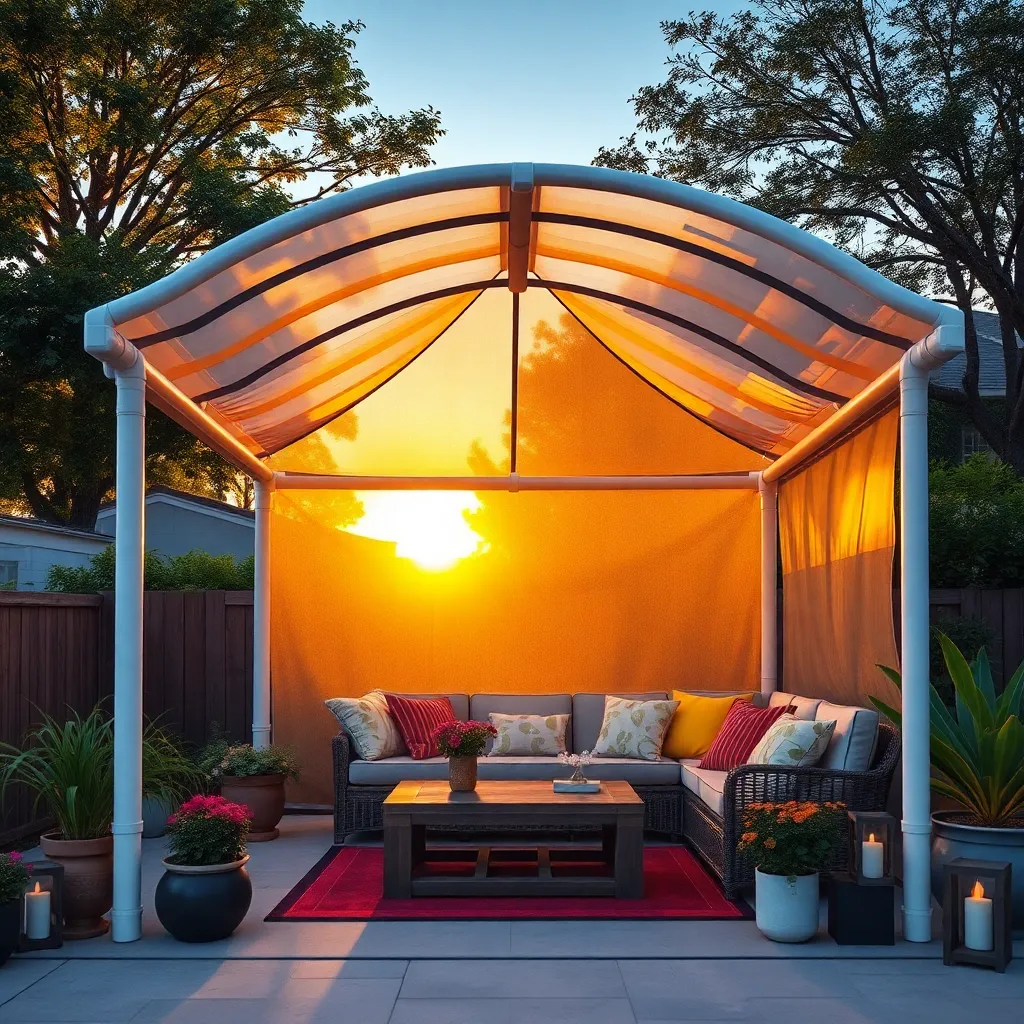
Building an outdoor shelter with lightweight PVC pipes is an excellent choice for a budget-friendly project. PVC pipes are easy to handle, cut, and assemble, making them perfect for DIY enthusiasts. Start by choosing pipes with a diameter of 1 to 1.5 inches for a sturdy framework. Use PVC connectors to assemble the frame in your desired shape, such as a simple rectangular or dome structure. Ensure the base is securely anchored into the ground using rebar stakes or sandbags for added stability.
Incorporate design elements like detachable joints to allow easy disassembly and storage when not in use. Cover the structure with durable materials like UV-resistant tarps or shade cloth to protect against sun and rain. For a more advanced touch, consider adding cross-bracing for extra strength or using spray paint to match the structure to your home’s aesthetic. With these simple techniques, you can create a functional and attractive outdoor shelter that suits various needs, from garden shade to a cozy outdoor reading nook.
Employ Tensioned Fabric Canopies
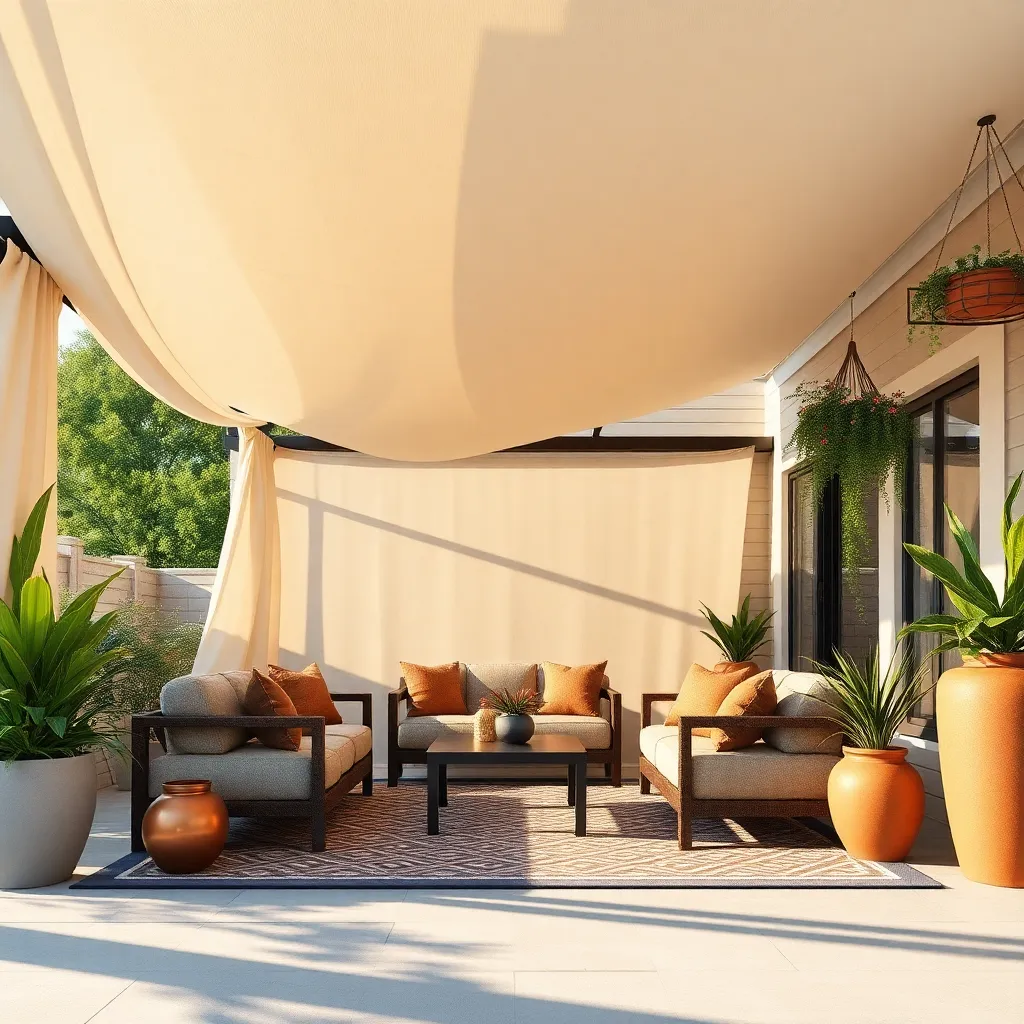
Consider employing tensioned fabric canopies to create a versatile and budget-friendly outdoor shelter. These canopies are ideal for providing shade while adding a modern touch to your garden or patio. For beginners, start with a simple design using UV-resistant fabric tensioned over a sturdy frame. Attach the fabric using eyelets and bungee cords to secure it tightly, ensuring it remains taut and can withstand wind.
For those seeking a more customized solution, explore various canopy shapes such as triangular or rectangular designs to suit your space. Use durable materials like stainless steel or aluminum poles for the structure, which offer longevity and stability. Consider incorporating adjustable tensioning systems to easily adapt the canopy to changing weather conditions. Whether you’re hosting a summer barbecue or simply relaxing outdoors, a tensioned fabric canopy can transform your space into a comfortable and stylish retreat.
Construct with Corrugated Metal Sheets
Constructing an outdoor shelter with corrugated metal sheets offers a durable and budget-friendly solution for homeowners. To begin, choose high-quality galvanized steel or aluminum sheets, which are not only rust-resistant but also lightweight. Measure the area you intend to cover and calculate the number of sheets required, considering overlap for added stability. For a basic project, a simple lean-to design using a wooden or metal frame can provide excellent protection from the elements. Attach the sheets with self-tapping screws, ensuring they are securely fastened to withstand wind and weather.
For those looking to add a touch of style, consider painting the metal sheets with weather-resistant paint for a pop of color. Enhance the functionality by installing gutters along the edge to channel rainwater away from your outdoor space. Advanced DIY enthusiasts might explore incorporating translucent panels to allow natural light while maintaining shelter.
- Ensure proper safety gear, like gloves and goggles, when handling metal sheets.
- Use a spirit level to maintain even alignment during installation.
With these steps, you’ll create a practical and attractive outdoor shelter that complements any garden or patio setting.
Design with Modular Shipping Containers
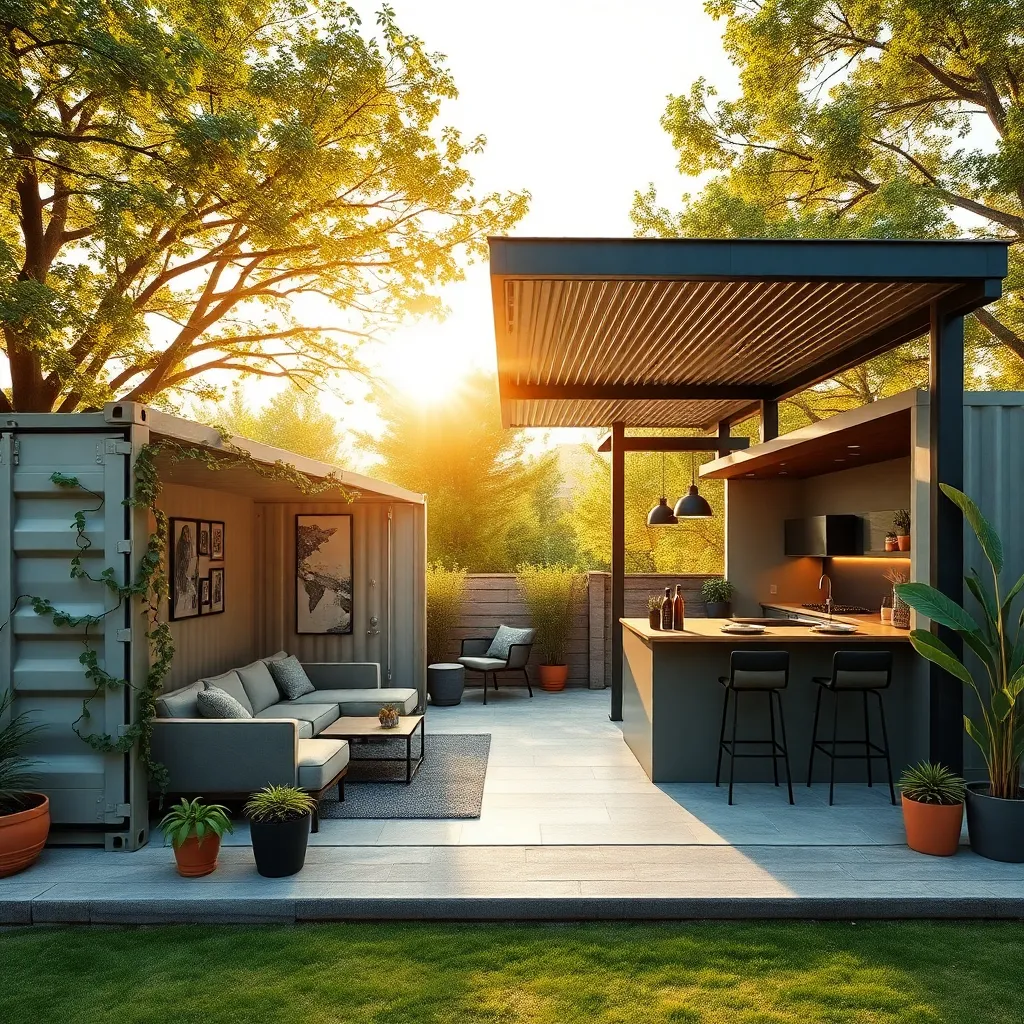
Utilizing modular shipping containers as an outdoor shelter is a practical and modern choice, combining durability with flexibility. These containers offer a robust steel structure that can withstand harsh weather conditions, making them ideal for diverse climates. Begin by selecting a standard container size, such as 20-foot or 40-foot, based on your space and needs. Ensure the container is well-ventilated and consider adding insulation to manage temperature extremes. For beginners, starting with a single container and expanding over time can be a practical approach.
Transforming a shipping container into a functional shelter involves a few key design elements. Windows and doors should be strategically placed to maximize natural light and airflow. Consider installing sliding glass doors and skylights to enhance the interior ambiance. For a more advanced touch, integrate solar panels on the roof to create an eco-friendly energy source. Using reclaimed wood or metal for interior finishes adds character without breaking the budget. With thoughtful planning, these containers can be customized to suit any style or purpose, from a cozy retreat to a spacious workshop.
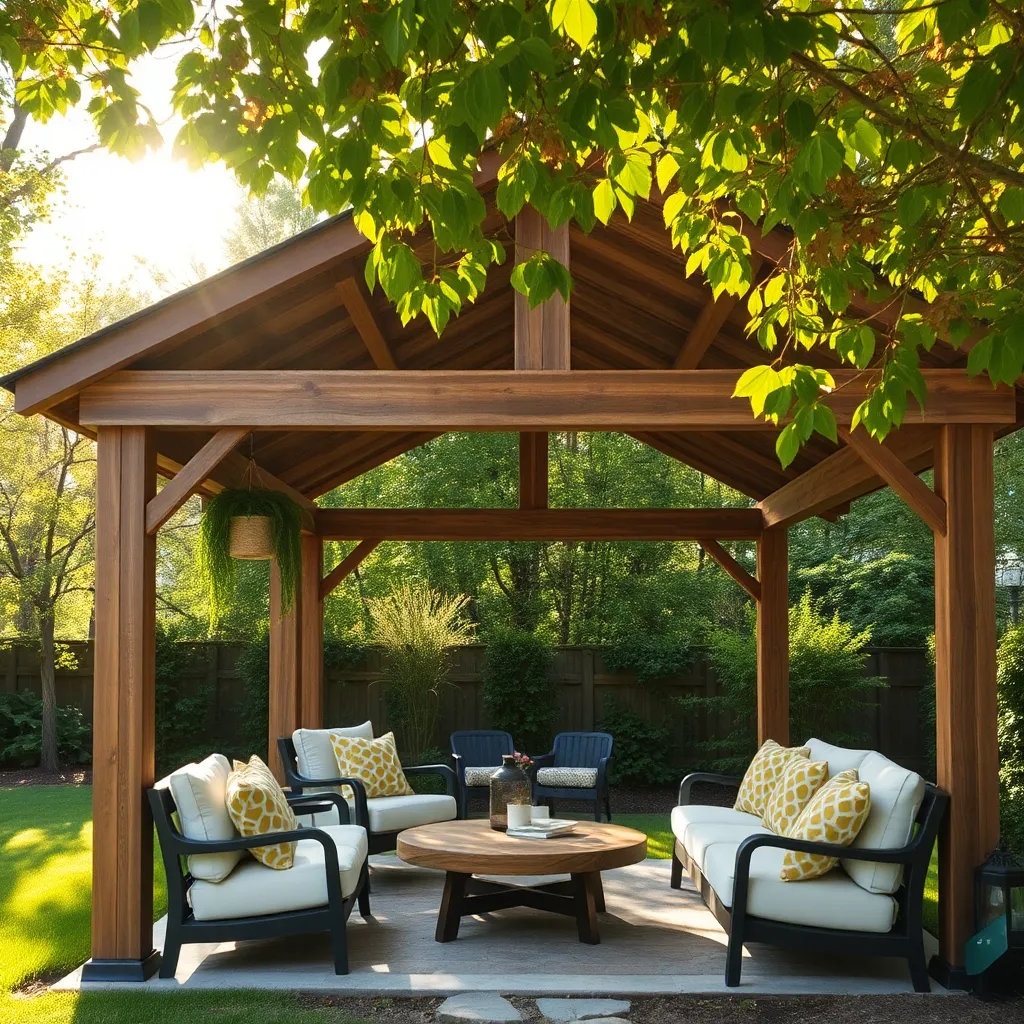
Opt for Bamboo as Framework

Bamboo is an excellent choice for outdoor shelter frameworks due to its strength, flexibility, and sustainability. For a simple yet effective design, consider using thick bamboo poles as the main supports, spaced approximately 3 to 4 feet apart, depending on the size of your shelter. Secure them firmly into the ground using metal brackets or concrete footings for added stability. Beginners can start with a basic rectangular structure, while more experienced builders might experiment with hexagonal or circular designs for a unique aesthetic.
When constructing your bamboo framework, it’s essential to treat the bamboo with a protective sealant to enhance its durability against weather elements. Join the bamboo poles with natural jute rope or metal connectors for a sturdy yet eco-friendly approach. For added functionality, consider incorporating a thatched or fabric roof, which can be mounted using simple crossbeams. Advanced builders might integrate adjustable panels or retractable awnings to provide flexible shade options. This approach not only ensures a cost-effective build but also adds a natural and exotic flair to your outdoor space.
Repurpose Old Doors as Walls
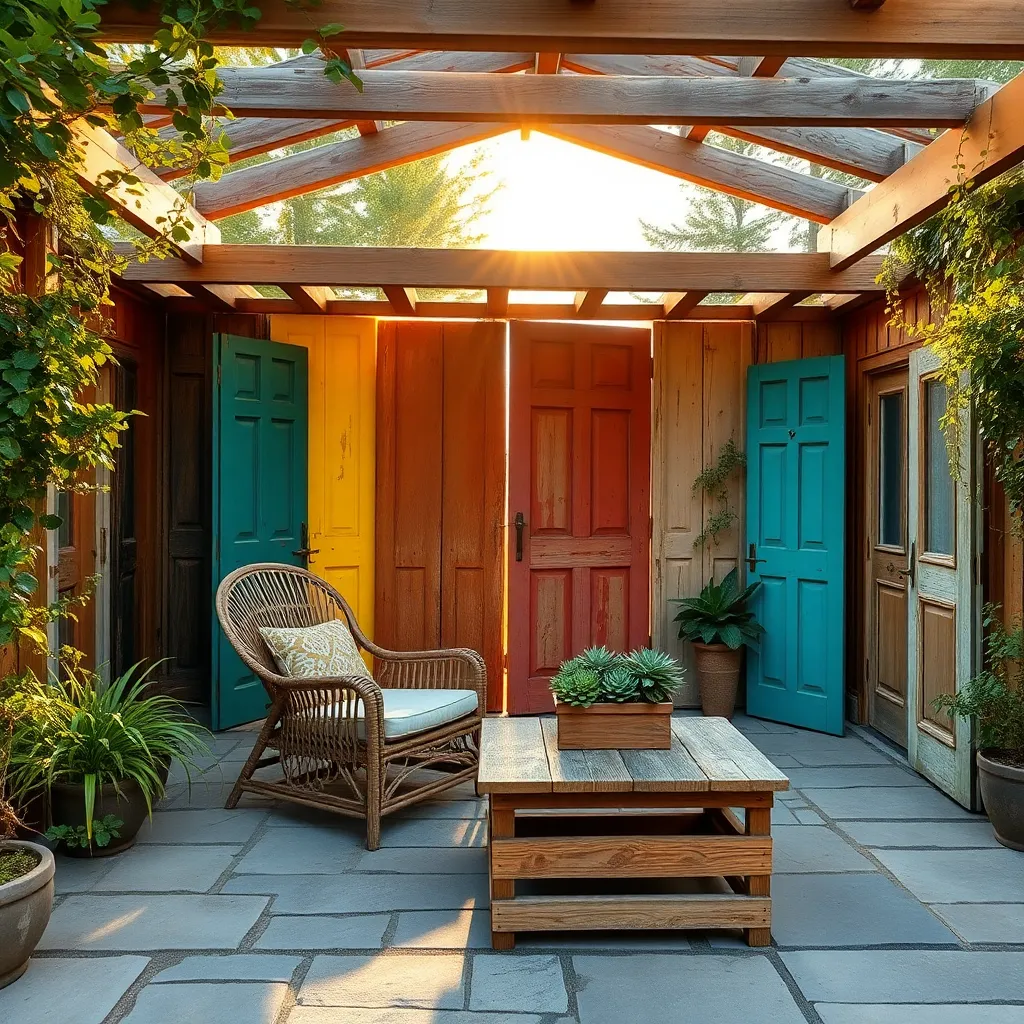
Repurposing old doors as walls for your outdoor shelter is a creative and budget-friendly option that adds character and charm. Begin by sourcing sturdy, solid-core doors from salvage yards, thrift stores, or online marketplaces. Ensure the doors are free from rot and structurally sound. Sand them down and apply a weather-resistant sealant to protect against the elements. For a more cohesive look, consider painting each door in a similar color palette or using a weathered finish for a rustic aesthetic.
When constructing your shelter, position the doors vertically and secure them with robust hinges or brackets, ensuring stability and safety. Anchor them into the ground using metal stakes or a concrete base for added durability. Advanced DIYers can incorporate additional design elements like window cutouts or shelving units between doors for extra functionality. This project not only recycles materials but also creates a unique and inviting space perfect for relaxing in your garden.
Secure Shelters with Ground Anchors
To ensure your outdoor shelter withstands the elements, secure it with ground anchors. Ground anchors provide stability by firmly rooting the structure to the ground, which is essential for areas prone to high winds or unstable soil. For a basic setup, use auger-style anchors made from galvanized steel or heavy-duty plastic, which are both cost-effective and durable. Simply twist these anchors into the ground at each corner of your shelter, ensuring they penetrate at least 12 inches deep for optimal stability.
For those looking to add a professional touch, consider using concrete anchors. These are ideal for larger structures or when extra security is desired. Start by digging holes at each corner of your shelter, roughly 18 inches deep, and pour a small concrete footing. Insert a J-bolt into the wet concrete, leaving enough exposed to attach your shelter frame securely. Once the concrete cures, attach the frame using heavy-duty bolts, ensuring your shelter is ready to face any weather with confidence.
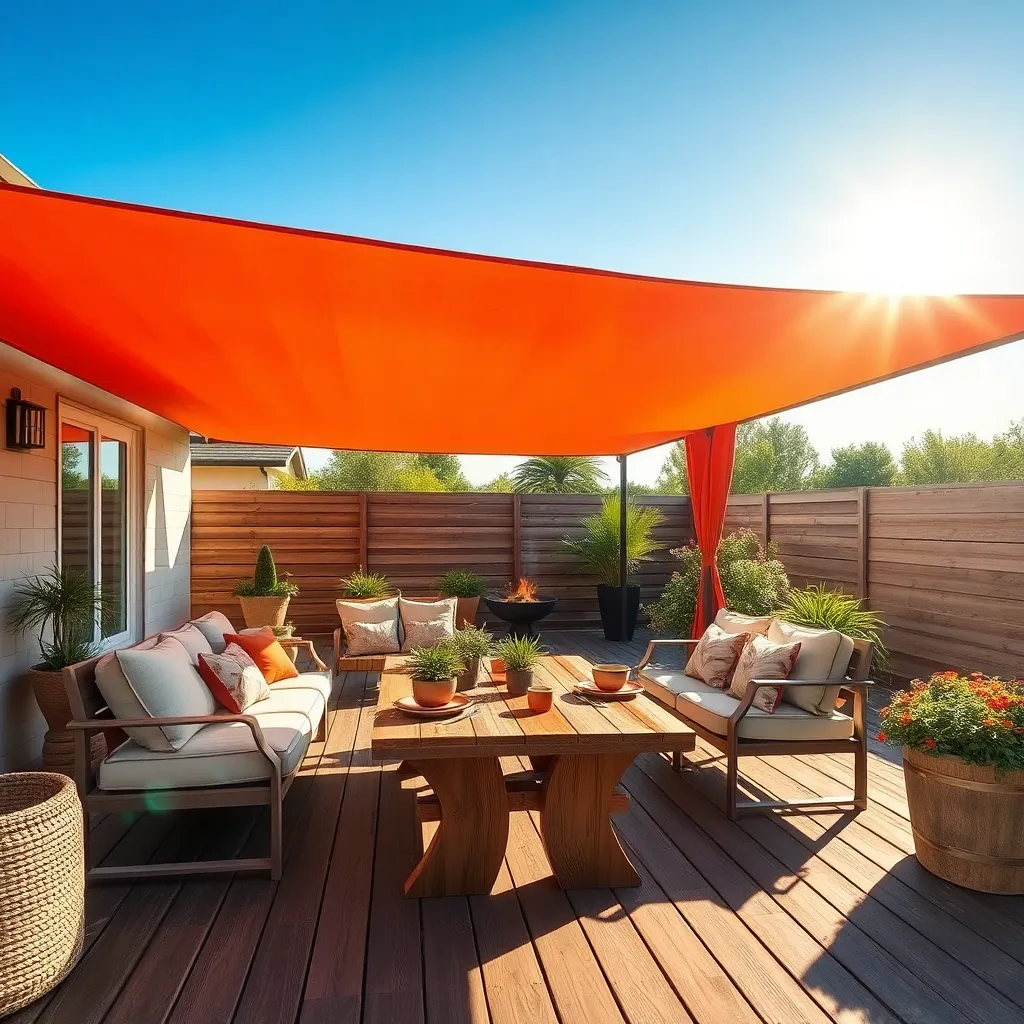
Add Shade with Sun Sail Kits
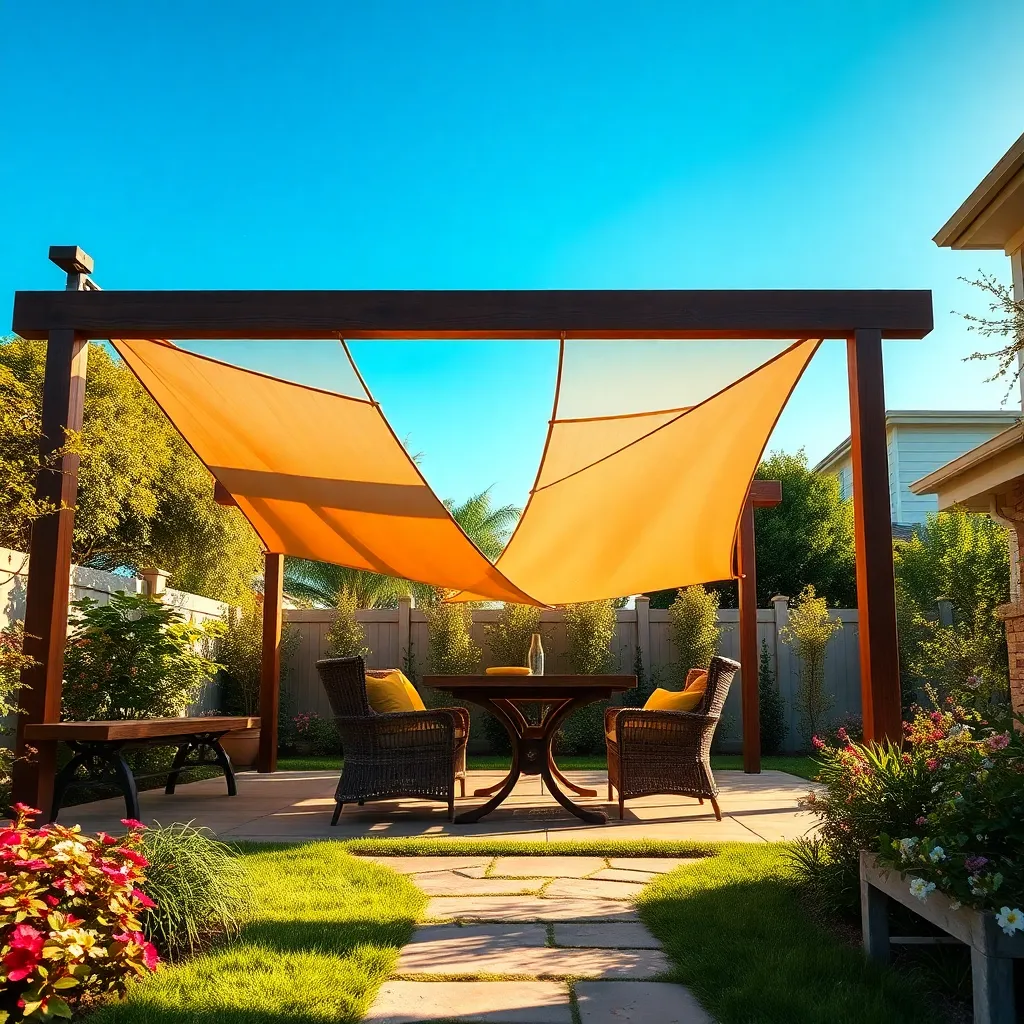
Adding shade to your outdoor space can be both stylish and budget-friendly with sun sail kits. These versatile and easy-to-install options provide a modern aesthetic while offering effective protection from the sun. To start, choose a high-quality, UV-resistant fabric, such as polyethylene or canvas, to ensure durability and longevity. Measure your space accurately, considering a slightly larger sail to allow for sag and tension adjustments. With a variety of colors and shapes available, you can easily find a design that complements your outdoor decor.
Installation is straightforward, making it an ideal project for beginners. Position your sun sail using sturdy anchor points like trees, poles, or your home’s exterior walls. Ensure the sail is installed with a slight slope to allow rainwater to run off easily, preventing sagging. For advanced users, consider using turnbuckles to adjust tension, maintaining a taut and professional look. To maximize effectiveness, install the sail to cover areas most affected by direct sunlight, creating a comfortable and inviting space for relaxation or entertaining.
Use Natural Thatch for Roofing
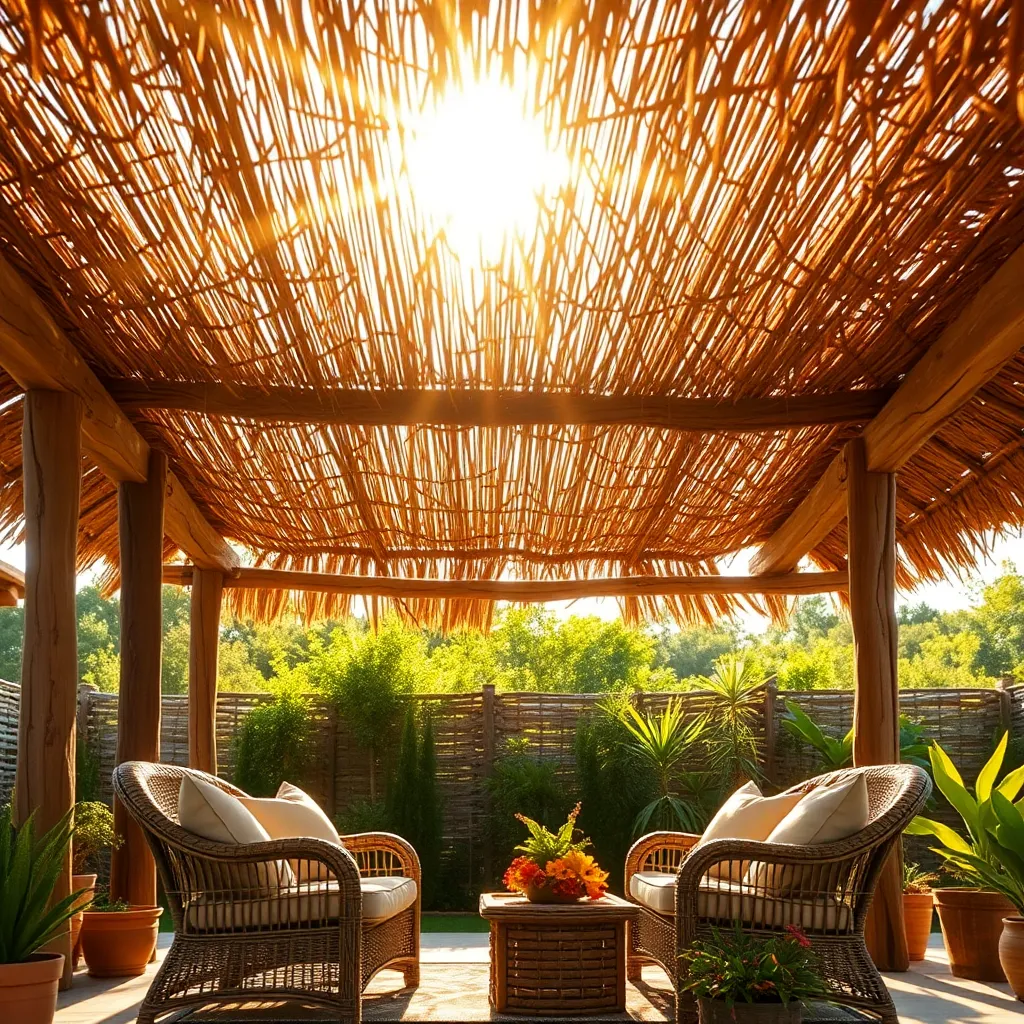
Using natural thatch for roofing is an excellent way to add a rustic touch to your outdoor shelter while remaining budget-friendly. Thatch is typically made from dried reeds, straw, or palm leaves, offering a sustainable solution that’s both durable and visually appealing. For beginners, start with a simple frame made from wooden poles or bamboo, ensuring it’s sturdy enough to support the weight of the thatch. You can layer the thatch materials at a thickness of about 6 to 12 inches to provide effective protection against the elements.
For a more polished look, consider weaving the thatch tightly and securing it with natural twine or wire. This advanced technique not only enhances the shelter’s durability but also its aesthetic appeal. Consider using a waterproof underlayment beneath the thatch to increase moisture resistance, especially in areas with heavy rainfall. When constructing your roof, remember that a steep pitch will allow water to run off more efficiently, reducing potential damage. By following these tips, you can create a charming and functional thatched roof that complements your outdoor space beautifully.
Assemble Portable Pop-Up Gazebos
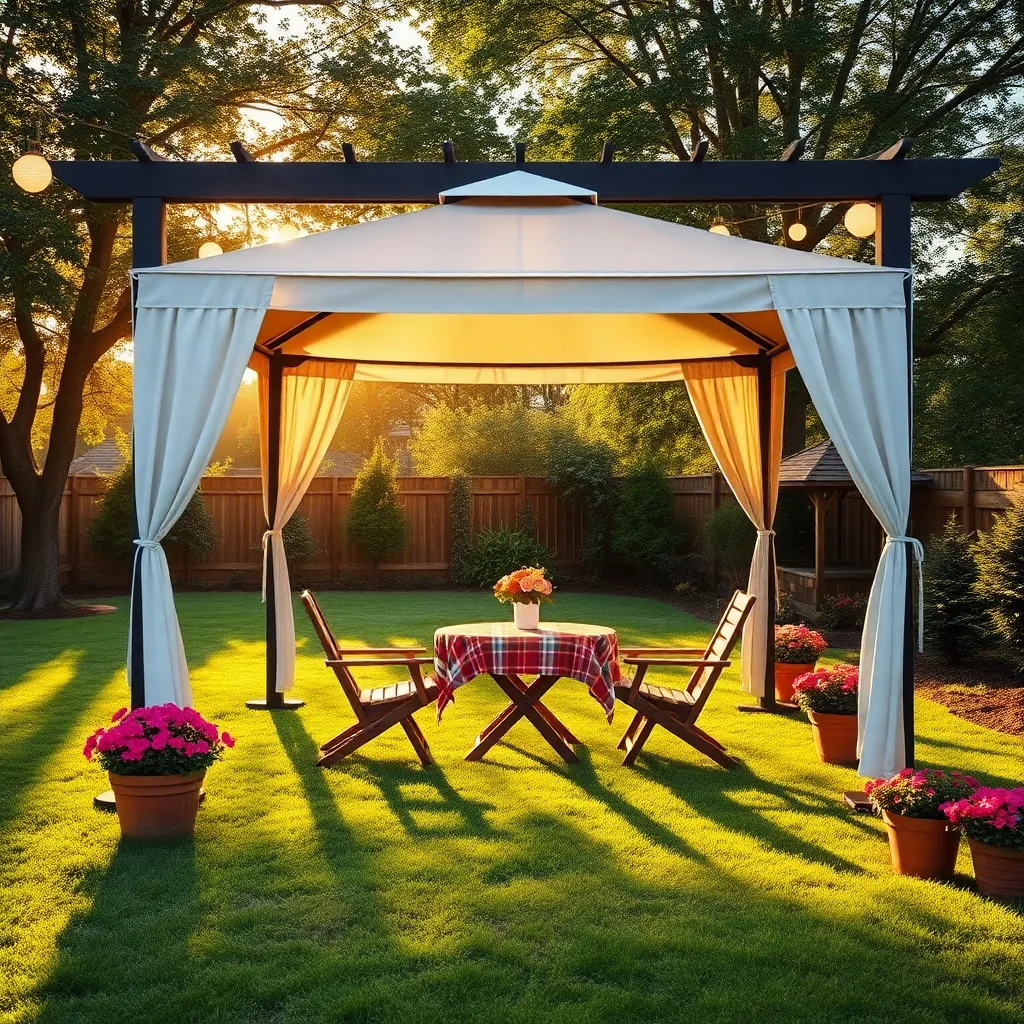
Portable pop-up gazebos are an excellent choice for creating a quick and budget-friendly outdoor shelter. These versatile structures are easy to assemble and provide instant shade and protection from the elements. Start by choosing a gazebo with a sturdy frame made of powder-coated steel or aluminum for durability and rust resistance. When setting up, ensure the canopy is made of weather-resistant polyester fabric, which will help shield against UV rays and rain. For beginners, a 10×10-foot gazebo is a manageable size that fits most backyards.
Experienced DIY enthusiasts can enhance their gazebo’s functionality by adding sidewalls for extra privacy and wind protection. For a more personalized touch, consider adding string lights or hanging planters to enhance ambiance and aesthetic appeal. Secure the gazebo with stakes or weights to keep it steady during windy conditions.
- Use sandbags or water weights for stability on hard surfaces.
- Regularly check for any loose connections or wear on the fabric to prolong the gazebo’s lifespan.
With these tips, you’ll have a practical and stylish outdoor retreat ready in no time.
Implement Rope and Canvas Tents
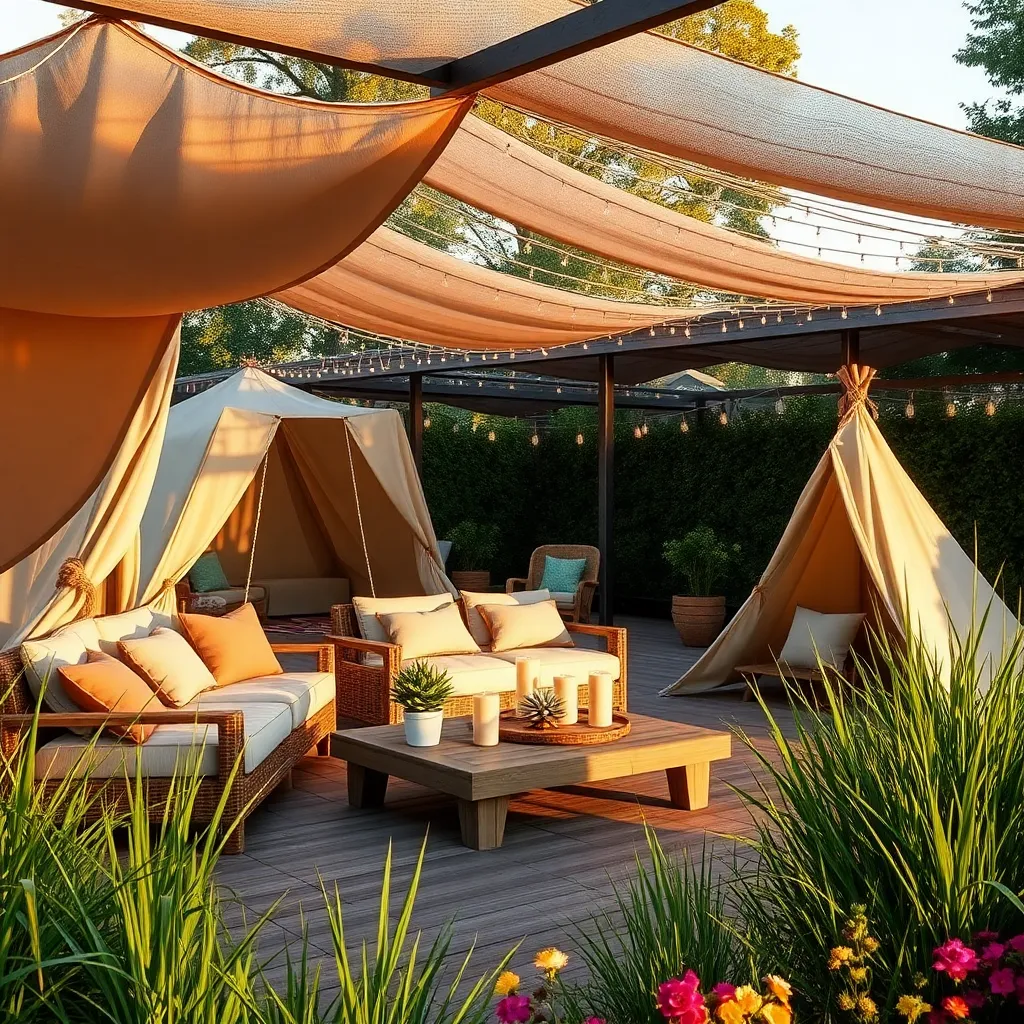
For an affordable and versatile outdoor shelter, consider using rope and canvas tents. This setup involves suspending a durable canvas over a series of ropes tied securely between trees or solid poles. For beginners, a simple A-frame structure is easy to construct: drape the canvas over a central rope and secure the sides with pegs or rocks. Opt for a heavy-duty, weather-resistant canvas to ensure durability, especially in regions prone to rain or strong winds.
For those with more experience, experiment with different shapes like lean-tos or custom designs with multiple layers for added protection. Advanced tip: Incorporate grommets along the edges of the canvas for a neater, more secure installation. Always use quality rope, such as nylon or polyester, for strength and weather resistance. By choosing a neutral or earth-toned canvas, you can seamlessly blend your shelter into the backyard landscape, making it both functional and aesthetically pleasing.
Conclusion: Creating Beautiful Outdoor Spaces
In this article, we explored 14 innovative and budget-friendly ideas to enhance your next shelter project, each designed to foster stronger connections and harmonious living. From embracing minimalistic designs to repurposing materials creatively, these concepts underscore the importance of collaboration, communication, and shared vision in your relationships. We’ve also highlighted the significance of personal spaces that reflect mutual respect and understanding, alongside sustainable choices that echo your shared values.
As a practical next step, consider selecting one idea that resonates with you and your partner, and initiate a conversation on how to incorporate it into your upcoming project. This collaborative effort not only creates a meaningful space but also strengthens your relationship dynamic.
Don’t forget to save or bookmark this article as a handy reference for your journey. These insights can serve as a guiding light, helping you navigate future projects with confidence and unity.
Looking ahead, remember that the key to successful relationships lies in continuous learning and adaptation. By embracing these ideas, you are taking a proactive step towards building a future filled with love, creativity, and mutual growth.