
Transforming your outdoor space into a cozy haven is more than just a home improvement project; it’s an invitation to enhance your lifestyle. Whether you’re a seasoned DIY enthusiast or just beginning your journey into home design, building a covered patio from scratch can be a rewarding endeavor that brings both comfort and value to your home. A well-crafted patio not only extends your living space but also offers a serene retreat to unwind, entertain, and connect with nature without leaving your backyard.
In this guide, we’ll walk you through the essential steps to design and construct a covered patio that suits your style and needs. From selecting the right materials to mastering the art of layout and shelter, you’ll gain the confidence and knowledge to create a personalized outdoor sanctuary. Embrace this opportunity to blend creativity with functionality, and soon, you’ll have a beautiful, shaded oasis that beckons you to spend more time outdoors, no matter the weather.
Plan Patio Layout and Design
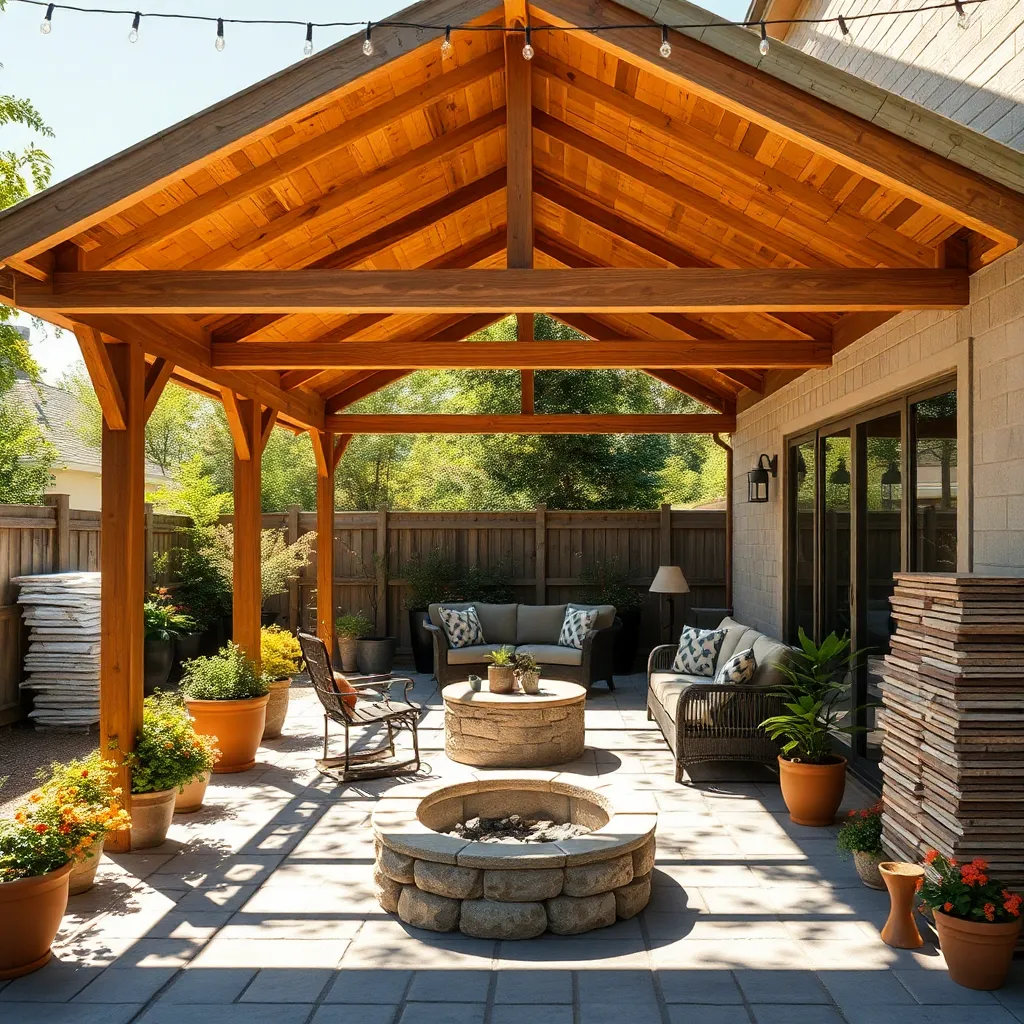
Creating a functional and aesthetically pleasing patio layout begins with determining the primary purpose of your space. Consider how you plan to use the patio—whether for dining, lounging, or entertaining—and allocate space accordingly. For a dining area, ensure at least an 8×10-foot space for a table and chairs, while a lounging area might benefit from a cozy 10×12-foot zone with comfortable seating. Choose durable materials like weather-resistant wood or composite decking to ensure longevity and minimal maintenance.
When designing your patio, think about incorporating multiple levels or zones to add dimension and interest. Use different materials to define these spaces, such as a combination of stone pavers and wooden decking. Ensure a smooth transition between the house and patio by aligning the materials and design elements with your home’s architecture. For a touch of sophistication, consider adding built-in features like a fire pit or planters, using materials that complement your existing landscape. A well-planned layout not only boosts functionality but also enhances your outdoor experience.
Gather Essential Building Materials
Before starting construction on your covered patio, it’s crucial to gather essential building materials. Begin by selecting durable materials suitable for outdoor use, such as pressure-treated lumber or cedar, which resist rot and insects. You’ll need concrete or gravel for stable footings, and consider using metal brackets for added structural support. For the roof, choose materials like polycarbonate panels or metal sheeting that offer both weather protection and aesthetic appeal. Additionally, don’t forget to have the right tools on hand, such as a power drill, saw, level, and measuring tape, to ensure precise construction.
For a polished and long-lasting finish, incorporate design elements that complement your home’s existing architecture. Opt for customizable options like adjustable pergola roofs or removable fabric canopies if you want seasonal versatility. Advanced DIYers might consider incorporating built-in lighting or a gutter system to enhance functionality. Make sure to measure carefully and plan for adequate spacing to accommodate furniture and movement, typically allowing for at least 12×12 feet of covered space for comfort. This preparation ensures that your patio is not only a functional outdoor retreat but also a seamless extension of your living area.
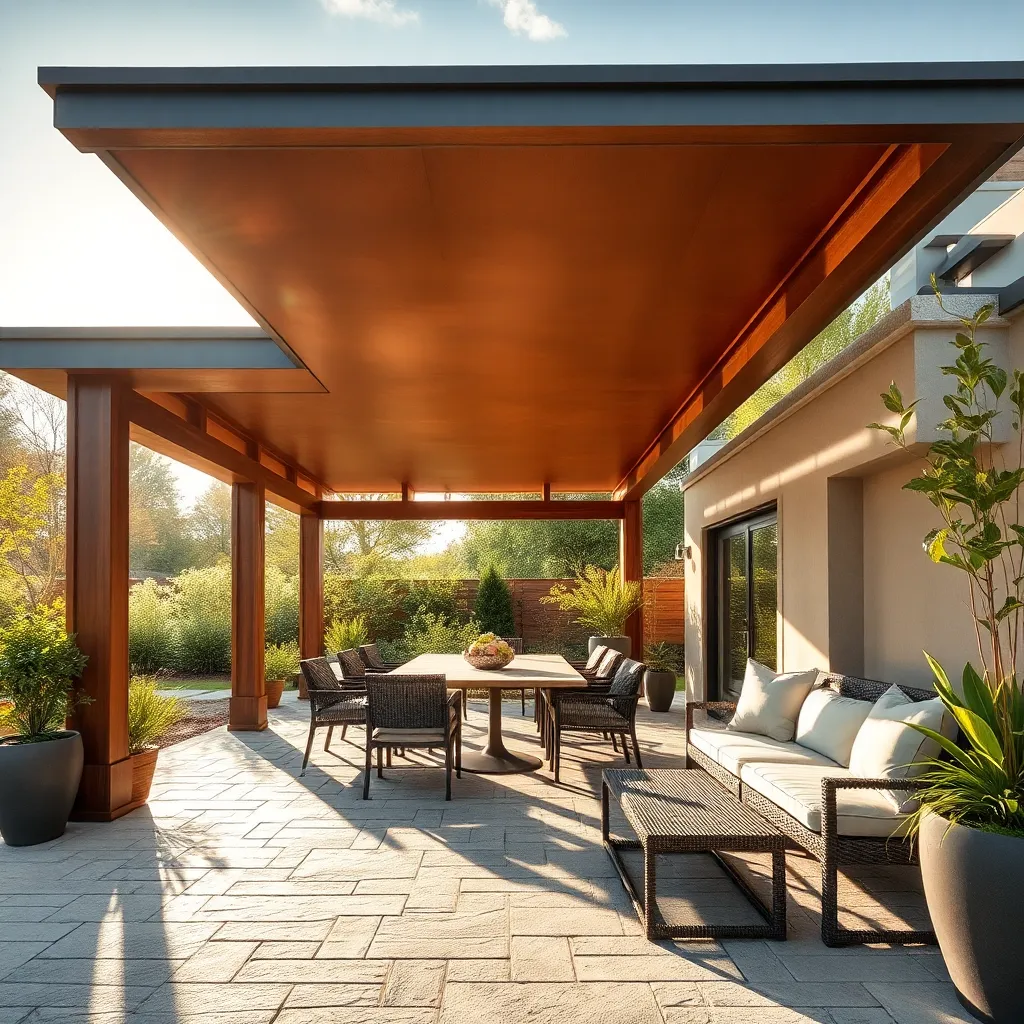
Construct Sturdy Support Framework
To construct a sturdy support framework for your covered patio, begin by selecting high-quality materials such as pressure-treated lumber or steel beams, which are essential for durability and weather resistance. Choose 4×4 or 6×6 posts for the vertical supports, as these provide the necessary strength to hold the weight of the roof. Ensure the posts are securely anchored in concrete footings at least 12 inches deep to prevent shifting or tilting over time. For beginners, using a post hole digger and a level will help achieve precise alignment.
Incorporate cross beams and rafters using 2×6 or 2×8 lumber, spaced 16 to 24 inches apart, to provide strong support for the roofing material. Advanced builders might consider incorporating decorative elements like angled braces or lattice panels for added stability and visual appeal. Ensure all joints are securely fastened with galvanized screws or bolts to prevent corrosion and maintain integrity. For a professional finish, consider using a spirit level and carpenter’s square to ensure all elements are perfectly aligned, offering both aesthetic appeal and structural soundness.
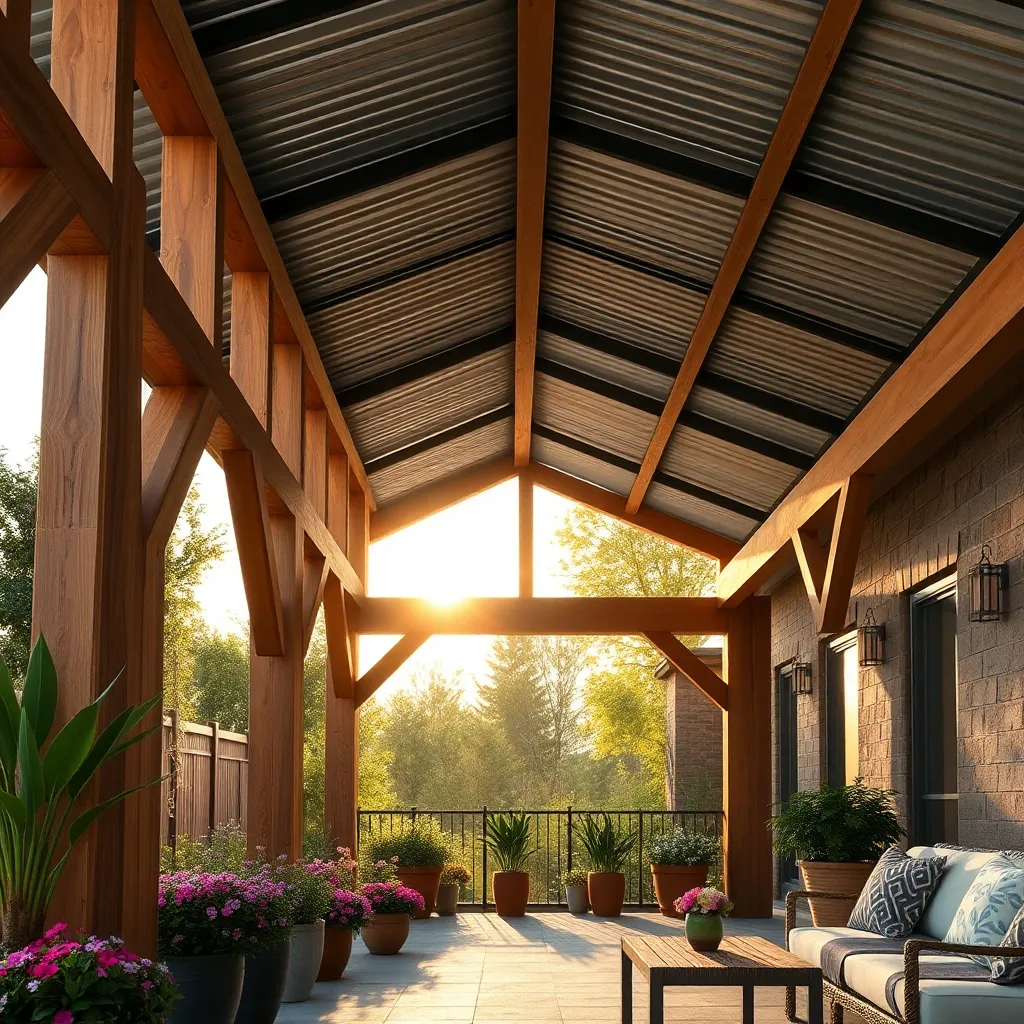
Install Durable Patio Roofing
Once your support framework is in place, it’s time to install durable patio roofing that will stand the test of time. Consider using materials like polycarbonate panels, which are lightweight yet strong, providing excellent weather resistance and UV protection. For a more traditional look, opt for corrugated metal or shingles, which offer both durability and aesthetic appeal. Ensure the roofing material complements your home’s exterior design to create a harmonious outdoor space.
When installing the roofing, start by measuring and cutting the materials to fit the framework precisely. Use galvanized screws or nails to secure the panels, as they resist rust and increase longevity. For added stability, consider reinforcing the edges with metal flashing to prevent water seepage and wind damage. Advanced tip: apply a silicone sealant along the seams to enhance waterproofing, keeping your patio dry and comfortable during rainstorms. Remember, selecting the right roofing not only enhances the patio’s functionality but also elevates the overall design of your outdoor retreat.
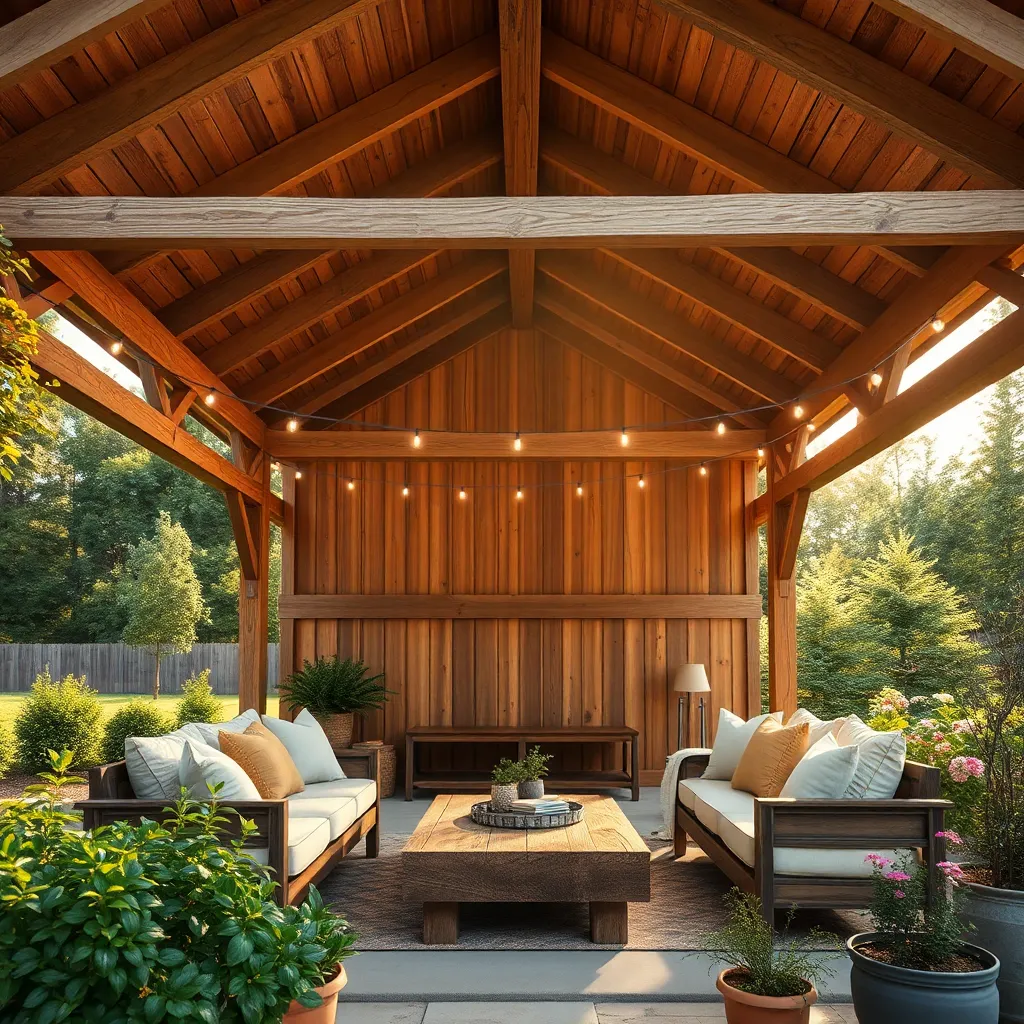
Add Finishing Touches and Decor
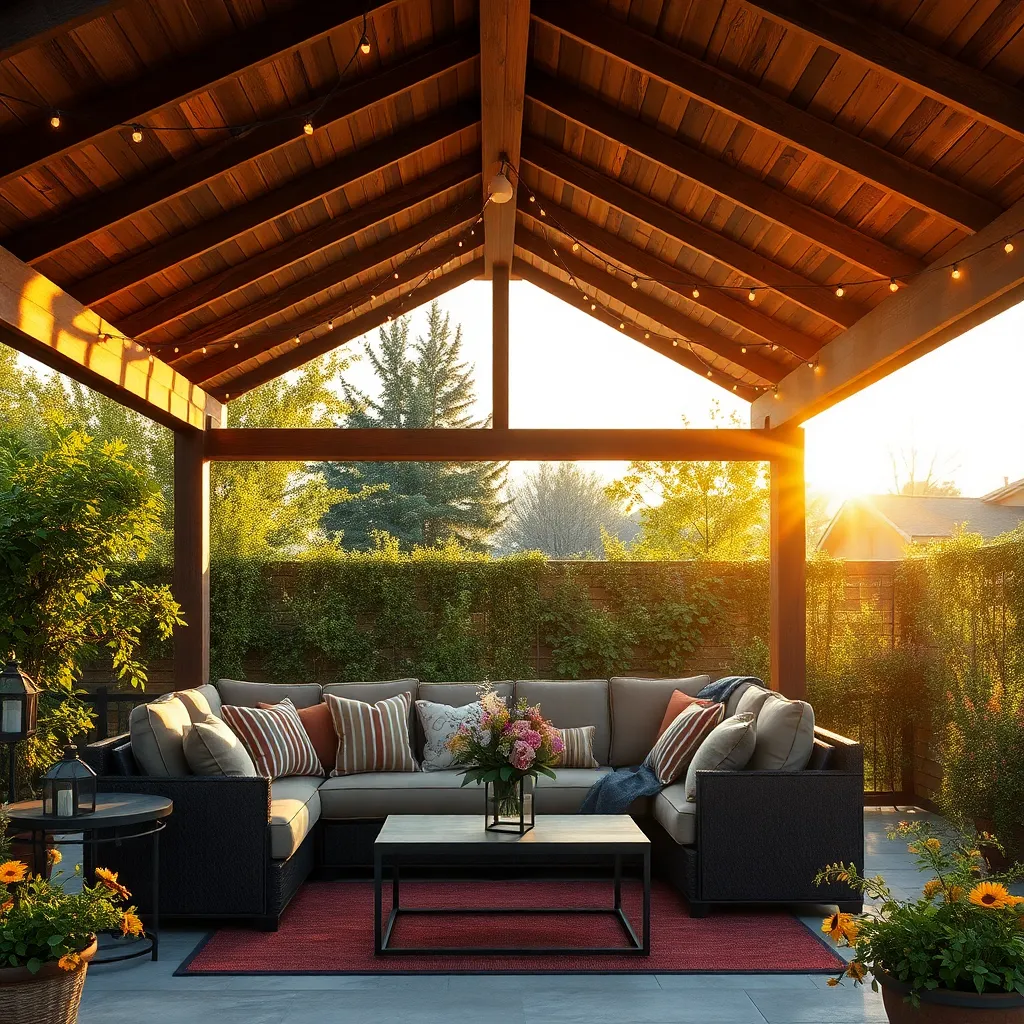
Once the roofing is secure, it’s time to infuse your personality into the patio with thoughtful decor. Start with weather-resistant furniture made from materials like teak or powder-coated aluminum for durability. Consider incorporating a cozy outdoor rug to define the space, ensuring it’s made from polypropylene or similar weatherproof materials. These foundational elements create a welcoming environment and set the stage for further enhancements.
To elevate your patio’s aesthetic, add layers of texture and color with potted plants and textiles. Arrange a mix of tall and trailing plants, such as ferns and petunias, in pots made from terracotta or glazed ceramic for added visual interest. Enhance the ambiance with string lights or lanterns for evening gatherings, and include throw pillows with fade-resistant fabric to maintain vibrancy. These finishing touches not only boost the visual appeal but also make your patio a comfortable extension of your home.
Conclusion: Creating Beautiful Outdoor Spaces
Building a covered patio from scratch is much like nurturing a relationship; both require a solid foundation, careful planning, and consistent effort. Throughout this article, we explored five key relationship concepts: understanding the importance of a strong foundation, the role of clear communication, the value of shared goals, the need for regular maintenance, and the beauty of creativity in keeping things fresh.
As a practical next step, take a moment to assess the foundation of your current relationships. Identify one area where you can apply these principles and set a small, achievable goal to enhance that aspect. Whether it’s scheduling regular check-ins with your partner or planning a creative date, small actions can build a stronger bond.
Remember, your relationships are ongoing projects that require attention and care. Save this article to your bookmarks as a handy guide to return to whenever you need a boost or fresh idea. With dedication and love, your efforts will cultivate a thriving, fulfilling relationship. As you continue this journey, envision the success and joy that come from a well-built partnership, and let this guide inspire your path forward.